• Home
  • Suggest A DIY
  • DIY Newsletter

Bath and Body

Soap Making, Oils and Recipes

  • About CraftGossip
  • Our Network
    • Bath & Body Crafts
    • Candle Making Ideas
    • Crochet Ideas
    • Cross Stitch
    • Edible Crafts
    • Felting Patterns
    • Glass Art
    • Home & Garden Ideas
    • Indie Crafts
    • Jewelry Making
    • Kids Crafts
    • Knitting Patterns
    • Lesson Plans
    • Needlework
    • Party Ideas
    • Polymer Clay
    • Quilting Ideas
    • Recycled Crafts
    • Scrapbooking
    • Sewing Patterns
    • Card Making
    • DIY Weddings
    • Not Craft Ideas
  • Giveaways
  • Roundups
  • Store
  • Search

DIY After Sun Skin-Soothing Spray

July 5, 2021 by Angie McKain Leave a Comment


Sunburn.

Ugh.

We’ve all been there and we all know how much it stinks.
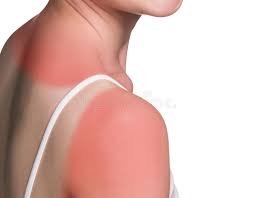
I want to preface this all by saying, if you’re going to be out in the sun, you should definitely be using sunscreen with an SPF of at least 50.  Sunscreen should be applied liberally and reapplied throughout the day; otherwise, you’re opening yourself up to the pain of sunburn along with the possibility of developing blisters or sun poisoning. Sunscreen should be applied even on days where it’s cloudy and overcast because even though we may not be able to see the sun, the rays are still coming through the clouds and can still cause sunburn.

Sun poisoning is the term used for a severe case of sunburn.  Symptoms generally present as a normal sunburn at first, with redness and pain of the skin, but then can further develop into blistering, skin cracking, dehydration, fever, and a rash. Confusion, nausea, vomiting, headaches, dizziness, and fainting can also occur with sun poisoning. It’s important that you seek medical care if you develop sun poisoning to help keep any potential complications to a minimum.

While we usually think of sunburn as an annoyance or an inconvenience that will go away before long, it’s important to keep in mind that there can be long-term consequences of repeatedly getting burned. Some of these include an increased risk of developing skin cancer (including melanoma, which is the deadliest form of skin cancer) and leaves our skin prone to premature wrinkles, aging, and developing brown spots. Sunburn can cause changes to our DNA, and once this damage is done, it’s impossible to reverse.

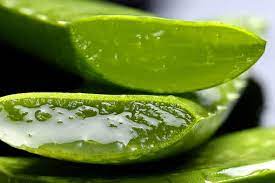
All of this being said, I realize that we’re all human and there are going to be times where we either forget to put our sunscreen on, don’t apply it often enough, or maybe get caught out when we don’t realize we’re even going to be exposed to UV rays. For those times, I have a simple DIY After Sun Skin Soothing Spray recipe for you today that is made with aloe (soothes burn), vegetable oil (keeps the skin hydrated), and essential oils (also helps soothe the burn and helps to keep skin healthy). Keep reading below for the recipe.
DIY After Sun Skin Soothing Spray

Ingredients:

1/4 cup Jojoba oil or vegetable oil of choice

1/4 cup aloe vera gel (you can also use aloe vera juice here if you would like)

1 tsp Vitamin E Oil

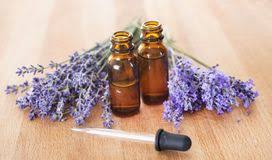
15 drops Lavender Essential Oil

15 drops Peppermint Essential Oil (if this is going to be used on kids, please replace the peppermint with spearmint or corn mint)

4-ounce glass or stainless steel spray bottle

Directions:

Add all ingredients to the spray bottle and shake well to combine. Shake well before each use and avoid spraying near the eyes or on clothing. This spray can be used several times throughout the day to promote healing of the skin and soothe the burn. Don’t use this spray on broken skin.
 

Happy Crafting!


«
»

Have you read?

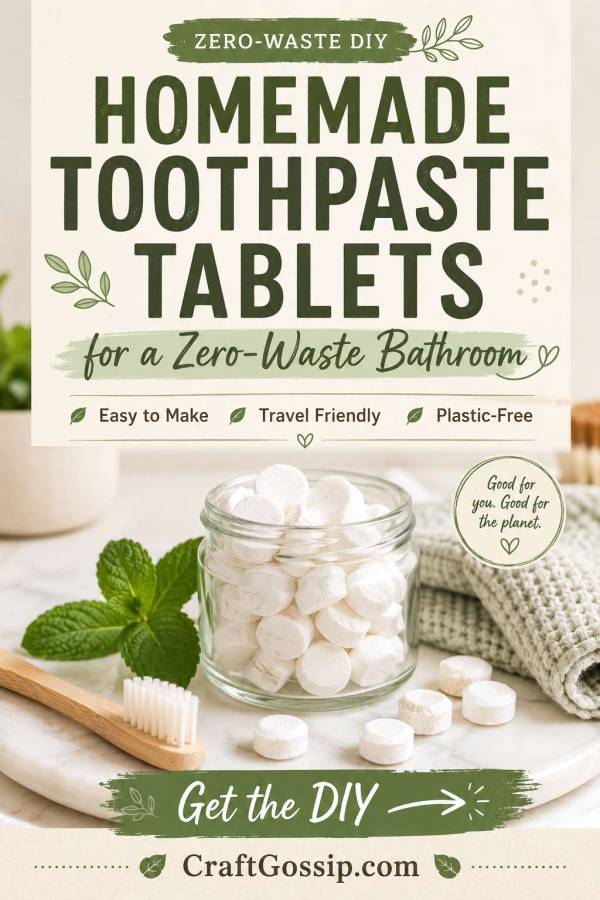
Homemade Toothpaste Tablets for a Zero-Waste Bathroom

If you’ve ever tried to squeeze the very last smear of toothpaste from a tube, rolled it from the bottom, folded it in half and then attacked it with the handle of your toothbrush, you’ll understand why toothpaste tablets have become such an interesting zero-waste bathroom swap.

They’re tiny, dry, easy to store and — rather wonderfully — don’t require another toothpaste tube.

You simply pop one into your mouth, chew it until it breaks down, wet your toothbrush and brush as normal.

And yes, you can actually make them yourself.

Before we get into the recipe, there is one important dental note. Most homemade toothpaste tablet recipes do not contain fluoride. The American Dental Association recommends brushing twice daily for two minutes with fluoride toothpaste, and NHS guidance also recommends fluoride toothpaste to help prevent tooth decay.

So think of homemade toothpaste tablets as an interesting DIY formulation rather than an automatic replacement for the toothpaste your dentist recommends.

Why Make Toothpaste Tablets?

For me, the attraction is partly the packaging.

Instead of continually buying toothpaste tubes, homemade tablets can be stored in a little reusable glass jar.

They’re also brilliant for travel.

No squashed tube.

No toothpaste exploding inside the toiletry bag.

No wondering whether your tube counts toward your liquids allowance.

You can simply put the number of tablets you need into a tiny container and go.

They also last in a way that homemade wet toothpaste often doesn’t because you’re creating a dried product rather than keeping a water-rich mixture sitting beside the bathroom sink.

Homemade Toothpaste Tablet Recipe

This formulation is based on the DIY Toothpaste Tablets Recipe created by dentist Tracy Ariza.

Her recipe uses calcium carbonate and baking soda as the main powdered ingredients, along with xylitol and a mild surfactant. The ingredients are combined with enough water to form a thick paste, pressed into small moulds and completely dried before storage.

You Will Need

50 g calcium carbonate

20 g baking soda

10 g xylitol

3 g sodium cocoyl glutamate or another appropriate toothpaste-formulation surfactant

Around 5 drops peppermint, anise or another suitable flavouring

Approximately 20 g filtered or distilled water

Small silicone mould

Small mixing bowl

Spoon or spatula

Airtight glass jar

How To Make The Tablets

Combine the calcium carbonate, baking soda and xylitol in a clean dry bowl.

Mix thoroughly so the powders are evenly distributed.

Add your chosen flavouring and surfactant and mix again.

Now add the distilled or filtered water very gradually.

You’re looking for a thick mouldable paste rather than a runny toothpaste consistency.

Press small amounts firmly into your silicone mould.

The smaller the mould cavities, the more practical your finished tablets will be. Think tiny mint rather than ice cube.

Allow them to dry completely.

Depending on humidity, this can take several hours or considerably longer. The original recipe suggests allowing the tablets to air dry and notes that a very low oven can help in cool or humid conditions.

Once completely dry and firm, remove them from the mould.

Store them in an airtight container away from moisture.

How Do You Use Toothpaste Tablets?

Take one tablet with dry hands.

Place it in your mouth and chew it until it breaks into a paste.

Wet your toothbrush and brush your teeth normally.

Brush thoroughly for around two minutes, covering the inside, outside and chewing surfaces of your teeth.

Then spit out the excess.

What Is Calcium Carbonate Doing In Toothpaste?

Calcium carbonate isn’t just an obscure ingredient you’ve suddenly encountered because you’re making something in your kitchen.

It’s commonly used as an abrasive ingredient in toothpaste.

In a homemade formulation it provides much of the tooth-cleaning powder that gives the tablet substance.

What About Baking Soda?

Baking soda — sodium bicarbonate — is another ingredient frequently found in tooth-cleaning formulations.

It also helps create the firm powder-heavy structure needed for a dried tablet.

More isn’t necessarily better, though.

DIY toothpaste isn’t the place to start enthusiastically increasing abrasive ingredients because you assume extra scrubbing means cleaner teeth.

Stick to a properly formulated recipe.

Why Add Xylitol?

Xylitol gives toothpaste tablets some sweetness without adding ordinary sugar.

One very important household warning: xylitol is highly toxic to dogs.

If you have dogs in the house, store xylitol and any xylitol-containing toothpaste products well out of their reach.

That includes the cute glass jar of toothpaste tablets sitting on the bathroom vanity.

Can I Make Them Without Xylitol?

You can find DIY tablet formulations online without it, but removing an ingredient can alter flavour, texture and how well a formulation presses together.

If you’re going to experiment, make small test batches rather than changing half the ingredients and hoping for the best.

That’s a lesson I’ve learned with practically every DIY bath and body recipe I’ve ever made.

One small substitution somehow becomes six substitutions and suddenly we’re not following a recipe at all.

Why I Like A Silicone Mould

You don’t need anything fancy.

Small silicone candy moulds work beautifully because the dried tablets can simply be pushed out.

Look for very small cavities.

A large chocolate mould might give you a tablet that looks impressive in the jar but feels slightly ridiculous when you’re trying to chew it before breakfast.

Keep Everything Dry

Moisture is the enemy here.

Always remove tablets with dry hands and keep the lid firmly closed.

Don’t store an open jar right beside the shower where it is repeatedly exposed to steam.

A small lidded glass jar inside the bathroom cabinet is a much better option.

Make A Travel Tin

This might actually be my favourite use for homemade toothpaste tablets.

Take a tiny screw-top tin or little reusable jar and fill it with enough tablets for your trip.

If you’re away for four nights and brush twice a day, you only need eight tablets plus a couple of spares.

It takes up almost no room.

What About Children?

I’d be cautious about swapping a child’s regular toothpaste for homemade tablets without speaking to their dentist.

Current NHS guidance recommends fluoride toothpaste for children, with fluoride concentration and toothpaste amount varying according to age.

There’s also the obvious issue that toothpaste tablets are designed to be chewed before brushing and could be mistaken for sweets.

Keep them securely stored away from young children.

Are Toothpaste Tablets Actually Zero Waste?

“Zero waste” is always a slightly ambitious phrase.

The ingredients still need to come from somewhere and will usually arrive in packaging.

But buying ingredients in larger quantities and repeatedly refilling one small container can reduce the stream of individual toothpaste tubes leaving your bathroom.

The broader zero-waste principle is really reduce first, reuse wherever possible, then recycle what remains. That’s also consistent with current EPA waste-reduction guidance.

And that’s why I like this project.

It’s not about creating a Pinterest-perfect bathroom where everything has magically become plastic-free overnight.

It’s about looking at one product you use every single day and asking whether there’s another way to do it.

Sometimes that alternative is surprisingly tiny.

Leave a Reply

Your email address will not be published. Required fields are marked *

RSS feed: More Articles More Articles

  • Easy and Quick Yorkshire Puddings: How to Make Yorkshire Pudding From Scratch
  • Easy Egg Bites Recipe With Cottage Cheese: Make-Ahead Breakfast in a Muffin Tin
  • Crochet Pretty Scallop Pattern Necklace – A Delicate DIY You Can Make With Thread, Wire and Beads
  • Knits for the Table for Thanksgiving and Beyond
  • 10 Ways to Upcycle Old Wool Scarves with Felting
  • BOO Halloween Mini Scrapbook Album
  • Ghost S’mores Favour Bags: Easy Halloween Treat Gifts
  • Clay Studio Series – YouTube Video Review Handmade Ceramic Pour Over – Coffee Meets Clay
  • 10 Halloween Wreaths You Can Make in an Hour
  • From Trash to Illusion: Thomas Deininger’s Recycled Art Challenges Perception and Promotes Sustainability

Copyright © 2026 · CraftGossip | Start Here | Contact Us | Link to Us | Your Editors | Privacy and affiliate policy