• Home
  • Suggest A DIY
  • DIY Newsletter

Bath and Body

Soap Making, Oils and Recipes

  • About CraftGossip
  • Our Network
    • Bath & Body Crafts
    • Candle Making Ideas
    • Crochet Ideas
    • Cross Stitch
    • Edible Crafts
    • Felting Patterns
    • Glass Art
    • Home & Garden Ideas
    • Indie Crafts
    • Jewelry Making
    • Kids Crafts
    • Knitting Patterns
    • Lesson Plans
    • Needlework
    • Party Ideas
    • Polymer Clay
    • Quilting Ideas
    • Recycled Crafts
    • Scrapbooking
    • Sewing Patterns
    • Card Making
    • DIY Weddings
    • Not Craft Ideas
  • Giveaways
  • Roundups
  • Store
  • Search

DIY Christmas Cherry Body Scrub

October 22, 2026 by Shellie Wilson Leave a Comment

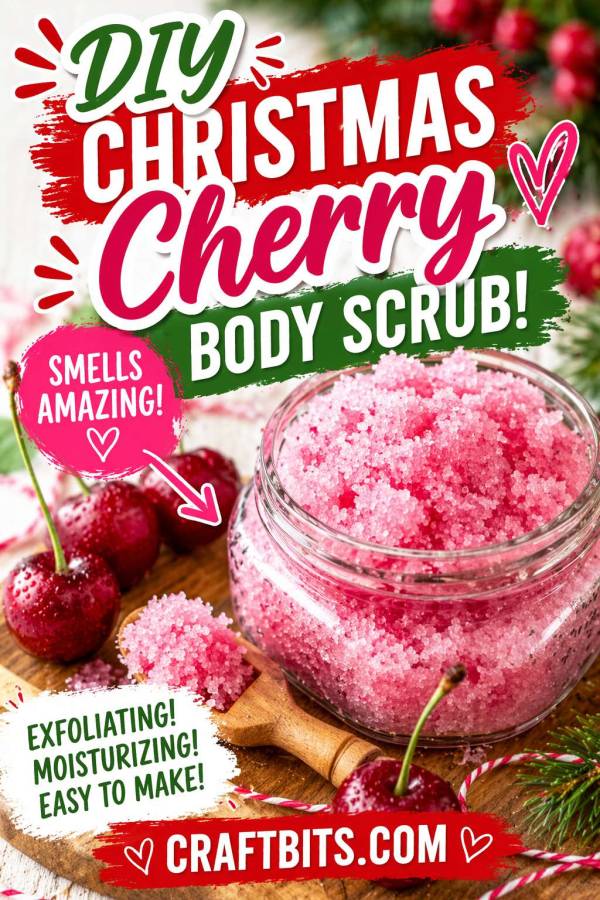
If you love simple handmade gifts that still feel festive and special, this DIY Christmas Cherry Body Scrub from CraftBits is such a fun little project. It is bright, pretty, and has that sweet cherry scent that makes it feel perfect for Christmas gifting.

What I like about this tutorial is how easy it is to pull together. The scrub uses granulated sugar, sweet almond oil or another carrier oil, red cherry fragrance oil, and a touch of mica powder for color, so it feels like one of those projects you can make quickly but still package up beautifully.

It is the kind of bath and body recipe that works really well for teacher gifts, stocking stuffers, hostess gifts, or just a little festive treat for yourself. The pretty pink-red color and cherry fragrance give it a cheerful Christmas feel without needing anything too complicated.

The tutorial itself is wonderfully straightforward too. You simply combine the ingredients well and store the finished scrub in an airtight container, which makes this a lovely beginner-friendly project for holiday crafting.

If you are looking for a quick Christmas body scrub recipe that feels handmade, giftable, and easy to recreate, this one is a sweet little pick.

Featured Project: DIY Christmas Cherry Body Scrub
 

«

Have you read?

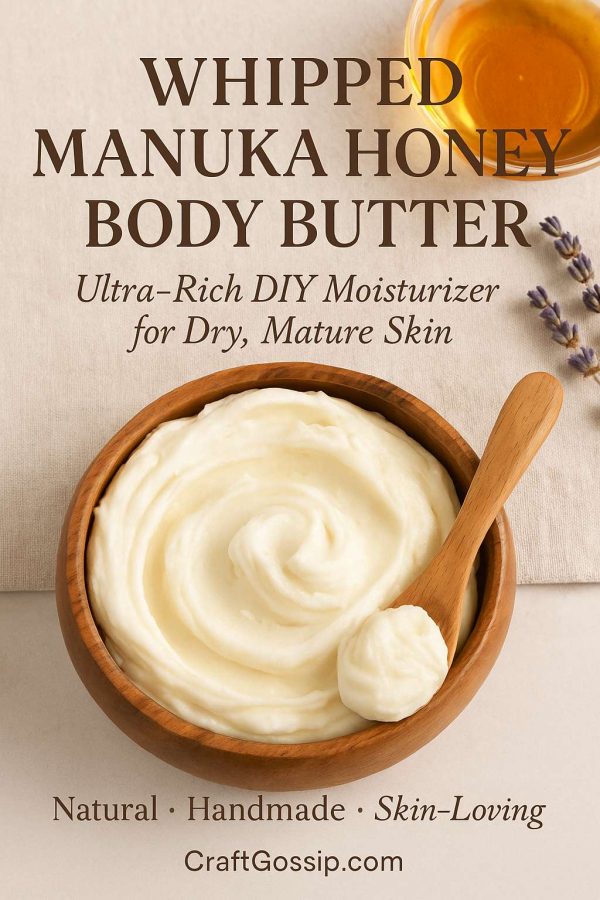
Whipped Manuka Honey Body Butter – Ultra-Rich DIY Moisturizer for Dry, Mature Skin

There’s something so soul-soothing about whipping up your own skincare, especially when it smells delicious and actually works. This whipped Manuka honey body butter is a total game-changer for dry, aging, or sensitive skin. It’s thick and creamy, but melts right into the skin—no greasiness, no weird store-bought additives, just honest hydration.

At 46, I’ve tested a lot of body butters. But this one? It’s a staple on my nightstand and my teenagers steal it all the time (especially after sunburns or too much chlorine). If your skin is feeling dull, flaky, or just tired-looking, give it this golden treat.

Why Manuka Honey?

Let’s talk about the real hero here—Manuka honey.

Unlike regular honey, Manuka is packed with naturally occurring enzymes and antibacterial properties. It’s:

  • Deeply hydrating without clogging pores 
  • Healing for cracked, irritated skin 
  • Rich in antioxidants to support skin elasticity 
  • A natural humectant (meaning it draws moisture in) 

Perfect for mature skin that needs extra TLC or anyone dealing with dry patches, eczema, or even keratosis pilaris.

Benefits of This DIY Body Butter

This isn’t your average whipped cream-in-a-jar. It’s designed to:

  • Repair and protect dry skin 
  • Reduce inflammation and irritation 
  • Soften rough spots like elbows, knees, and heels 
  • Offer a chemical-free alternative to store-bought moisturizers 

And yes, you can use it on your face if your skin leans dry—just patch test first.

DIY Whipped Manuka Honey Body Butter Recipe

SEO keywords: DIY manuka honey body butter, whipped body butter recipe, homemade body moisturizer, natural skincare for dry skin

Ingredients:

  • ½ cup raw shea butter (unrefined is best) 
  • ¼ cup organic coconut oil 
  • 2 tablespoons Manuka honey (UMF 10+ or higher recommended) 
  • 1 tablespoon sweet almond oil (or jojoba for sensitive skin) 
  • 1 teaspoon arrowroot powder (helps reduce that oily feel) 
  • 10 drops lavender essential oil (optional but calming) 

Optional Add-ins:

  • 1 tsp Vitamin E oil for anti-aging benefits 
  • A few drops of rose or frankincense oil for mature skin support 

Instructions:

  1. Melt shea butter and coconut oil together using a double boiler or heat-safe bowl over simmering water. 
  2. Once melted, remove from heat and allow to cool for 5–10 minutes. 
  3. Stir in Manuka honey, almond oil, and arrowroot powder until well combined. 
  4. Pop the bowl into the fridge for about 30–40 minutes until it firms up but isn’t solid. 
  5. Whip it! Use a hand mixer or stand mixer to whip the mixture until fluffy—think frosting texture. 
  6. Add essential oils, whip again briefly, and transfer to a clean jar with a lid. 

Storage Tip: Keep in a cool, dry place for up to 4 months. If your home runs warm, store it in the fridge to prevent melting.

How to Use

Apply to slightly damp skin after a shower to lock in moisture. Massage in circular motions, especially over knees, elbows, hands, and heels. Use daily or as needed.

You can even dab a little on split ends or massage it into cuticles—hello multitasking!

Custom Blends & Scent Ideas

This butter is endlessly customizable. Try:

  • Lemon + Vanilla for an energizing summer scent 
  • Chamomile + Calendula oil for soothing sensitive skin 
  • Cocoa butter + Peppermint for a wintery, chocolate-mint vibe 

Why Make It Yourself?

Aside from being ridiculously satisfying to whip up your own skincare, homemade body butters:

  • Are free of parabens, phthalates, and fillers 
  • Cost way less in the long run 
  • Can be tailored to your skin’s needs 
  • Make gorgeous handmade gifts! 

Add a cute label and gift one to a friend—they’ll think you spent a fortune at a boutique.

If you’ve been slathering on lotion and still feel like a lizard in jeans, it’s time to upgrade your routine. This whipped Manuka honey body butter is the perfect blend of skin food and luxury—without the $60 price tag.

Go whip yourself a jar. Your skin (and your future self) will thank you.

Leave a Reply

Your email address will not be published. Required fields are marked *

RSS feed: More Articles More Articles

  • Designer Spotlight: Stitching Housewives
  • Easy Projects to Knit with a Square (or Two)
  • 10 Colorful Halloween Scrapbook Layout Ideas
  • Ghost Poop Marshmallow Bags With a Free Printable Halloween Topper
  • Knit Picks Friends & Family Sale: Save 20% on Your Next Knitting Project
  • Easy Cosmetics Bag Sewing Pattern
  • Domestic vs Imported Wool – Does Origin Matter in Felting?
  • 10 DIY Christmas Earrings To Make For The Holiday Season
  • 10 Temari Ball Instructions for Learning This Beautiful Japanese Needle Art
  • Celebrating Guy Fawkes Night with Kids

Copyright © 2026 · CraftGossip | Start Here | Contact Us | Link to Us | Your Editors | Privacy and affiliate policy