• Home
  • Suggest A DIY
  • DIY Newsletter

Bath and Body

Soap Making, Oils and Recipes

  • About CraftGossip
  • Our Network
    • Bath & Body Crafts
    • Candle Making Ideas
    • Crochet Ideas
    • Cross Stitch
    • Edible Crafts
    • Felting Patterns
    • Glass Art
    • Home & Garden Ideas
    • Indie Crafts
    • Jewelry Making
    • Kids Crafts
    • Knitting Patterns
    • Lesson Plans
    • Needlework
    • Party Ideas
    • Polymer Clay
    • Quilting Ideas
    • Recycled Crafts
    • Scrapbooking
    • Sewing Patterns
    • Card Making
    • DIY Weddings
    • Not Craft Ideas
  • Giveaways
  • Roundups
  • Store
  • Search

How To Water Marble your Nails In 5 Easy Steps

January 18, 2012 by Nellie Lee Luhrmann 2 Comments

Admiring all the different types of water marbled nails out there I had yet to come across someone who was willing to offer up a tutorial on how to do it all by yourself. Then I was contacted by Mixed Mama wanting to share her easy peasy 5 step tutorial on how to achieve the water marbled look yourself. I used to think it was really hard to do but not so…………… To get things started you will need the following

2 shades of nail polish. Use the following 2 shades if you are after nails like the ones in the pic or choose your own.

Essie Mint Candy Apple

Essie Soul Mate

Seche Vite Top Coat

Tape

Q-Tips

Cup of room temperature FILTERED water

Mechanical pencil

Nail polish remover

To follow Mixed Mamas tutorial complete with pictures, hints and tips click HERE

** Photo property of Mixed Mama**
«
»

Comments

  1. roxy says

    January 28, 2012 at 3:32 pm

    Why do you need a mechanical pencil?!?

  2. alliah says

    July 4, 2012 at 8:03 am

    i dont even kno y u need a pencil

Have you read?

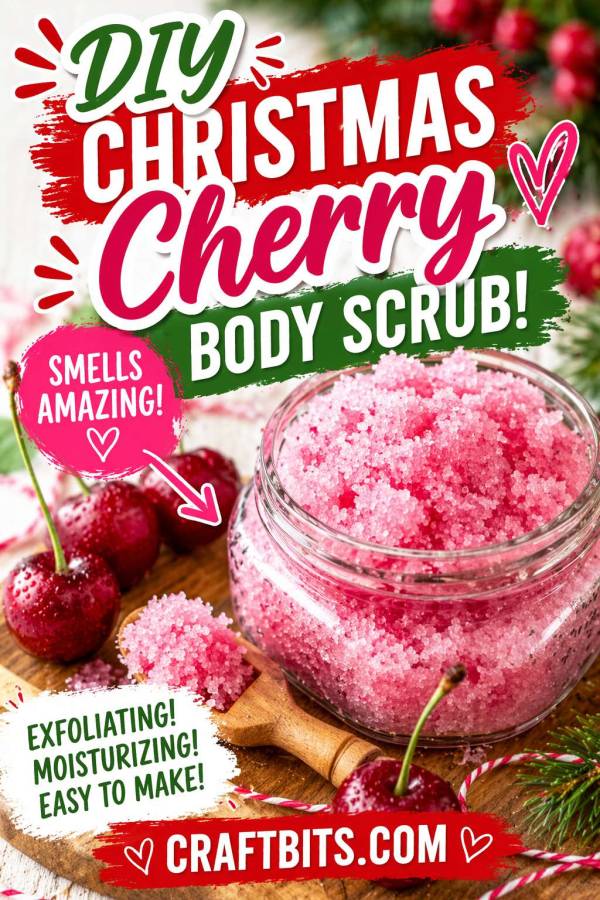
DIY Christmas Cherry Body Scrub

If you love simple handmade gifts that still feel festive and special, this DIY Christmas Cherry Body Scrub from CraftBits is such a fun little project. It is bright, pretty, and has that sweet cherry scent that makes it feel perfect for Christmas gifting.

What I like about this tutorial is how easy it is to pull together. The scrub uses granulated sugar, sweet almond oil or another carrier oil, red cherry fragrance oil, and a touch of mica powder for color, so it feels like one of those projects you can make quickly but still package up beautifully.

It is the kind of bath and body recipe that works really well for teacher gifts, stocking stuffers, hostess gifts, or just a little festive treat for yourself. The pretty pink-red color and cherry fragrance give it a cheerful Christmas feel without needing anything too complicated.

The tutorial itself is wonderfully straightforward too. You simply combine the ingredients well and store the finished scrub in an airtight container, which makes this a lovely beginner-friendly project for holiday crafting.

If you are looking for a quick Christmas body scrub recipe that feels handmade, giftable, and easy to recreate, this one is a sweet little pick.

Featured Project: DIY Christmas Cherry Body Scrub


Leave a Reply

Your email address will not be published. Required fields are marked *

RSS feed: More Articles More Articles

  • Free Knitted Crown Pattern for Kids and Adults: A Sweet Handmade Dress-Up Idea
  • Free Knitted Knockers Crochet Pattern: Make Soft Breast Forms to Donate
  • Hedgehog Crochet Patterns for Adorable Woodland Makes
  • DIY Thrifted Glass Christmas Platter With Vintage Santa Fabric
  • Celebrate Inventor’s Day by Learning about Inventors
  • How to Make a Stamped Fall Scarecrow Card
  • Tiny Knits in Team Colors
  • Book Review: The Ultimate Cross Stitch Christmas Collection
  • FREE Cute Ghost and Pumpkin Background
  • Sandok Cable Sweater Review: Sizing, Yarn and What to Know Before Knitting

Copyright © 2026 · CraftGossip | Start Here | Contact Us | Link to Us | Your Editors | Privacy and affiliate policy