• Home
  • Suggest A DIY
  • DIY Newsletter

Bath and Body

Soap Making, Oils and Recipes

  • About CraftGossip
  • Our Network
    • Bath & Body Crafts
    • Candle Making Ideas
    • Crochet Ideas
    • Cross Stitch
    • Edible Crafts
    • Felting Patterns
    • Glass Art
    • Home & Garden Ideas
    • Indie Crafts
    • Jewelry Making
    • Kids Crafts
    • Knitting Patterns
    • Lesson Plans
    • Needlework
    • Party Ideas
    • Polymer Clay
    • Quilting Ideas
    • Recycled Crafts
    • Scrapbooking
    • Sewing Patterns
    • Card Making
    • DIY Weddings
    • Not Craft Ideas
  • Giveaways
  • Roundups
  • Store
  • Search

Juniper & Lavender Bath Bombs

August 22, 2017 by Shellie Wilson 1 Comment

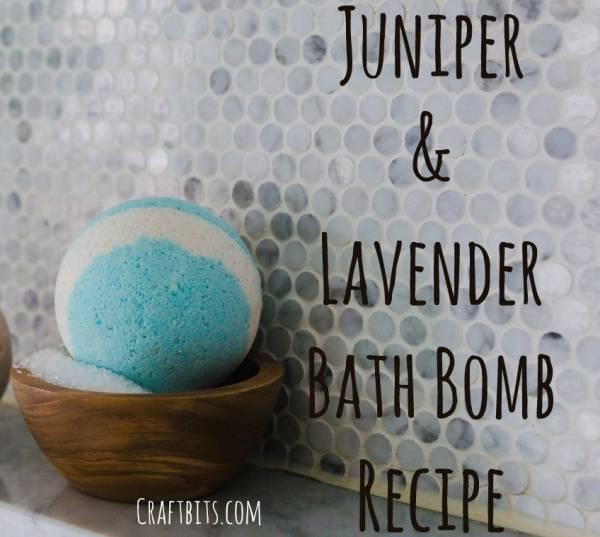
This juniper and lavender bath bomb recipe is perfect for those with a little cellulite. Juniper essential oil is believed to aid with cellulite reduction. Makes 7 medium sized bath bombs.

What you need

1 1/4 cups cup of Baking soda or Bicarbonate of Soda
1/2 cup of Citric acid
2 -6 tsp of Almond Oil or Apricot oil
1/4 cup of dried lavender
1/2-2 tbs Water
5 drops of Food coloring
10-15 drops of Juniper essential oil


Instructions

Combine the dry ingredients in a bowl and stir until well mixed.

Drizzle in the almond oil and stir until mixture is moistened. Add more oil and fragrance and stir until well mixed.

If the mixture is crumbly then add more oil or a dash of water.

Roll the mixture into a ball using your hands or press it into a lightly oiled mold. Use a bath bomb mold or a chocolate mold.

Let it slip out from the mold and then put the ball/shape on a sheet of wax paper and leave it to dry till it is hard. It may take several days.

Store them in a airtight container.

Use 1 bath bomb per bath.

Related Posts:

  • DIY Rainbow Bath Bombs
  • How To Make Slow Release Vibrant Bath Bombs
«
»

Comments

  1. Annie says

    August 28, 2017 at 2:55 pm

    Hi Shellie Wilson
    My kids love this “Juniper & Lavender Bath Bombs” and they share this article with their friends and my blogs too. They tried this recipe and it really worked for them too. They are really too happy. Thanks
    You can check my article too. It about makes DIY bath bombs with 5 recipe: http://iteenworld.com/make-homemade-diy-bath-bombs/

Have you read?

DIY Herbal Vapor Rub Balm – A Natural Vicks-Style Decongestant for Cold and Flu Relief

When someone in the house starts sniffling, you just know it’s going to make the rounds. That’s when I reach for this homemade herbal vapor rub—our family’s go-to chest balm for easing congestion, coughs, and that heavy-headed sick feeling.

Made with gentle yet powerful essential oils, this balm works just like the classic Vicks rub (but without the synthetic stuff). It’s safe, effective, and smells like a eucalyptus grove with a hint of grandma’s medicine chest—in the best possible way!

Whether you’re treating a toddler’s sniffles or trying to head off a man cold, this DIY vapor rub will be your winter wellness MVP.

Why You’ll Love This Natural Decongestant Balm

  • No petroleum or nasties – A clean, green homemade Vicks alternative 
  • Gentle enough for kids – With optional adjustments for littlies 
  • Nourishing balm texture – Melts into skin without being greasy 
  • Essential oils – Provide cooling, clearing, and comforting support 
  • Customizable – Make it stronger for adults or extra-gentle for babies 

Ingredients

Base:

  • 1/4 cup coconut oil (or olive oil for a softer balm) 
  • 2 tbsp shea butter or mango butter 
  • 2 tbsp beeswax pellets 

Essential Oil Blend (for adults):

  • 10 drops eucalyptus essential oil 
  • 8 drops peppermint essential oil 
  • 6 drops rosemary essential oil 
  • 4 drops tea tree essential oil 
  • 4 drops lavender essential oil 

Optional for kids under 5:
Replace eucalyptus and peppermint with fir needle and cedarwood atlas, and halve the total essential oil amount.

How to Make Your Own Vapor Rub

  1. Melt the base:
    In a double boiler (or a bowl over simmering water), gently melt the coconut oil, shea butter, and beeswax together. Stir until smooth and liquid. 
  2. Cool slightly:
    Remove from heat and let cool just a few minutes—enough that it’s no longer scalding hot but still liquid. 
  3. Add essential oils:
    Stir in your essential oil blend. Don’t add them too early or the heat will evaporate their goodness. 
  4. Pour into tins or jars:
    Carefully pour into a small glass jar or metal balm tin. Let cool completely before putting the lid on. 
  5. Label & store:
    Store in a cool place away from sunlight. Balm will keep for up to 6 months. 

How to Use Your Herbal Chest Rub

  • For chest and back: Rub a small amount onto chest, upper back, and soles of the feet during cold or flu season. 
  • For steam relief: Add a pea-sized amount to a bowl of steaming water, cover your head with a towel, and inhale. 
  • For headaches: Dab a touch on temples and neck (use caution and avoid eyes). 

Mum Tips

  • Patch test first if you’re unsure about sensitivities. 
  • Keep a tiny jar in your handbag during winter for on-the-go sniffles. 
  • For a nighttime version, add a few drops of Roman chamomile or lavender for extra sleep support. 


Leave a Reply

Your email address will not be published. Required fields are marked *

RSS More Articles

  • 12 Handmade Patriotic 4th of July Card Ideas
  • Shark Week Learning for Kids
  • Book Review – Needle Felting Art: Mixed Media Woodland Creatures
  • Knit Summer Tops with Fun Necklines
  • DIY Pottery Clay Doily Platter with Pink Speckled Glaze
  • How to Make Thick Yoghurt Smoothie Bowls in the Ninja Slushie Maker
  • FREE 4×6 Printable Backgrounds – 4th of July Collection (Red, White and Blue Craft Papers)
  • Turtle Crochet Patterns That Are Slow, Sweet, And Totally Worth Making
  • Heirloom Keepsake Crafts: Pretty Ways To Upcycle Grandma’s Vintage Teaspoons
  • Book Review: The Book Book of Beginner Amigurumi

Copyright © 2026 · CraftGossip | Start Here | Contact Us | Link to Us | Your Editors | Privacy and affiliate policy