• Home
  • Suggest A DIY
  • DIY Newsletter

Bath and Body

Soap Making, Oils and Recipes

  • About CraftGossip
  • Our Network
    • Bath & Body Crafts
    • Candle Making Ideas
    • Crochet Ideas
    • Cross Stitch
    • Edible Crafts
    • Felting Patterns
    • Glass Art
    • Home & Garden Ideas
    • Indie Crafts
    • Jewelry Making
    • Kids Crafts
    • Knitting Patterns
    • Lesson Plans
    • Needlework
    • Party Ideas
    • Polymer Clay
    • Quilting Ideas
    • Recycled Crafts
    • Scrapbooking
    • Sewing Patterns
    • Card Making
    • DIY Weddings
    • Not Craft Ideas
  • Giveaways
  • Roundups
  • Store
  • Search

Post Partum Padsicles – Yep Ice Packs For Your WhooHa

September 11, 2015 by Shellie Wilson Leave a Comment

,padsicles-post-partum-diy-comfort

Are you looking for the perfect gift for the new Mom? Need a gift idea for someone who has just given birth? How about making her up a batch of Pad-sicles? To anyone who hasn’t had kids it probably sounds a little Cray Cray but for everyone else you are like, yes where were these when I needed them?

Sooth your Whooha with a little DIY TLC post-partum.  To help soothe the pain and heal the skin.

Help your perineum heal. soothe your perineum every couple of hours for the first 24 hours post–birth to help reduce the pain and the swelling.

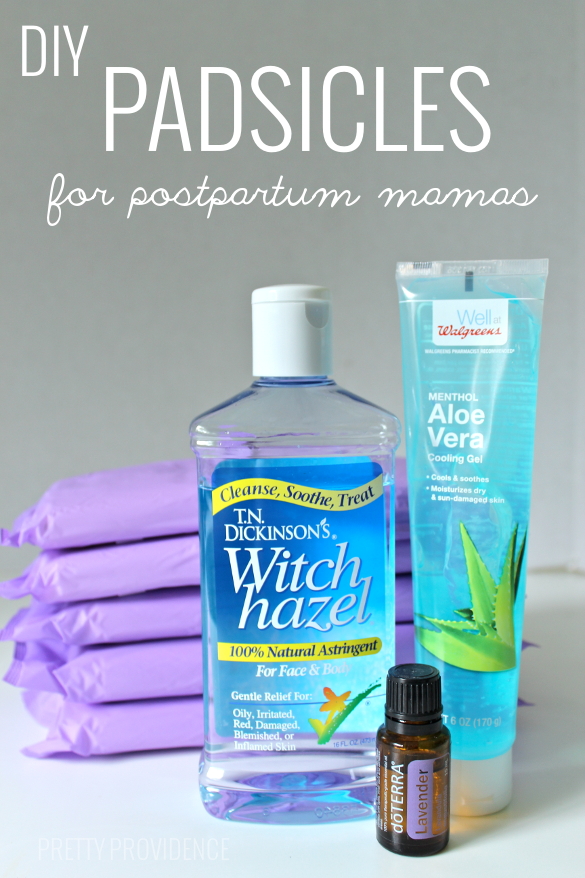
I have also seen condoms being filled with ice and chilled in the freezer. Use the condom to lay against your vagina, I think there would probably be cheaper things to use but at least, you know it is safe against your raw skin. Aloe vera and witch hazel are one of the “always have” items in my medical box, so they are a great purchase for your home.

Perineum cooling pads are also available, but making your own gives you the benefit of adding the healing ingredients too.

Related Posts:

  • DIY Makeup Remover Recipes For Every Skin Type
  • Efficiency and Expertise: Crafting 200 Bath Bombs in…
«
»

Have you read?

DIY Herbal Vapor Rub Balm – A Natural Vicks-Style Decongestant for Cold and Flu Relief

When someone in the house starts sniffling, you just know it’s going to make the rounds. That’s when I reach for this homemade herbal vapor rub—our family’s go-to chest balm for easing congestion, coughs, and that heavy-headed sick feeling.

Made with gentle yet powerful essential oils, this balm works just like the classic Vicks rub (but without the synthetic stuff). It’s safe, effective, and smells like a eucalyptus grove with a hint of grandma’s medicine chest—in the best possible way!

Whether you’re treating a toddler’s sniffles or trying to head off a man cold, this DIY vapor rub will be your winter wellness MVP.

Why You’ll Love This Natural Decongestant Balm

  • No petroleum or nasties – A clean, green homemade Vicks alternative 
  • Gentle enough for kids – With optional adjustments for littlies 
  • Nourishing balm texture – Melts into skin without being greasy 
  • Essential oils – Provide cooling, clearing, and comforting support 
  • Customizable – Make it stronger for adults or extra-gentle for babies 

Ingredients

Base:

  • 1/4 cup coconut oil (or olive oil for a softer balm) 
  • 2 tbsp shea butter or mango butter 
  • 2 tbsp beeswax pellets 

Essential Oil Blend (for adults):

  • 10 drops eucalyptus essential oil 
  • 8 drops peppermint essential oil 
  • 6 drops rosemary essential oil 
  • 4 drops tea tree essential oil 
  • 4 drops lavender essential oil 

Optional for kids under 5:
Replace eucalyptus and peppermint with fir needle and cedarwood atlas, and halve the total essential oil amount.

How to Make Your Own Vapor Rub

  1. Melt the base:
    In a double boiler (or a bowl over simmering water), gently melt the coconut oil, shea butter, and beeswax together. Stir until smooth and liquid. 
  2. Cool slightly:
    Remove from heat and let cool just a few minutes—enough that it’s no longer scalding hot but still liquid. 
  3. Add essential oils:
    Stir in your essential oil blend. Don’t add them too early or the heat will evaporate their goodness. 
  4. Pour into tins or jars:
    Carefully pour into a small glass jar or metal balm tin. Let cool completely before putting the lid on. 
  5. Label & store:
    Store in a cool place away from sunlight. Balm will keep for up to 6 months. 

How to Use Your Herbal Chest Rub

  • For chest and back: Rub a small amount onto chest, upper back, and soles of the feet during cold or flu season. 
  • For steam relief: Add a pea-sized amount to a bowl of steaming water, cover your head with a towel, and inhale. 
  • For headaches: Dab a touch on temples and neck (use caution and avoid eyes). 

Mum Tips

  • Patch test first if you’re unsure about sensitivities. 
  • Keep a tiny jar in your handbag during winter for on-the-go sniffles. 
  • For a nighttime version, add a few drops of Roman chamomile or lavender for extra sleep support. 


Leave a Reply

Your email address will not be published. Required fields are marked *

RSS More Articles

  • How To Sew A Tube Top: 10 Easy Tube Top Sewing Tutorials
  • Tropical Bird Crafts and Learning Activities
  • 12 Camping Quilt Projects for Campers, Cabins, and Glamping Fans
  • 15 Bind-Off Methods Every Knitter Should Know And When To Use Them
  • Star Wars: The Official Crochet Pattern Book Review – Amigurumi Patterns for Galaxy-Loving Crafters
  • 10 Recipes You Can Make In A Dutch Oven Loaf Pan
  • 12 Summer Sea Scene Card Ideas
  • Lincraft To Close Its Remaining Storefronts Across Australia And New Zealand
  • Pretty Tank Top Knitting Patterns to Keep You Cool
  • Seagull Cross Stitch Patterns

Copyright © 2026 · CraftGossip | Start Here | Contact Us | Link to Us | Your Editors | Privacy and affiliate policy