• Home
  • Suggest A DIY
  • DIY Newsletter

Bath and Body

Soap Making, Oils and Recipes

  • About CraftGossip
  • Our Network
    • Bath & Body Crafts
    • Candle Making Ideas
    • Crochet Ideas
    • Cross Stitch
    • Edible Crafts
    • Felting Patterns
    • Glass Art
    • Home & Garden Ideas
    • Indie Crafts
    • Jewelry Making
    • Kids Crafts
    • Knitting Patterns
    • Lesson Plans
    • Needlework
    • Party Ideas
    • Polymer Clay
    • Quilting Ideas
    • Recycled Crafts
    • Scrapbooking
    • Sewing Patterns
    • Card Making
    • DIY Weddings
    • Not Craft Ideas
  • Giveaways
  • Roundups
  • Store
  • Search

DIY Herbal Vapor Rub Balm – A Natural Vicks-Style Decongestant for Cold and Flu Relief

June 15, 2026 by Shellie Wilson Leave a Comment

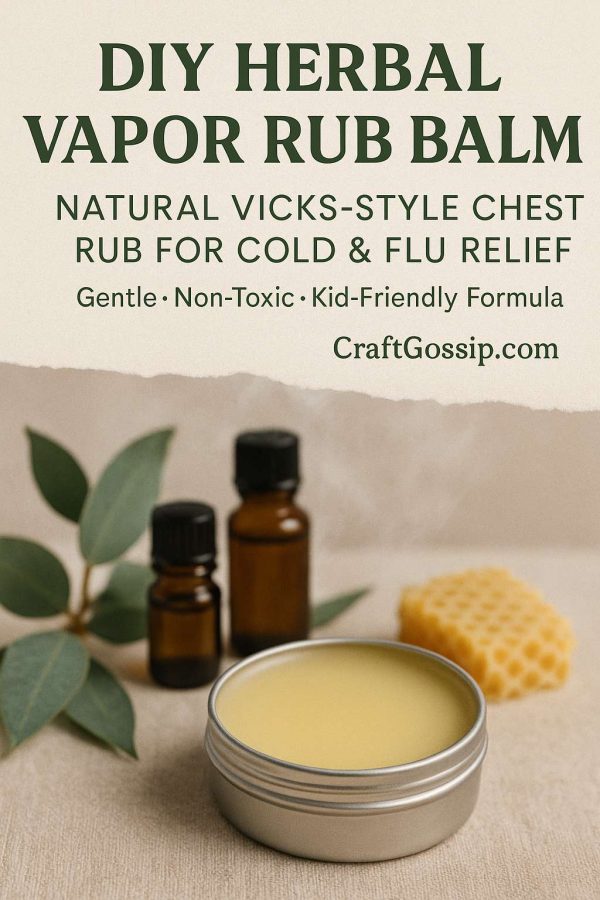
When someone in the house starts sniffling, you just know it’s going to make the rounds. That’s when I reach for this homemade herbal vapor rub—our family’s go-to chest balm for easing congestion, coughs, and that heavy-headed sick feeling.

Made with gentle yet powerful essential oils, this balm works just like the classic Vicks rub (but without the synthetic stuff). It’s safe, effective, and smells like a eucalyptus grove with a hint of grandma’s medicine chest—in the best possible way!

Whether you’re treating a toddler’s sniffles or trying to head off a man cold, this DIY vapor rub will be your winter wellness MVP.

Why You’ll Love This Natural Decongestant Balm

  • No petroleum or nasties – A clean, green homemade Vicks alternative 
  • Gentle enough for kids – With optional adjustments for littlies 
  • Nourishing balm texture – Melts into skin without being greasy 
  • Essential oils – Provide cooling, clearing, and comforting support 
  • Customizable – Make it stronger for adults or extra-gentle for babies 

Ingredients

Base:

  • 1/4 cup coconut oil (or olive oil for a softer balm) 
  • 2 tbsp shea butter or mango butter 
  • 2 tbsp beeswax pellets 

Essential Oil Blend (for adults):

  • 10 drops eucalyptus essential oil 
  • 8 drops peppermint essential oil 
  • 6 drops rosemary essential oil 
  • 4 drops tea tree essential oil 
  • 4 drops lavender essential oil 

Optional for kids under 5:
Replace eucalyptus and peppermint with fir needle and cedarwood atlas, and halve the total essential oil amount.

How to Make Your Own Vapor Rub

  1. Melt the base:
    In a double boiler (or a bowl over simmering water), gently melt the coconut oil, shea butter, and beeswax together. Stir until smooth and liquid. 
  2. Cool slightly:
    Remove from heat and let cool just a few minutes—enough that it’s no longer scalding hot but still liquid. 
  3. Add essential oils:
    Stir in your essential oil blend. Don’t add them too early or the heat will evaporate their goodness. 
  4. Pour into tins or jars:
    Carefully pour into a small glass jar or metal balm tin. Let cool completely before putting the lid on. 
  5. Label & store:
    Store in a cool place away from sunlight. Balm will keep for up to 6 months. 

How to Use Your Herbal Chest Rub

  • For chest and back: Rub a small amount onto chest, upper back, and soles of the feet during cold or flu season. 
  • For steam relief: Add a pea-sized amount to a bowl of steaming water, cover your head with a towel, and inhale. 
  • For headaches: Dab a touch on temples and neck (use caution and avoid eyes). 

Mum Tips

  • Patch test first if you’re unsure about sensitivities. 
  • Keep a tiny jar in your handbag during winter for on-the-go sniffles. 
  • For a nighttime version, add a few drops of Roman chamomile or lavender for extra sleep support. 


Related Posts:

  • DIY Makeup Remover Recipes For Every Skin Type
  • DIY Money Saving Bathroom And Kitchen Cleaners
«

Have you read?

Make Your Own Nourishing Stretch Mark Oil

There’s something really lovely about a project like this DIY nourishing stretch mark oil. It feels gentle, thoughtful, and the kind of homemade self-care recipe that fits beautifully into real life rather than some impossible spa fantasy where nobody has laundry on the couch. The tutorial uses chamomile flowers, lavender flowers, marshmallow root, and a carrier oil to create a slow-infused body oil designed to nourish skin and support elasticity. It makes around 4 to 6 ounces, which is a nice manageable batch for personal use.

What I like most is that this isn’t trying to be dramatic. It’s not pretending one little bottle is going to magically erase every line your body has ever earned. It’s more about care, consistency, and giving your skin something soft and soothing. That makes it feel especially relatable for pregnancy, postpartum, weight changes, and yes, even perimenopause, when skin can suddenly feel drier, more fragile, and just generally a bit less cooperative than it used to be. It’s one of those quiet body-care projects that says, “Let’s be kind to ourselves,” and I’m very much here for that.

The method is simple enough too. You add the herbs to a clean jar, cover them fully with your chosen carrier oil, then let the mixture infuse in a cool, dark place for at least six weeks, giving it a gentle shake every few days before straining and bottling it. There’s even a practical little tip about putting parchment paper under the lid so the herbs don’t sit against the metal, which is exactly the kind of small homemade detail I appreciate in a DIY tutorial.

I also like that the project leaves room for flexibility. It mentions using different carrier oils such as avocado oil, coconut oil, or jojoba oil, depending on your skin type and preference, and it notes that you can add essential oils if you want a little fragrance or extra skin-loving benefits. That sort of custom feel is part of the appeal with homemade bath and body recipes. You get to make something that suits your own skin instead of just grabbing whatever is shouting the loudest on the chemist shelf.

Another nice touch is the extra ingredient suggestions. The post includes ideas like vitamin E oil, rosehip seed oil, aloe vera, cocoa butter, hyaluronic acid, gotu kola, argan oil, glycolic acid, and retinol as ingredients often associated with improving the look of stretch marks. It also sensibly reminds readers to patch test first and speak to a dermatologist if they have concerns. I always appreciate that kind of balance. Homemade skincare is wonderful, but so is remembering that not every skin type wants to join the party.

This feels like a very approachable project for anyone who enjoys herbal body care, slower beauty rituals, and making useful gifts or personal self-care items. It has that handmade, nurturing quality that a lot of commercial products try to fake with expensive packaging and words like botanical on the label. Here, it actually is botanical, and you made it yourself, which somehow makes the whole thing feel even nicer.

Leave a Reply

Your email address will not be published. Required fields are marked *

RSS More Articles

  • 3 FREE Peony Flower Frames to Print or Cut
  • 15 Crochet Messy Bun Hat Patterns For Ponytails, Buns And Bad Hair Days
  • Easy Felt Food Pancakes for Kids – A Sweet Pretend Play Craft for Classrooms and Home
  • Knitting Stylish Stuff from Your Stash Book Review
  • Etsy Feature – City Street Pottery Roller with Handle
  • Designer Spotlight: Silverberry Designs
  • Sewing Pattern Saturday Review: The Juniper Dress PDF Sewing Pattern
  • Crochet Siamese Cat – Emotional Support Kitty
  • Easy Fourth of July Ribbon Wreath – No-Sew Patriotic Door Decor
  • Book Review: 200 Sanity-Saving Tips, Tricks, and Hacks for Quilters

Copyright © 2026 · CraftGossip | Start Here | Contact Us | Link to Us | Your Editors | Privacy and affiliate policy