• Home
  • Suggest A DIY
  • DIY Newsletter

Bath and Body

Soap Making, Oils and Recipes

  • About CraftGossip
  • Our Network
    • Bath & Body Crafts
    • Candle Making Ideas
    • Crochet Ideas
    • Cross Stitch
    • Edible Crafts
    • Felting Patterns
    • Glass Art
    • Home & Garden Ideas
    • Indie Crafts
    • Jewelry Making
    • Kids Crafts
    • Knitting Patterns
    • Lesson Plans
    • Needlework
    • Party Ideas
    • Polymer Clay
    • Quilting Ideas
    • Recycled Crafts
    • Scrapbooking
    • Sewing Patterns
    • Card Making
    • DIY Weddings
    • Not Craft Ideas
  • Giveaways
  • Roundups
  • Store
  • Search

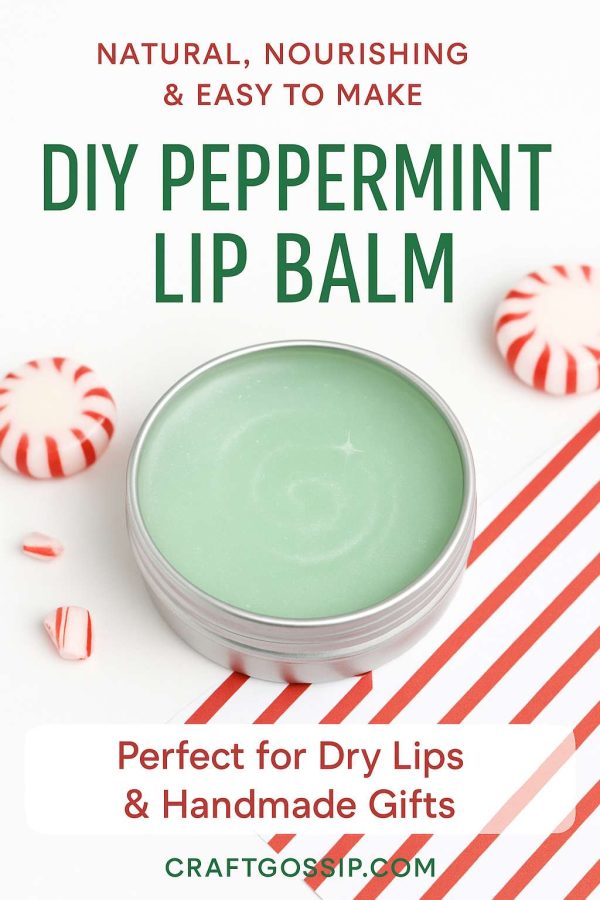
DIY Peppermint Lip Balm Recipe – Natural, Soothing, and Refreshingly Tingly

December 3, 2007 by Kimberly Ayers Leave a Comment

If your lips are dry, cracked, or just plain grumpy, this simple homemade peppermint lip balm is going to be your new go-to. It’s cooling, hydrating, and super easy to whip up in your kitchen—no fancy tools or mysterious ingredients. Just pure, tingly goodness in a tin or tube!

This recipe has been a CraftGossip favorite since 2007, and it’s still just as relevant today. Why? Because it works. It’s natural, effective, and you can tweak it to suit your needs (or your stash of oils and butters).

Whether you’re filling up stockings, making teacher gifts, or just treating yourself, you’ll love how nourishing this balm feels on your lips—and how easy it is to make a whole batch in under 30 minutes.

Why You’ll Love This Peppermint Lip Balm

  • Cooling tingle from pure peppermint essential oil 
  • Beeswax base for long-lasting protection 
  • Nourishing oils to soften and heal chapped lips 
  • Customizable – make it vegan or switch up the scent 
  • Perfect for gifting – add a cute label or tie with twine 

Ingredients:

  • 2 tablespoons grated beeswax or beeswax pellets 
  • 2 tablespoons coconut oil 
  • 2 tablespoons sweet almond oil or olive oil 
  • 6–10 drops peppermint essential oil (adjust to your tingle preference) 

Optional Add-Ins:

  • ½ teaspoon shea butter or cocoa butter (extra moisturizing) 
  • ¼ teaspoon vitamin E oil (extends shelf life + skin healing) 
  • A pinch of mica powder for a shimmer tint 
  • A few drops of stevia or honey for a hint of sweetness 

Tools:

  • Heat-safe bowl or jug 
  • Saucepan (for double boiler method) 
  • Lip balm tubes or tins (clean and dry) 
  • Dropper or small spoon for pouring 

Instructions:

  1. Melt It Down
    In a heat-safe bowl, combine the beeswax, coconut oil, and almond oil. Use the double boiler method to gently melt everything until smooth, stirring occasionally. 
  2. Add the Goodies
    Remove from heat and let it cool slightly (about 1 minute), then stir in the peppermint essential oil and any optional ingredients. 
  3. Pour & Set
    Carefully pour the mixture into your lip balm containers. (A small funnel or pipette helps avoid messes!) Let them sit at room temp until fully set, about 30–60 minutes. 
  4. Label & Store
    Pop on a label, decorate, or stash them in a tin. Store in a cool, dry place. Balm will last 6–12 months depending on ingredients. 

Tips for Perfect Peppermint Lip Balm:

  • Use less peppermint if you’re sensitive to tingling. 
  • Want it firmer? Add a bit more beeswax. 
  • Making it vegan? Swap beeswax for candelilla wax. 

Gift Idea:

Bundle a peppermint balm with a handmade mug and a hot chocolate mix for a cozy winter gift set. Or tuck a few into a Christmas cracker or holiday card.
 

«
»

Have you read?

DIY Burn Relief Soap – A Soothing Aloe Vera and Lavender Recipe for Sunburn, Windburn, and Irritated Skin

Raise your hand if you’ve ever been caught out without sunscreen—and paid the price with lobster-red shoulders, itchy rashes, or skin so tender you could cry brushing against cotton sheets. Been there, done that (more than once if I’m honest). Whether it’s summer sunburn, winter windburn, or a splash from a hot pan, our skin sometimes needs a little extra TLC—and that’s where this DIY Burn Relief Soap comes in.

This homemade soap bar is designed to calm, hydrate, and gently cleanse burned or irritated skin. Made with a melt-and-pour soap base, soothing aloe vera, and essential oils like lavender and chamomile, it’s gentle enough for daily use—even for kids or those with sensitive skin.

Think of it as first-aid meets spa day in a soap bar.

Why This Soap Works for Burn Relief

Each ingredient in this recipe has a soothing purpose—no fillers, no synthetics, just skin-loving goodness:

  • Aloe Vera Gel
    Famous for its burn-healing powers, aloe is cooling, hydrating, and anti-inflammatory. It speeds up healing and eases discomfort on contact. 
  • Chamomile-Infused Oil
    Chamomile contains bisabolol and apigenin—natural compounds known to reduce redness, calm inflammation, and support skin regeneration. 
  • Lavender Essential Oil
    Not just for relaxation, lavender is also antimicrobial and helps soothe painful skin. It may even reduce scarring over time. 
  • Goat’s Milk or Aloe Melt and Pour Base
    A gentle, nourishing base loaded with vitamins, perfect for dry or damaged skin. The creamy lather won’t strip away your natural oils. 
  • Tea Tree Oil (Optional)
    A drop or two adds antibacterial support, especially if your burn is the result of heat rash or has broken the skin. 

Ingredients You’ll Need

  • 1 lb goat’s milk or aloe vera melt-and-pour soap base 
  • 2 tablespoons pure aloe vera gel (no alcohol or colorants) 
  • 1 tablespoon chamomile-infused oil
    (You can DIY this by steeping dried chamomile flowers in sweet almond or olive oil for 1–2 weeks) 
  • 10 drops lavender essential oil 
  • 5 drops tea tree essential oil (optional) 
  • Silicone soap mold 
  • Rubbing alcohol (for surface bubbles, optional) 

Step-by-Step Instructions

1. Melt the Soap Base

Cut the melt-and-pour soap base into small cubes for even melting. Use a double boiler or microwave in short 20–30 second bursts, stirring often until smooth.

2. Add Aloe Vera and Oils

Remove from heat and stir in the aloe vera gel and chamomile-infused oil. Mix gently until fully combined.

3. Add Essential Oils

Once the soap cools slightly but is still pourable, add the lavender (and optional tea tree) essential oil. Avoid adding them while the soap is too hot, or they’ll evaporate.

4. Pour Into Molds

Carefully pour the mixture into your soap molds. Spritz the surface with rubbing alcohol to remove bubbles.

5. Let It Set

Allow the soaps to cool and harden completely—usually 3–4 hours at room temp, or pop into the fridge to speed things up.

6. Unmold and Store

Once firm, gently pop out your bars. Store in an airtight container or wrap in wax paper to keep them fresh and prevent “soap sweating.”

How to Use Your Burn Relief Soap

  • Use in the shower or bath after sun exposure or any time your skin feels tight, hot, or inflamed. 
  • Gently lather with lukewarm water—avoid hot water, which can aggravate burns. 
  • Pat skin dry with a soft towel and follow with a natural after-sun lotion or body oil for extra moisture. 

Make It Your Own – Variations & Tips

  • Add Oatmeal: For extra calming, stir in 1–2 tablespoons of finely ground oats (colloidal oatmeal works best). 
  • Extra Cooling: Add 2–3 drops of peppermint essential oil for a gentle cooling tingle—great for sunburn. 
  • Herbal Layer: Place dried calendula or chamomile petals in the bottom of your mold before pouring the soap for a botanical, handmade look. 
  • Mini Soaps: Pour into mini silicone molds to make burn relief travel soaps for beach bags, camping kits, or gifts. 

Safety Notes

  • This soap is ideal for minor burns, sunburns, and skin irritation. 
  • Don’t use on open blisters or severe burns—in that case, stick to medical treatment. 
  • Always do a patch test if you’re using a new essential oil or ingredient, especially for kids or sensitive skin. 

Perfect For…

  • After-sun showers 
  • Camping and travel first aid kits 
  • Gift baskets for gardeners, surfers, or outdoor lovers 
  • Care packages for new mums or anyone with sensitive skin 
  • Self-care stash for menopause-related heat sensitivity 

Making your own burn relief soap is such a simple but powerful way to care for your skin naturally—and it feels especially good knowing there are no sneaky synthetic additives or harsh ingredients lurking in your bar. Just healing herbs, soothing oils, and a whole lot of love.

Leave a Reply

Your email address will not be published. Required fields are marked *

RSS More Articles

  • 10 Bookmark Embroidery Patterns for Quick Handmade Gifts
  • Necklace Length Guide For Handmade Jewelry Makers
  • Toy Story Cross Stitch Patterns
  • Vintage Bed Socks Knitting Pattern – A Cozy Little Gift Project With Old-Fashioned Charm
  • Vintage Crochet Baby Dress Pattern Review
  • 12+ Beautiful Butterfly Card Ideas
  • Cute Little Backpack Knitting Patterns
  • Easy Pen and Paper Games for Road Trips and Beyond
  • Handmade Pretend Play Food Ideas For Kids’ Kitchens, Classrooms And Crafty Grandparents
  • Air-Dry Clay Sunflower Trinket Dish Tutorial

Copyright © 2026 · CraftGossip | Start Here | Contact Us | Link to Us | Your Editors | Privacy and affiliate policy