• Home
  • Suggest A DIY
  • DIY Newsletter

Bath and Body

Soap Making, Oils and Recipes

  • About CraftGossip
  • Our Network
    • Bath & Body Crafts
    • Candle Making Ideas
    • Crochet Ideas
    • Cross Stitch
    • Edible Crafts
    • Felting Patterns
    • Glass Art
    • Home & Garden Ideas
    • Indie Crafts
    • Jewelry Making
    • Kids Crafts
    • Knitting Patterns
    • Lesson Plans
    • Needlework
    • Party Ideas
    • Polymer Clay
    • Quilting Ideas
    • Recycled Crafts
    • Scrapbooking
    • Sewing Patterns
    • Card Making
    • DIY Weddings
    • Not Craft Ideas
  • Giveaways
  • Roundups
  • Store
  • Search

Tips & Tricks: Filling Cosmetic Tubes

June 28, 2007 by Jodi 2 Comments

Making your own cosmetics can be fun, but sometimes filling those little tubes and containers with hot from the stove product can be a bit tricky. Here’s a method that will help.

Fill a cake pan halfway with layer of uncooked rice, lentils or small beans. Stand the tubes or containers straight up so their bases are flat against the pan bottoms and the rice is holding the tubes firmly in place. Using a dropper or turkey baster, draw up the melted product and squirt it gently into each tube. Any excess drips should fall onto the rice. Let the product cool in the tubes until it becomes solid.
«
»

Comments

  1. Naomi says

    July 2, 2007 at 9:27 am

    This is a very neat idea. I like it very much.

  2. Sonya T says

    August 22, 2007 at 4:22 am

    I find it easier to use a lipstick mould – These don’t fall over when pouring in a lip balm or lipstick mixture. Plus you can them recycle all of your favorite lipstick holders. Yes it may look like a channel lipstick – but its really my creation in there!

Have you read?

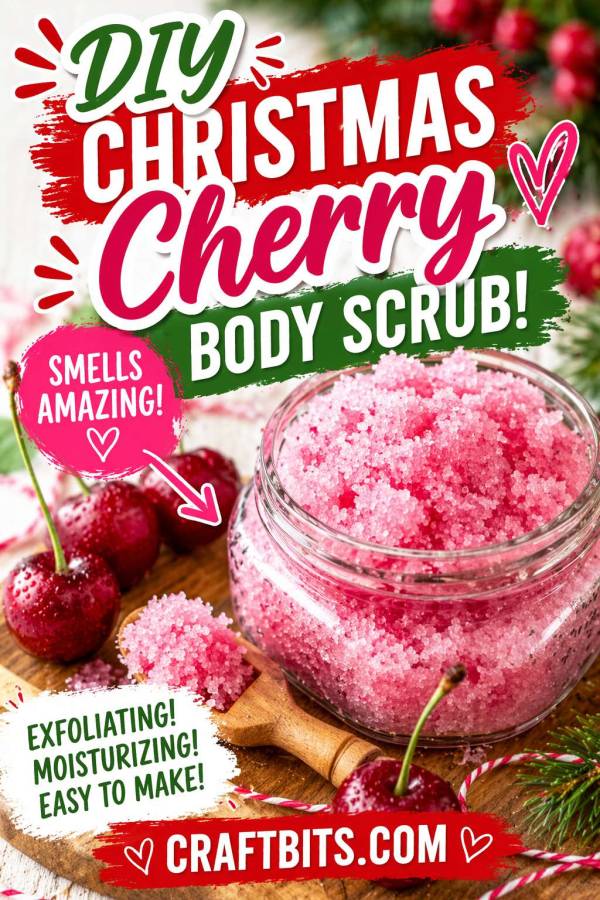
DIY Christmas Cherry Body Scrub

If you love simple handmade gifts that still feel festive and special, this DIY Christmas Cherry Body Scrub from CraftBits is such a fun little project. It is bright, pretty, and has that sweet cherry scent that makes it feel perfect for Christmas gifting.

What I like about this tutorial is how easy it is to pull together. The scrub uses granulated sugar, sweet almond oil or another carrier oil, red cherry fragrance oil, and a touch of mica powder for color, so it feels like one of those projects you can make quickly but still package up beautifully.

It is the kind of bath and body recipe that works really well for teacher gifts, stocking stuffers, hostess gifts, or just a little festive treat for yourself. The pretty pink-red color and cherry fragrance give it a cheerful Christmas feel without needing anything too complicated.

The tutorial itself is wonderfully straightforward too. You simply combine the ingredients well and store the finished scrub in an airtight container, which makes this a lovely beginner-friendly project for holiday crafting.

If you are looking for a quick Christmas body scrub recipe that feels handmade, giftable, and easy to recreate, this one is a sweet little pick.

Featured Project: DIY Christmas Cherry Body Scrub


Leave a Reply

Your email address will not be published. Required fields are marked *

RSS feed: More Articles More Articles

  • Free Knitted Crown Pattern for Kids and Adults: A Sweet Handmade Dress-Up Idea
  • Free Knitted Knockers Crochet Pattern: Make Soft Breast Forms to Donate
  • Hedgehog Crochet Patterns for Adorable Woodland Makes
  • DIY Thrifted Glass Christmas Platter With Vintage Santa Fabric
  • Celebrate Inventor’s Day by Learning about Inventors
  • How to Make a Stamped Fall Scarecrow Card
  • Tiny Knits in Team Colors
  • Book Review: The Ultimate Cross Stitch Christmas Collection
  • FREE Cute Ghost and Pumpkin Background
  • Sandok Cable Sweater Review: Sizing, Yarn and What to Know Before Knitting

Copyright © 2026 · CraftGossip | Start Here | Contact Us | Link to Us | Your Editors | Privacy and affiliate policy