• Home
  • Suggest A Craft
  • DIY Newsletter

Bath and Body

Soap Making, Oils and Recipes

  • About CraftGossip
  • Our Network
    • Bath & Body Crafts
    • Candle Making Ideas
    • Crochet Ideas
    • Cross Stitch
    • Edible Crafts
    • Felting Patterns
    • Glass Art
    • Home & Garden Ideas
    • Indie Crafts
    • Jewelry Making
    • Kids Crafts
    • Knitting Patterns
    • Lesson Plans
    • Needlework
    • Party Ideas
    • Polymer Clay
    • Quilting Ideas
    • Recycled Crafts
    • Scrapbooking
    • Sewing Patterns
    • Card Making
    • DIY Weddings
    • Not Craft Ideas
  • Giveaways
  • Roundups
  • Store
  • Search

Base Cream Recipe From Scratch

April 5, 2011 by Nellie Lee Luhrmann 8 Comments

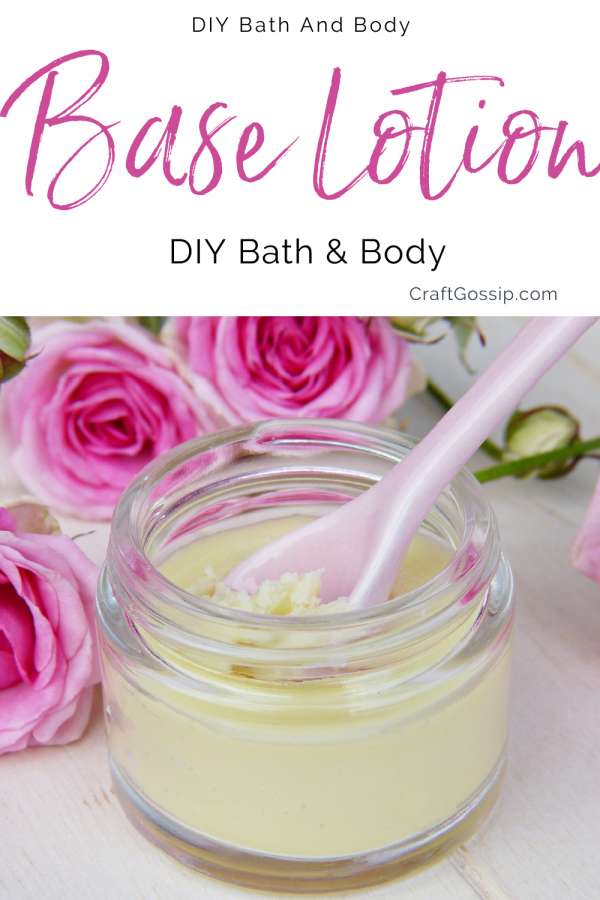
When making your own body lotions/face creams you have 2 options: you can either make your own or buy one. Below is a recipe for a basic cream/lotion base.

When making a cream from scratch there are two stages that must be considered – the oil phase and the water phase. They must be kept separate until each has reached a maximum heat of 70 degrees, after which they can be mixed together.

WATER PHASE

900ml distilled or purified water

25 g Unigerm g-2 ( synthetic preservative ) or 7g grapefruit seed extract ( natural preservative )

OIL PHASE

100ml carrier oil of your choice ( a good all rounder is almond oil or jojoba oil )

60g emulsifying wax ( reduce to 40 gram for lotion consistency )

STEP 1

Pour distilled/purified water in a saucepan. Apply low heat and slowly build to a maximum of 70 degrees. Keep checking to ensure you do not exceed the maximum temperature.

STEP 2

In a separate saucepan add the carrier oil and the emulsifying wax, once again on low heat. As with the water, phase keeps on checking the temperature. You will generally find that once the emulsifying wax has fully melted you are close to the desired temperature.

STEP 3

Once you have reached 70 degrees in both the water and oil phase, remove from the stove and pour the water into the oil.

STEP 4

Stir until the mixture reaches 45 degrees, then add the preservative and other active ingredients such as essential oils, vitamins, or extracts. Continue to stir.

STEP 5

Once the mixture has reached around 35 – 36 degrees you will notice it starting to thicken. Let it cool completely.

And that is it. Now you have your very own base cream!

Over the coming weeks I will be posting many different types of creams & lotions for you to make using this base cream.

Related Posts:

  • DIY Rainbow Bath Bombs
  • DIY Ice Plunge Options at Home
«
»

Comments

  1. Jackie M. says

    April 5, 2011 at 8:53 am

    Are the temperature degrees in centigrade?

  2. Mary Lou says

    April 5, 2011 at 12:55 pm

    love the idea of making my own creams. I know what is an isn;t in them then.

  3. Nellie Lee Luhrmann says

    April 5, 2011 at 1:34 pm

    Yes it is Jackie 🙂

  4. Naomi Peters says

    April 7, 2011 at 11:16 am

    Grapefruit Seed Extract is not a preservative! It is an anti-oxidant and a broad-spectrum antimicrobal but definately not a preservative. You’ll have germies growing if you don’t use a real preservative!

  5. Nellie Lee Luhrmann says

    April 7, 2011 at 3:01 pm

    Hi Naomi,

    I get lots of conflicting stories over grapefruit seed extract. . For Bath n Body readers maybe you could suggest a few alternatives to GSE my only other suggestion would be “Naticide”

  6. maddie says

    September 1, 2015 at 3:50 am

    how many grams of cream does this recipe make?

  7. FLORA FAMAKINDE says

    February 16, 2021 at 6:51 am

    Hi,
    This looks pretty straightforward and easy. Thanks fir the recipe. I noticed that you didn’t use a stick blender…is it not necessary for making a base cream?

    Flora

Trackbacks

  1. DIY Face Moisturizer For Everyday Use · Bath and Body | CraftGossip.com says:
    April 12, 2011 at 3:17 pm

    […] Base Cream Recipe From ScratchDIY Bath Salt Recipe FormulaDIY Chocolate Face Mask Recipe DIY Chocolate SoapAnd The Winner Is ……………Vapour Organic Beauty – Review DIY Lady Luck Bath Salts – Perfect For Mothers dayCosima nominated in 2011 Telstra Business AwardsDIY Face Moisturizer For Everyday Use […]

Have you read?

DIY Summer Nail Designs You’ll Want to Rock All Season Long

As soon as the weather heats up and the days get longer, I swap out my moody nail colors for something a little more fun, flirty, and full of sunshine. Summer is the perfect excuse to get playful with your nail designs — and this year, I’ve been experimenting at home to find a few favorites that are both easy to paint and seriously cute.

I’ve rounded up three of my go-to summer nail looks that you can totally do yourself, even if you’re not a pro. These are the styles I keep coming back to because they’re fun, eye-catching, and honestly — they just make you feel good. Whether you’re heading to the beach, a backyard BBQ, or just want to admire your nails while holding an iced latte, these are the ones to try.

Let’s dive in!

Sunset Ombre Nails

This is hands down one of the most satisfying nail designs you can do yourself. The colors melt into each other like a beach sunset, and the end result looks way more advanced than it really is.

You’ll Need:

  • A base coat

  • Three polishes (I use pink, orange, and yellow)

  • A makeup sponge

  • Top coat

  • Nail polish remover for cleanup

How to Do It:

  1. Start with a clear base coat to protect your nails.

  2. Paint horizontal stripes of your 3 colors directly onto the makeup sponge.

  3. Dab the sponge gently onto your nail, reapplying polish to the sponge as needed. Tap until the gradient blends.

  4. Clean up any excess polish around your cuticle.

  5. Apply a top coat to smooth the colors and add shine.

This design is one of those that looks good even when it’s a little messy — the top coat really pulls it all together.


 Tropical Palm Silhouettes

If you want vacation vibes without actually going anywhere, this one’s for you. The pastel base paired with simple black palm trees gives it that dreamy island feel.

You’ll Need:

  • A light pastel base polish or soft gradient background

  • Black nail art pen or thin brush with black polish

  • Top coat

How to Do It:

  1. Paint your nails with a soft pastel or ombre base.

  2. Once dry, draw a thin curved line for the palm trunk.

  3. From the top of the trunk, add small lines that fan out to mimic palm fronds.

  4. Let everything dry completely before adding a glossy top coat.

Even if your palm trees aren’t perfect, they still look awesome. Think of it like nail doodling — just more tropical.


 Watermelon French Tips

This design is so cheerful, I smile every time I see it. It’s a fruity twist on a French manicure and it’s perfect for pool parties or picnics.

You’ll Need:

  • Pink polish for the base

  • Green and white for the rind

  • Black polish for the seeds (use a dotting tool or toothpick)

  • Base and top coat

How to Do It:

  1. Paint your entire nail a soft pink.

  2. Add a green curved tip at the top edge (like a French tip).

  3. Under the green, paint a very thin white stripe.

  4. Add small black dots on the pink section to create seeds.

  5. Seal it all in with your favorite top coat.

This one is such a crowd-pleaser and looks adorable on both long and short nails.

Whether you try one of these or rotate through all three this summer, I hope these nail designs add a little color and creativity to your routine. They’re simple enough to do at home but still look like you spent time (and money!) at the salon.

Let me know which one you’re trying first — and don’t forget to tag us if you share your summer nail look!

Leave a Reply

Your email address will not be published. Required fields are marked *

RSS More Articles

  • Book Review: Merry Stitchmas
  • Etsy Spotlight – Sew the Dress of Your Dreams with This Romantic Puff Sleeve Pattern
  • Vacation Pocket Mini Album Project
  • DIY Soda Bottle Cloches – A Clever Way to Shield Your Seedlings
  • Crochet Pattern Review: Aura Pullover
  • Scrappy Pineapple Block – Quilt Pattern
  • Learning about the Moon for Kids
  • Free Crochet Pattern – Battenberg Blanket
  • Book Review – Big Thrift Energy
  • How to Make a Summer Drinks Shaker Card

Categories

Bath And Body bath bombs Body Scrubs & Lotions Colds & Flu CraftGossip Exclusive Craft Inspirations detox DIY Recipes And Tutorials DIY Tutorials and Patterns Essential Oils And Aromatherapy facials Hair Care Makeup & Beauty Melt & Pour Soap Packaging Product Reviews Soapmaking Recipes, Products And Tutorials Style Me Quick Supply Store Specials & Discounts Wellbeing

Copyright © 2025 · CraftGossip | Start Here | Contact Us | Link to Us | Your Editors | Privacy and affiliate policy