• Home
  • Suggest A Craft
  • DIY Newsletter

Bath and Body

Soap Making, Oils and Recipes

  • About CraftGossip
  • Our Network
    • Bath & Body Crafts
    • Candle Making Ideas
    • Crochet Ideas
    • Cross Stitch
    • Edible Crafts
    • Felting Patterns
    • Glass Art
    • Home & Garden Ideas
    • Indie Crafts
    • Jewelry Making
    • Kids Crafts
    • Knitting Patterns
    • Lesson Plans
    • Needlework
    • Party Ideas
    • Polymer Clay
    • Quilting Ideas
    • Recycled Crafts
    • Scrapbooking
    • Sewing Patterns
    • Card Making
    • DIY Weddings
    • Not Craft Ideas
  • Giveaways
  • Roundups
  • Store
  • Search

DIY Healthy Nail Tips

August 29, 2011 by Nellie Lee Luhrmann 3 Comments

Toluene and formaldehyde, used widely in commercial cosmetic polishes, can cause throat irritation, rashes, headache, nausea & asthma. If you are like me and partial to a bit of polish on your nails there are a few good natural alternatives.

Try buffing your nails with beeswax, cocoa butter or a tiny amount of vegetable oil and soft cloth. Naturally buffed, nicely shaped nails look luxuriously pampered. Buffing is good for your nails, as it stimulates circulation in the nail bed which helps the nails to grow stronger. When buffing be sure to buff them in an up-and-down motion, this stimulates blood flow and creates a glorious sheen.

Here is a natural alternative to a DIY french polish obviously it wont look these      
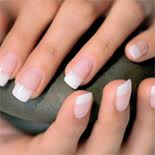
but it will still look natural, wont cost the earth and is chemical free.

YOU WILL NEED…………

Henna powder

Hairdryer

Nail Buffer

White Pencil

HOW TO……….

Mix some henna powder with water to make a paste, apply a 1mm layer to clean dry nails.

Dry with hairdryer ( careful not to get to close or hot you may burn your self ) The warmth will intensify the colour.

Rinse off dry the nail then proceed to buff them to a high polish. Your nails should resemble pretty pink seashells.

Run a white pencil under the tips to accent them and create the effect of a french polish.

Henna is  a must have for DIY at home  hair & nail conditioning treatments. It will prevent both from splitting and give them a glorious shine.

Related Posts:

  • How To Do A Castor Oil Compress
  • 10 DIY Bath And Body Recipes For When You Have A Headache
«
»

Comments

  1. Willa Neice says

    August 29, 2011 at 6:17 am

    Hello- I am a licensed manicurist of 13 years and these are all very good tips to follow, but don’t forget to gently push the cuticle back after the shower when they have absorbed some water. Overgrown cuticle tissue can slow the growth of healthy nails.

  2. Kayla Barrington says

    September 5, 2011 at 9:57 am

    Everything is quite open and really clear explanation of troubles. was truly details. Your site is extremely useful. Many thanks for sharing.

  3. Kathryn Church says

    October 13, 2011 at 8:08 pm

    Loved the tips thanks so much.

Have you read?

DIY Summer Nail Designs You’ll Want to Rock All Season Long

As soon as the weather heats up and the days get longer, I swap out my moody nail colors for something a little more fun, flirty, and full of sunshine. Summer is the perfect excuse to get playful with your nail designs — and this year, I’ve been experimenting at home to find a few favorites that are both easy to paint and seriously cute.

I’ve rounded up three of my go-to summer nail looks that you can totally do yourself, even if you’re not a pro. These are the styles I keep coming back to because they’re fun, eye-catching, and honestly — they just make you feel good. Whether you’re heading to the beach, a backyard BBQ, or just want to admire your nails while holding an iced latte, these are the ones to try.

Let’s dive in!

Sunset Ombre Nails

This is hands down one of the most satisfying nail designs you can do yourself. The colors melt into each other like a beach sunset, and the end result looks way more advanced than it really is.

You’ll Need:

  • A base coat

  • Three polishes (I use pink, orange, and yellow)

  • A makeup sponge

  • Top coat

  • Nail polish remover for cleanup

How to Do It:

  1. Start with a clear base coat to protect your nails.

  2. Paint horizontal stripes of your 3 colors directly onto the makeup sponge.

  3. Dab the sponge gently onto your nail, reapplying polish to the sponge as needed. Tap until the gradient blends.

  4. Clean up any excess polish around your cuticle.

  5. Apply a top coat to smooth the colors and add shine.

This design is one of those that looks good even when it’s a little messy — the top coat really pulls it all together.


 Tropical Palm Silhouettes

If you want vacation vibes without actually going anywhere, this one’s for you. The pastel base paired with simple black palm trees gives it that dreamy island feel.

You’ll Need:

  • A light pastel base polish or soft gradient background

  • Black nail art pen or thin brush with black polish

  • Top coat

How to Do It:

  1. Paint your nails with a soft pastel or ombre base.

  2. Once dry, draw a thin curved line for the palm trunk.

  3. From the top of the trunk, add small lines that fan out to mimic palm fronds.

  4. Let everything dry completely before adding a glossy top coat.

Even if your palm trees aren’t perfect, they still look awesome. Think of it like nail doodling — just more tropical.


 Watermelon French Tips

This design is so cheerful, I smile every time I see it. It’s a fruity twist on a French manicure and it’s perfect for pool parties or picnics.

You’ll Need:

  • Pink polish for the base

  • Green and white for the rind

  • Black polish for the seeds (use a dotting tool or toothpick)

  • Base and top coat

How to Do It:

  1. Paint your entire nail a soft pink.

  2. Add a green curved tip at the top edge (like a French tip).

  3. Under the green, paint a very thin white stripe.

  4. Add small black dots on the pink section to create seeds.

  5. Seal it all in with your favorite top coat.

This one is such a crowd-pleaser and looks adorable on both long and short nails.

Whether you try one of these or rotate through all three this summer, I hope these nail designs add a little color and creativity to your routine. They’re simple enough to do at home but still look like you spent time (and money!) at the salon.

Let me know which one you’re trying first — and don’t forget to tag us if you share your summer nail look!

Leave a Reply

Your email address will not be published. Required fields are marked *

RSS More Articles

  • Monday Musings: The Blog Post That Flopped (And What I Learned From It)
  • Simple Embroidery: 35 projects to make: Embellish clothes, accessories, and more and create wall art with modern hand-sewn designs
  • Book Review: The Secret Life of the Forest
  • Textured Baby Blanket Knitting Patterns
  • Jethro Cardigan- Crochet Pattern
  • Book Review: Merry Stitchmas
  • Etsy Spotlight – Sew the Dress of Your Dreams with This Romantic Puff Sleeve Pattern
  • Vacation Pocket Mini Album Project
  • DIY Soda Bottle Cloches – A Clever Way to Shield Your Seedlings
  • Crochet Pattern Review: Aura Pullover

Categories

Bath And Body bath bombs Body Scrubs & Lotions Colds & Flu CraftGossip Exclusive Craft Inspirations detox DIY Recipes And Tutorials DIY Tutorials and Patterns Essential Oils And Aromatherapy facials Hair Care Makeup & Beauty Melt & Pour Soap Packaging Product Reviews Soapmaking Recipes, Products And Tutorials Style Me Quick Supply Store Specials & Discounts Wellbeing

Copyright © 2025 · CraftGossip | Start Here | Contact Us | Link to Us | Your Editors | Privacy and affiliate policy