• Home
  • Suggest A Craft
  • DIY Newsletter

Bath and Body

Soap Making, Oils and Recipes

  • About CraftGossip
  • Our Network
    • Bath & Body Crafts
    • Candle Making Ideas
    • Crochet Ideas
    • Cross Stitch
    • Edible Crafts
    • Felting Patterns
    • Glass Art
    • Home & Garden Ideas
    • Indie Crafts
    • Jewelry Making
    • Kids Crafts
    • Knitting Patterns
    • Lesson Plans
    • Needlework
    • Party Ideas
    • Polymer Clay
    • Quilting Ideas
    • Recycled Crafts
    • Scrapbooking
    • Sewing Patterns
    • Card Making
    • DIY Weddings
    • Not Craft Ideas
  • Giveaways
  • Roundups
  • Store
  • Search

10 Ways To Make DIY Beer Soap

November 13, 2022 by Shellie Wilson Leave a Comment

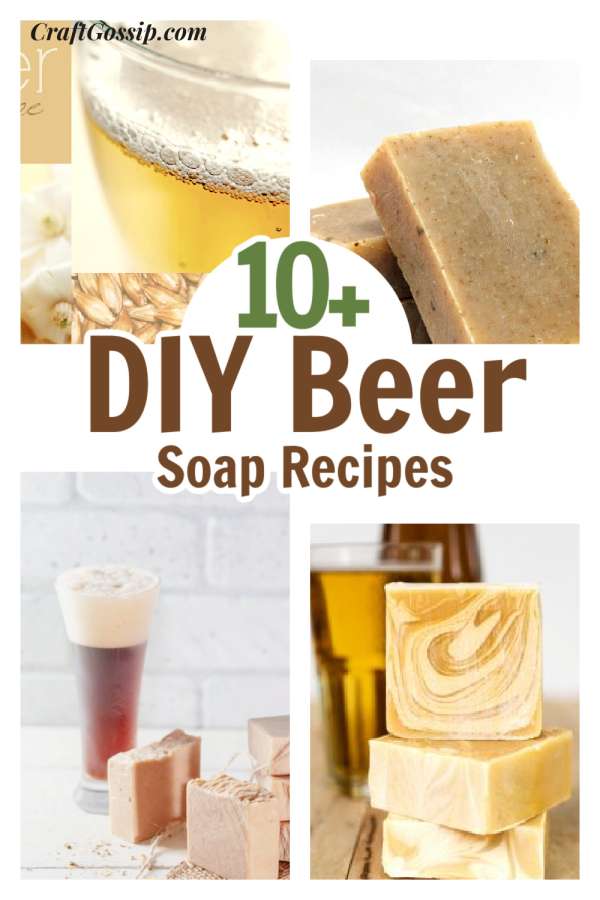
When it comes to soap, most people are accustomed to the typical fruity or floral scents, but have you ever heard of beer soap? Yes, that’s right, soap made with beer! But it’s not just a novelty item with a unique scent, beer soap has its own set of natural benefits for the skin.

As beer is made from natural ingredients such as hops, malt, and yeast, it contains essential vitamins and minerals that can improve the overall health of your skin. Beer soap is also known for its natural exfoliating properties and ability to help balance the skin’s pH levels.

Plus, the scent of beer soap can be both refreshing and invigorating. So, if you’re looking for a new way to incorporate natural ingredients into your skincare routine, or just want to try something new, making your own beer soap might be the perfect DIY project for you.

Beer soap has been really popular in treating acne. If you want to try them before you make them, check out these beer soaps on Etsy.

Some benefits include:

  • Fighting acne
  • Improved shaving
  • Overly dry skin
  • Overly oily skin
  • Improving your complexion

Beer soap is often paired with a rustic scent like cedarwood or pine.

Beer is rich in Selenium and glutathione, which are well-known antioxidants. It means that beer helps your skin to keep soft and young.  

If you are tossing up between brewing your own beer and making your own soap, then it’s far easier to make the soap. Or you could do both and offer beer and soap for your guests.

Some other options are adding in hops for an exfoliating soap bar or substituting the beer for a cider to try something different.

Charcoal Beer Soap 

How to Make Beer Soap — Back to School Brewing

Beer Soap Recipe 

Beer Soap Made the Old Fashioned Way.

Beer Soap for Beginners 

How to Make Beer Soap

8 Easy Steps to Make Beer Soap

Beer Soap Recipe

Homemade Beer Soap – The DIY Life

Beer Soap Recipe with Chamomile & Neroli Plus Helpful Soap Making Tips

Honey Ale Beer Soap Tutorial | Craft Tutorials & Recipes | Crafting Library


Related Posts:

  • Why You Can't Claim Your Product Cures Eczema,…
  • 10 DIY Bath And Body Recipes For When You Have A Headache
«
»

Have you read?

DIY Summer Nail Designs You’ll Want to Rock All Season Long

As soon as the weather heats up and the days get longer, I swap out my moody nail colors for something a little more fun, flirty, and full of sunshine. Summer is the perfect excuse to get playful with your nail designs — and this year, I’ve been experimenting at home to find a few favorites that are both easy to paint and seriously cute.

I’ve rounded up three of my go-to summer nail looks that you can totally do yourself, even if you’re not a pro. These are the styles I keep coming back to because they’re fun, eye-catching, and honestly — they just make you feel good. Whether you’re heading to the beach, a backyard BBQ, or just want to admire your nails while holding an iced latte, these are the ones to try.

Let’s dive in!

Sunset Ombre Nails

This is hands down one of the most satisfying nail designs you can do yourself. The colors melt into each other like a beach sunset, and the end result looks way more advanced than it really is.

You’ll Need:

  • A base coat

  • Three polishes (I use pink, orange, and yellow)

  • A makeup sponge

  • Top coat

  • Nail polish remover for cleanup

How to Do It:

  1. Start with a clear base coat to protect your nails.

  2. Paint horizontal stripes of your 3 colors directly onto the makeup sponge.

  3. Dab the sponge gently onto your nail, reapplying polish to the sponge as needed. Tap until the gradient blends.

  4. Clean up any excess polish around your cuticle.

  5. Apply a top coat to smooth the colors and add shine.

This design is one of those that looks good even when it’s a little messy — the top coat really pulls it all together.


 Tropical Palm Silhouettes

If you want vacation vibes without actually going anywhere, this one’s for you. The pastel base paired with simple black palm trees gives it that dreamy island feel.

You’ll Need:

  • A light pastel base polish or soft gradient background

  • Black nail art pen or thin brush with black polish

  • Top coat

How to Do It:

  1. Paint your nails with a soft pastel or ombre base.

  2. Once dry, draw a thin curved line for the palm trunk.

  3. From the top of the trunk, add small lines that fan out to mimic palm fronds.

  4. Let everything dry completely before adding a glossy top coat.

Even if your palm trees aren’t perfect, they still look awesome. Think of it like nail doodling — just more tropical.


 Watermelon French Tips

This design is so cheerful, I smile every time I see it. It’s a fruity twist on a French manicure and it’s perfect for pool parties or picnics.

You’ll Need:

  • Pink polish for the base

  • Green and white for the rind

  • Black polish for the seeds (use a dotting tool or toothpick)

  • Base and top coat

How to Do It:

  1. Paint your entire nail a soft pink.

  2. Add a green curved tip at the top edge (like a French tip).

  3. Under the green, paint a very thin white stripe.

  4. Add small black dots on the pink section to create seeds.

  5. Seal it all in with your favorite top coat.

This one is such a crowd-pleaser and looks adorable on both long and short nails.

Whether you try one of these or rotate through all three this summer, I hope these nail designs add a little color and creativity to your routine. They’re simple enough to do at home but still look like you spent time (and money!) at the salon.

Let me know which one you’re trying first — and don’t forget to tag us if you share your summer nail look!

Leave a Reply

Your email address will not be published. Required fields are marked *

RSS More Articles

  • Democratic Republic of the Congo for Kids
  • Primrose and Bee Punch Needle Pattern from DMC
  • Striped Ripple Afghan- Free Crochet Pattern
  • Knitting Pattern Review: Sabai Top by PaulaStrickt
  • Book Review – Capture Your Own Life with Collage Quilting
  • 4 FREE Christmas in July Digital Stamp Borders
  • Designer Spotlight: Needle Lot Designs
  • Coffee Cozy Knitting Patterns
  • Book Review: Sew Green: Reimagine, Reuse, Recreate
  • 12 Travel and Vacation Scrapbook Layout Ideas

Categories

Bath And Body bath bombs Body Scrubs & Lotions Colds & Flu CraftGossip Exclusive Craft Inspirations detox DIY Recipes And Tutorials DIY Tutorials and Patterns Essential Oils And Aromatherapy facials Hair Care Makeup & Beauty Melt & Pour Soap Packaging Product Reviews Soapmaking Recipes, Products And Tutorials Style Me Quick Supply Store Specials & Discounts Wellbeing

Copyright © 2025 · CraftGossip | Start Here | Contact Us | Link to Us | Your Editors | Privacy and affiliate policy