• Home
  • Suggest A Craft
  • DIY Newsletter

Bath and Body

Soap Making, Oils and Recipes

  • About CraftGossip
  • Our Network
    • Bath & Body Crafts
    • Candle Making Ideas
    • Crochet Ideas
    • Cross Stitch
    • Edible Crafts
    • Felting Patterns
    • Glass Art
    • Home & Garden Ideas
    • Indie Crafts
    • Jewelry Making
    • Kids Crafts
    • Knitting Patterns
    • Lesson Plans
    • Needlework
    • Party Ideas
    • Polymer Clay
    • Quilting Ideas
    • Recycled Crafts
    • Scrapbooking
    • Sewing Patterns
    • Card Making
    • DIY Weddings
    • Not Craft Ideas
  • Giveaways
  • Roundups
  • Store
  • Search

12 DIY Beard Oils To Nourish and Soften

October 24, 2020 by Shellie Wilson Leave a Comment

So we, I mean my husband went through a phase of growing a beard right before COVID lockdown hit, so not having to go to work made growing in the beard far easier. I mean pyjamas and not having to shave every day he was living the good life.

We took this opportunity to check out some DIY beard oils to help soften beards and nourish the hair. If you thought you could just grow hair on your face and not care for it you are very crazy my friend.  If you’re growing or maintaining facial hair, applying beard oil should be a non-negotiable part of your daily routine.

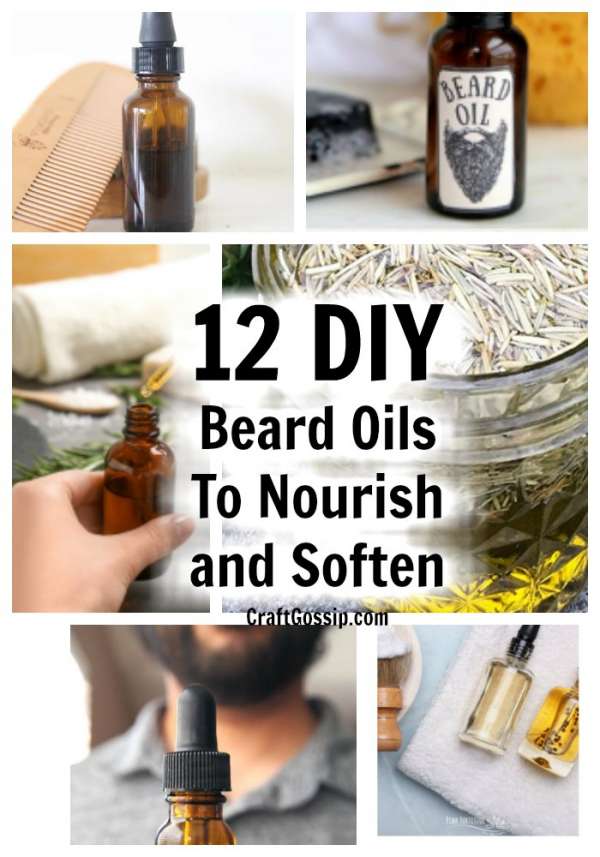
Beard oil moisturizes facial hair and the skin beneath.

Lots of these DIY’s are shown in a glass eye dropper bottle, but whilst these look stylish I actually love using a spray bottle for a spritz of all. I have dropped far too many glass eyedropper bottles in my bathroom.

The best time to apply your homemade beard oil is first thing in the morning after you have showered or cleansed your face. This way, your pores and hair follicles will be wide open and able to absorb the oil. Of course, night-time is a good time to do this too. The main reason for day time application is the oil moisturizes your skin before you head out into the elements.

You only need a few drops, rubbed into your beard for it to be effective. When it comes to styling, you simply style as normal. It’s a good idea to invest in good beard comb


.Natural Beard Oil — CraftBits.com

DIY Beard Oil Recipe

Lemon Cedar Beard Oil | Essential Oils for Men

The Best Recipe for DIY Beard Oil [With Free Labels!]

Woodsy  beard oil recipe

DIY Beard Oil Recipe: So Easy to Make!

DIY Beard Oil With Essential Oils

Homemade All-Natural Beard Oil DIY

Natural Beard Conditioning Oil Recipe

Homemade Rosemary Beard Oil

Spiced Bergamot Beard Oil

DIY Beard Oil

Looking for more oil recipes Check these out.


Smokers Beard Oil

hides the smell and nourishes at the same time.

15 ml grapeseed oil or Coconut oil
5 drops vitamin E oil
2 drops peppermint essential oil
3 drops black pepper essential oil
4 drops cinnamon essential oil

Anti- Dandruff Beard Oil

15 ml of Coconut oil
5 drops vitamin E oil
3 drops Rosemary Essential oil
3 drops Ylang Ylang
3 drops of Chamomile essential oil

Related Posts:

  • 10 DIY Bath And Body Recipes For When You Have A Headache
  • Efficiency and Expertise: Crafting 200 Bath Bombs in…
«
»

Have you read?

DIY Summer Nail Designs You’ll Want to Rock All Season Long

As soon as the weather heats up and the days get longer, I swap out my moody nail colors for something a little more fun, flirty, and full of sunshine. Summer is the perfect excuse to get playful with your nail designs — and this year, I’ve been experimenting at home to find a few favorites that are both easy to paint and seriously cute.

I’ve rounded up three of my go-to summer nail looks that you can totally do yourself, even if you’re not a pro. These are the styles I keep coming back to because they’re fun, eye-catching, and honestly — they just make you feel good. Whether you’re heading to the beach, a backyard BBQ, or just want to admire your nails while holding an iced latte, these are the ones to try.

Let’s dive in!

Sunset Ombre Nails

This is hands down one of the most satisfying nail designs you can do yourself. The colors melt into each other like a beach sunset, and the end result looks way more advanced than it really is.

You’ll Need:

  • A base coat

  • Three polishes (I use pink, orange, and yellow)

  • A makeup sponge

  • Top coat

  • Nail polish remover for cleanup

How to Do It:

  1. Start with a clear base coat to protect your nails.

  2. Paint horizontal stripes of your 3 colors directly onto the makeup sponge.

  3. Dab the sponge gently onto your nail, reapplying polish to the sponge as needed. Tap until the gradient blends.

  4. Clean up any excess polish around your cuticle.

  5. Apply a top coat to smooth the colors and add shine.

This design is one of those that looks good even when it’s a little messy — the top coat really pulls it all together.


 Tropical Palm Silhouettes

If you want vacation vibes without actually going anywhere, this one’s for you. The pastel base paired with simple black palm trees gives it that dreamy island feel.

You’ll Need:

  • A light pastel base polish or soft gradient background

  • Black nail art pen or thin brush with black polish

  • Top coat

How to Do It:

  1. Paint your nails with a soft pastel or ombre base.

  2. Once dry, draw a thin curved line for the palm trunk.

  3. From the top of the trunk, add small lines that fan out to mimic palm fronds.

  4. Let everything dry completely before adding a glossy top coat.

Even if your palm trees aren’t perfect, they still look awesome. Think of it like nail doodling — just more tropical.


 Watermelon French Tips

This design is so cheerful, I smile every time I see it. It’s a fruity twist on a French manicure and it’s perfect for pool parties or picnics.

You’ll Need:

  • Pink polish for the base

  • Green and white for the rind

  • Black polish for the seeds (use a dotting tool or toothpick)

  • Base and top coat

How to Do It:

  1. Paint your entire nail a soft pink.

  2. Add a green curved tip at the top edge (like a French tip).

  3. Under the green, paint a very thin white stripe.

  4. Add small black dots on the pink section to create seeds.

  5. Seal it all in with your favorite top coat.

This one is such a crowd-pleaser and looks adorable on both long and short nails.

Whether you try one of these or rotate through all three this summer, I hope these nail designs add a little color and creativity to your routine. They’re simple enough to do at home but still look like you spent time (and money!) at the salon.

Let me know which one you’re trying first — and don’t forget to tag us if you share your summer nail look!

Leave a Reply

Your email address will not be published. Required fields are marked *

RSS More Articles

  • Designer Spotlight: Flossy Fox Shop
  • 6 FREE Summer Printable Journaling Cards
  • Bucket Hat Knitting Patterns
  • DIY Summer Nail Designs You’ll Want to Rock All Season Long
  • Varsity Scarf: The Perfect Gift for Sports Fans (or Fashion Lovers!)
  • Unlock the Secrets of Stunning Stitches: Why The Geometry of Hand-Sewing Will Transform Your Craft Forever
  • Summer Math Games for Kids
  • A Children’s Book About A Quilt Maker – Perfect Gift Idea
  • DIY Kids Craft Project – Upcycled Cardboard Box Sandcastle
  • How to Make a Taylor Swift Inspired Card

Categories

Bath And Body bath bombs Body Scrubs & Lotions Colds & Flu CraftGossip Exclusive Craft Inspirations detox DIY Recipes And Tutorials DIY Tutorials and Patterns Essential Oils And Aromatherapy facials Hair Care Makeup & Beauty Melt & Pour Soap Packaging Product Reviews Soapmaking Recipes, Products And Tutorials Style Me Quick Supply Store Specials & Discounts Wellbeing

Copyright © 2025 · CraftGossip | Start Here | Contact Us | Link to Us | Your Editors | Privacy and affiliate policy