• Home
  • Suggest A Craft
  • DIY Newsletter

Bath and Body

Soap Making, Oils and Recipes

  • About CraftGossip
  • Our Network
    • Bath & Body Crafts
    • Candle Making Ideas
    • Crochet Ideas
    • Cross Stitch
    • Edible Crafts
    • Felting Patterns
    • Glass Art
    • Home & Garden Ideas
    • Indie Crafts
    • Jewelry Making
    • Kids Crafts
    • Knitting Patterns
    • Lesson Plans
    • Needlework
    • Party Ideas
    • Polymer Clay
    • Quilting Ideas
    • Recycled Crafts
    • Scrapbooking
    • Sewing Patterns
    • Card Making
    • DIY Weddings
    • Not Craft Ideas
  • Giveaways
  • Roundups
  • Store
  • Search

7 Beautiful Hair Braids You Can Do For Yourself

September 3, 2015 by Larissa Coleman 1 Comment

As one of the most versatile hairstyles, braids have been a favorite for women of all ages for centuries. Whether you’re heading to work or attending a formal event, a braid can add a touch of elegance and sophistication to your overall look. Not to mention, it’s a great way to keep your hair out of your face and under control.

These 7 hair braid tutorials are perfect for those who want to add a little something extra to their everyday hair routine or want to learn how to create a new and trendy style. The best part is that they’re easy enough for anyone to master, even if you’re not a professional hairstylist. Plus, we’ve included our favorite hairbrush that won’t pull or yank, making these tutorials even more effortless to achieve. Get ready to transform your hair game with these simple and chic braid tutorials.

Check out our favorite hairbrush that doesn’t pull or yank.

triple

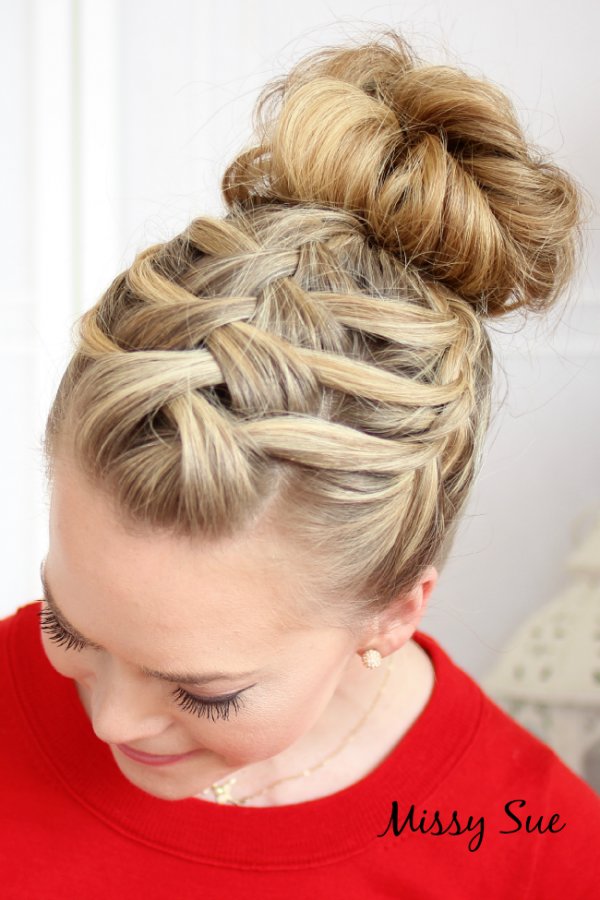
1- Triple French Braid Double Waterfall from Missy Sue

topknot

2- Tousled Top Knot from Beauty Tutorials

doubledutch

3- The Double Dutch from Simply Summer Ann

bun

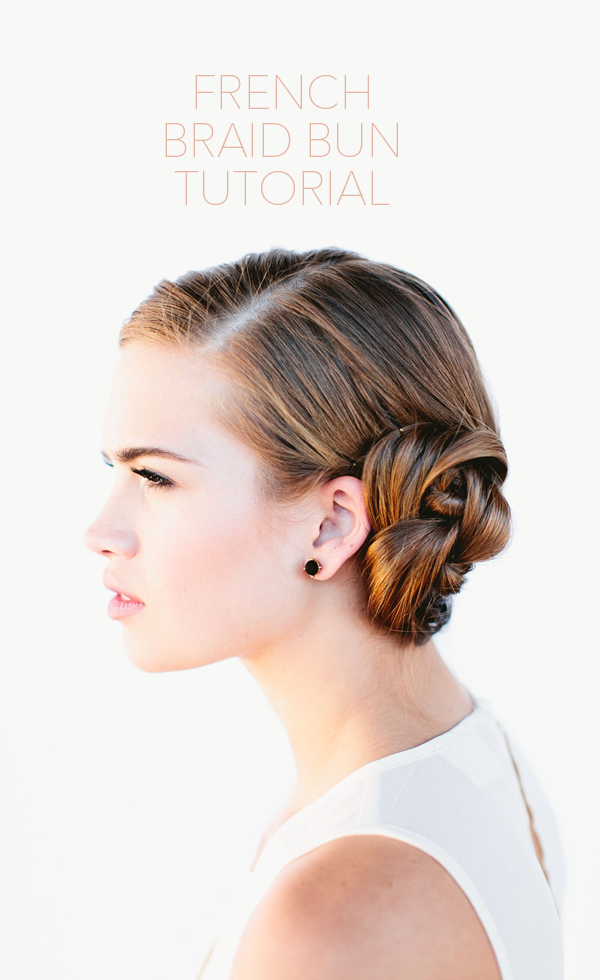
4- French Braid Bun from Once Wed

mermaid

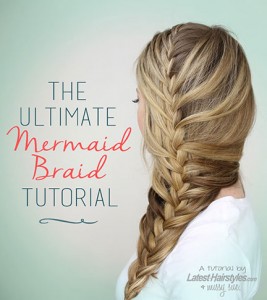
5- The Ultimate Mermaid Braid from Latest Hairstyles

halfcrown

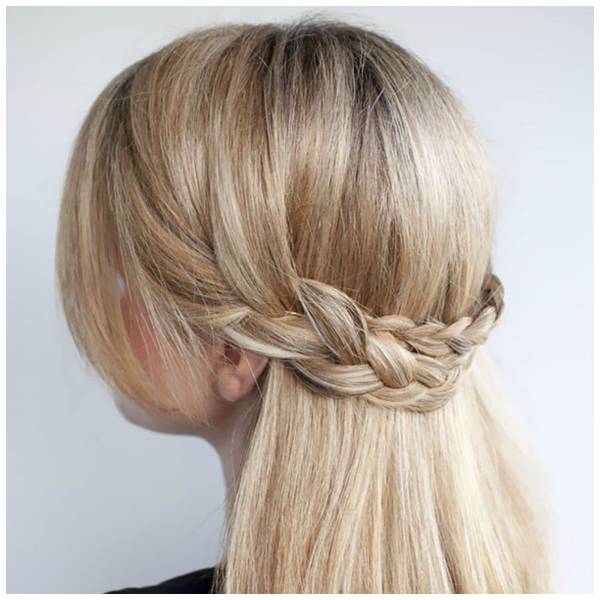
6- Half Crown Braid from Hair Romance

pullthrough

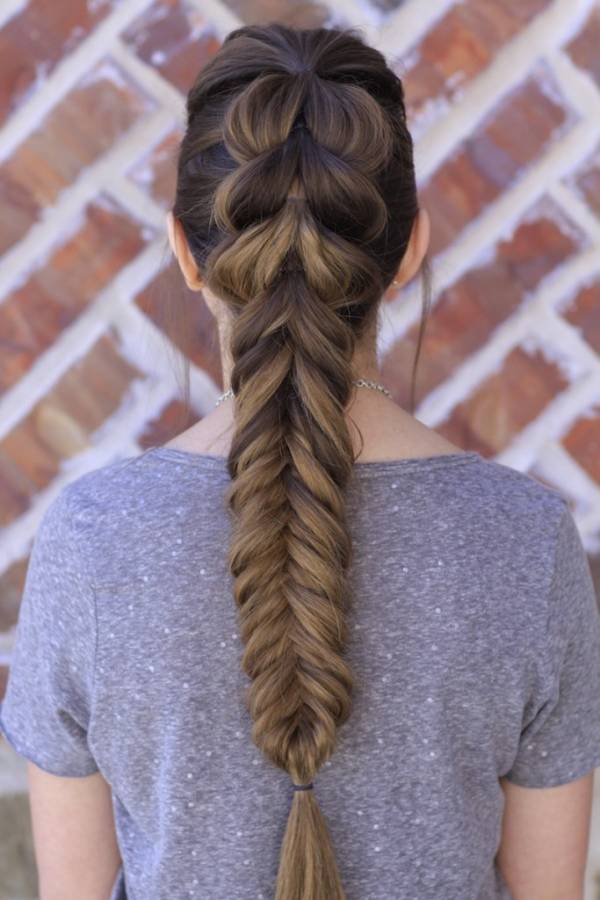
7- Pull Through Braid Fish Tail Combo from Little Girl Hairstyles


Here’s a recipe for a DIY leave-in hair conditioner:

Ingredients:

1 cup distilled water
2 tablespoons aloe vera gel
1 tablespoon vegetable glycerin
1 tablespoon jojoba oil
10 drops essential oil (optional)
Instructions:

Combine all the ingredients in a spray bottle and shake well.
Use the conditioner after washing your hair, when it is still damp.
Spray the leave-in conditioner on your hair, focusing on the ends.
Gently comb through your hair to distribute the conditioner evenly.
Style your hair as usual.
The aloe vera gel and vegetable glycerin will help moisturize your hair and prevent dryness, while the jojoba oil will add shine and protect your hair from damage. The essential oils can be customized to your preference, but some good options for hair include lavender, rosemary, peppermint, or tea tree oil.

Note: This leave-in conditioner should be stored in the refrigerator and used within one week. Shake well before each use.

Related Posts:

  • Cold Process Soap Recipe: Dehydrated Orange Slice Elegance
  • How To Make Fresh Aloe Vera Under Eye Gel
«
»

Comments

  1. Carlos Alberto Laguilón says

    December 14, 2015 at 8:27 pm

    Wonderful!!

Have you read?

DIY Summer Nail Designs You’ll Want to Rock All Season Long

As soon as the weather heats up and the days get longer, I swap out my moody nail colors for something a little more fun, flirty, and full of sunshine. Summer is the perfect excuse to get playful with your nail designs — and this year, I’ve been experimenting at home to find a few favorites that are both easy to paint and seriously cute.

I’ve rounded up three of my go-to summer nail looks that you can totally do yourself, even if you’re not a pro. These are the styles I keep coming back to because they’re fun, eye-catching, and honestly — they just make you feel good. Whether you’re heading to the beach, a backyard BBQ, or just want to admire your nails while holding an iced latte, these are the ones to try.

Let’s dive in!

Sunset Ombre Nails

This is hands down one of the most satisfying nail designs you can do yourself. The colors melt into each other like a beach sunset, and the end result looks way more advanced than it really is.

You’ll Need:

  • A base coat

  • Three polishes (I use pink, orange, and yellow)

  • A makeup sponge

  • Top coat

  • Nail polish remover for cleanup

How to Do It:

  1. Start with a clear base coat to protect your nails.

  2. Paint horizontal stripes of your 3 colors directly onto the makeup sponge.

  3. Dab the sponge gently onto your nail, reapplying polish to the sponge as needed. Tap until the gradient blends.

  4. Clean up any excess polish around your cuticle.

  5. Apply a top coat to smooth the colors and add shine.

This design is one of those that looks good even when it’s a little messy — the top coat really pulls it all together.


 Tropical Palm Silhouettes

If you want vacation vibes without actually going anywhere, this one’s for you. The pastel base paired with simple black palm trees gives it that dreamy island feel.

You’ll Need:

  • A light pastel base polish or soft gradient background

  • Black nail art pen or thin brush with black polish

  • Top coat

How to Do It:

  1. Paint your nails with a soft pastel or ombre base.

  2. Once dry, draw a thin curved line for the palm trunk.

  3. From the top of the trunk, add small lines that fan out to mimic palm fronds.

  4. Let everything dry completely before adding a glossy top coat.

Even if your palm trees aren’t perfect, they still look awesome. Think of it like nail doodling — just more tropical.


 Watermelon French Tips

This design is so cheerful, I smile every time I see it. It’s a fruity twist on a French manicure and it’s perfect for pool parties or picnics.

You’ll Need:

  • Pink polish for the base

  • Green and white for the rind

  • Black polish for the seeds (use a dotting tool or toothpick)

  • Base and top coat

How to Do It:

  1. Paint your entire nail a soft pink.

  2. Add a green curved tip at the top edge (like a French tip).

  3. Under the green, paint a very thin white stripe.

  4. Add small black dots on the pink section to create seeds.

  5. Seal it all in with your favorite top coat.

This one is such a crowd-pleaser and looks adorable on both long and short nails.

Whether you try one of these or rotate through all three this summer, I hope these nail designs add a little color and creativity to your routine. They’re simple enough to do at home but still look like you spent time (and money!) at the salon.

Let me know which one you’re trying first — and don’t forget to tag us if you share your summer nail look!

Leave a Reply

Your email address will not be published. Required fields are marked *

RSS More Articles

  • Designer Spotlight: Stitch with Coffee
  • Peach Themed Learning Activities
  • How to Create a Photo Box Card
  • Embellish Your Knit Dishcloth with Flowers
  • Free Crochet Pattern – Emotional Support Chicken
  • 30 Brilliant Uses for Empty Pill Bottles You Probably Haven’t Tried Yet
  • Unisex Pajama Top Free Pattern
  • Back to School Cross Stitch Patterns
  • Wrap Yourself in Brilliance: Crochet Your Own Shawl or Scarf
  • 3 FREE Boho Bugs Coloring Pages and Digital Images

Categories

Bath And Body bath bombs Body Scrubs & Lotions Colds & Flu CraftGossip Exclusive Craft Inspirations detox DIY Recipes And Tutorials DIY Tutorials and Patterns Essential Oils And Aromatherapy facials Hair Care Makeup & Beauty Melt & Pour Soap Packaging Product Reviews Soapmaking Recipes, Products And Tutorials Style Me Quick Supply Store Specials & Discounts Wellbeing

Copyright © 2025 · CraftGossip | Start Here | Contact Us | Link to Us | Your Editors | Privacy and affiliate policy