• Home
  • Suggest A Craft
  • DIY Newsletter

Bath and Body

Soap Making, Oils and Recipes

  • About CraftGossip
  • Our Network
    • Bath & Body Crafts
    • Candle Making Ideas
    • Crochet Ideas
    • Cross Stitch
    • Edible Crafts
    • Felting Patterns
    • Glass Art
    • Home & Garden Ideas
    • Indie Crafts
    • Jewelry Making
    • Kids Crafts
    • Knitting Patterns
    • Lesson Plans
    • Needlework
    • Party Ideas
    • Polymer Clay
    • Quilting Ideas
    • Recycled Crafts
    • Scrapbooking
    • Sewing Patterns
    • Card Making
    • DIY Weddings
    • Not Craft Ideas
  • Giveaways
  • Roundups
  • Store
  • Search

Christmas School Gifts

November 26, 2014 by Shellie Wilson Leave a Comment

christmas-gifts-for-school-mates-class

Christmas in Australia is all about Summer and the sun. (Crazy right!)

When my kids asked for presents for their school friends I just had to try and bring in these sunglasses I got stuck with after a wrong order was sent out to me last year.

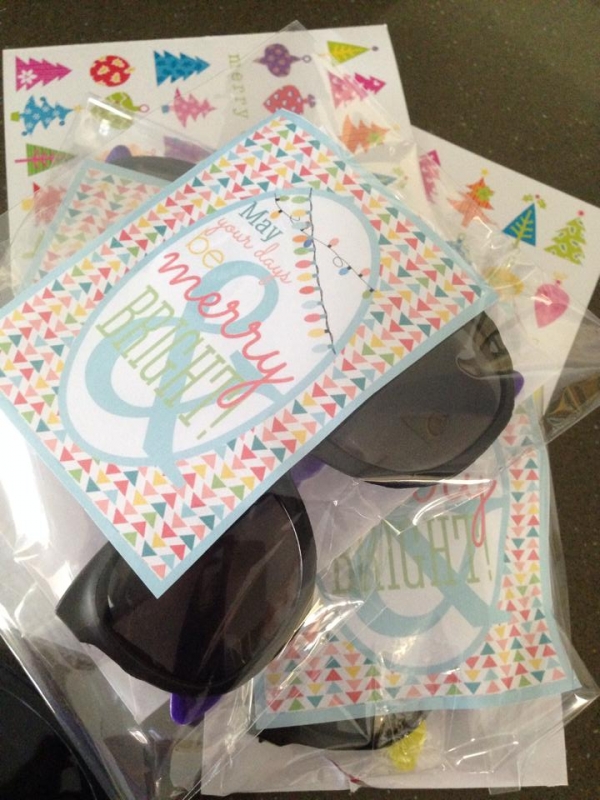
I found this cute free printable for “May Your Days Be Merry and Bright” and popped it in with the Sunglasses for a fun gift. You know BRIGHT / SUNGLASSES sure the kids won’t get it but It’s cute and I will get a few aww that’s so clever remarks from the candy cane moms.  Free Printable Merry and Bright labels.

Whilst most parents like to give candy canes with a Christmas card ( pink ones, green ones, strawberry flavoured ones) I personally have an ongoing issue with Candy canes. You see,  candy canes and I are unable to come to an agreement of just how to get the darn things open. I especially detest large candy canes the ones that your kids get half way through then hand you to “hold” and “not lick” until they decide they want it again. Meantime whilst your holding the half eaten candy cane your child’s hands and face has attracted fluff to every drop of stickiness the sugary cane left behind. As you walk around with a candy cane hanging from your mouth ( cause let’s face it there really is nowhere else to hold it) everyone is wondering why your child has a moustache made of what could only be described as butt fluff.

Last year we handed out Christmas pencils cause it was Prep and school supplies were still cool. What are you going to give your kids to hand out to their school friends  this year?


Related Posts:

  • Efficiency and Expertise: Crafting 200 Bath Bombs in…
  • Free Prinatable Soap Labels
«
»

Have you read?

Pumpkin Pie Melt and Pour Soap: A Cozy Fall Soap Recipe That Smells Good Enough to Eat

When the leaves start crunching underfoot and pumpkin spice fills every café, it’s time to cozy up with an easy fall DIY that smells just like grandma’s dessert table—without the calories. This Pumpkin Pie Melt and Pour Soap is one of my absolute favorite seasonal recipes. It’s warm, comforting, and gives off those straight-out-of-the-oven vibes every time you lather up.

Perfect for fall craft fairs, Thanksgiving hostess gifts, or a festive bathroom refresh, this handmade soap smells divine, looks adorable, and takes less than an hour to whip up.

Why You’ll Love This Pumpkin Soap Recipe

  • Smells like real pumpkin pie (think cinnamon, nutmeg, vanilla—yes please!) 
  • Made with skin-friendly melt and pour base—no lye required 
  • Easy enough for beginners or weekend makers 
  • Customizable with layers, swirls, or “whipped cream” topping 

Ingredients & Supplies

Yields: 4–6 small bars depending on your mold size

  • 1 lb goat milk melt and pour soap base (or shea butter base) 
  • 1 tsp pumpkin pie spice (yes, the real baking blend!) 
  • ½ tsp ground cinnamon (optional for visual specks) 
  • 1 tsp vitamin E oil or sweet almond oil 
  • 1–2 tsp brown mica or orange soap-safe colorant 
  • 1 tsp vanilla extract (optional for scent depth—make sure it’s oil-based or use a fragrance oil blend) 
  • Pumpkin pie fragrance oil (skin-safe, approx. 1–2 tsp per pound of soap base) 
  • Rubbing alcohol in a spray bottle 
  • Silicone soap mold (round, square, or pie-slice shaped) 
  • Microwave-safe jug or double boiler 
  • Stirring sticks or silicone spatula 

Step-by-Step Instructions

1. Chop and Melt the Soap Base

Cut your melt and pour soap base into small cubes and place in a microwave-safe jug. Microwave in 30-second bursts, stirring between each round until fully melted. (Do not let it boil!)

2. Add Scent and Spice

Once melted, stir in your fragrance oil, pumpkin pie spice, and optional vanilla extract. Add a pinch of cinnamon if you like the flecked look.

Tip: Spray your mold lightly with rubbing alcohol before pouring to prevent bubbles.

3. Colour and Pour

Add your mica powder or orange colorant, a little at a time, until you reach your ideal pumpkiny hue. Stir well, then carefully pour the mixture into your soap molds.

Immediately spritz the tops with rubbing alcohol to remove surface bubbles.

4. Let It Set

Leave the soap undisturbed at room temperature for 2–4 hours until fully hardened. Pop the bars out of the mold once they’re firm to the touch.

Optional: If you’re feeling fancy, melt a small amount of white soap base and pipe a “whipped cream” swirl on top using a piping bag and star tip.

Tips & Variations

  • Make it two-tone: Pour half your batch in orange, then top with a creamy vanilla layer for a pie-slice look. 
  • Add oatmeal: Toss in 1 tsp of ground oats for a gentle exfoliant and rustic charm. 
  • Use pie molds: Silicone molds shaped like pie slices or tart pans give these a dessert-style finish. 
  • Gift-ready idea: Wrap in wax paper, tie with twine, and add a “Pumpkin Pie Soap” tag for instant fall gifts. 

How to Store Homemade Soap

Keep your finished soaps in an airtight container or shrink wrap them if you’re gifting. Melt and pour soap can sweat in humid climates, so cool, dry storage is best.

This DIY pumpkin spice soap recipe is everything you want from a cozy fall project—easy, fragrant, and irresistibly cute. Whether you’re new to soap making or a seasoned maker prepping for a market table, these little bars will have everyone asking, “Where’s the whipped cream?”


Leave a Reply

Your email address will not be published. Required fields are marked *

RSS More Articles

  • How to Create a Stunning Rainbow Dress – Perfect for Any Occasion
  • Small Halloween Knitting Patterns
  • Cross Stitch Patterns for Fall
  • Diwali Festival Handmade Chocolate with Edible Gold Leaf
  • Free Pattern – Colvin Socks
  • Transform Ordinary Candles into Stunning DIY Masterpieces with Image Transfers
  • Etsy Spotlight: Floppy Teddy Bear Sewing Pattern
  • FREE Floral Alphabet Font
  • Clay Studio Series – YouTube Video Review: What type of clay should I use?
  • How to Make a Half-Square Triangle Surprise Quilt – Free Quilting Tutorial

Categories

Bath And Body bath bombs Body Scrubs & Lotions Colds & Flu CraftGossip Exclusive Craft Inspirations detox DIY Recipes And Tutorials DIY Tutorials and Patterns Essential Oils And Aromatherapy facials Hair Care Makeup & Beauty Melt & Pour Soap Packaging Product Reviews Soapmaking Recipes, Products And Tutorials Style Me Quick Supply Store Specials & Discounts Wellbeing

Copyright © 2025 · CraftGossip | Start Here | Contact Us | Link to Us | Your Editors | Privacy and affiliate policy