• Home
  • Suggest A DIY
  • DIY Newsletter

Bath and Body

Soap Making, Oils and Recipes

  • About CraftGossip
  • Our Network
    • Bath & Body Crafts
    • Candle Making Ideas
    • Crochet Ideas
    • Cross Stitch
    • Edible Crafts
    • Felting Patterns
    • Glass Art
    • Home & Garden Ideas
    • Indie Crafts
    • Jewelry Making
    • Kids Crafts
    • Knitting Patterns
    • Lesson Plans
    • Needlework
    • Party Ideas
    • Polymer Clay
    • Quilting Ideas
    • Recycled Crafts
    • Scrapbooking
    • Sewing Patterns
    • Card Making
    • DIY Weddings
    • Not Craft Ideas
  • Giveaways
  • Roundups
  • Store
  • Search

DIY Anxiety-Soothing Bath Tea for Perimenopause Mood Swings and Emotional Overwhelm

February 18, 2026 by Shellie Wilson Leave a Comment

You know those days when everything makes you cry or snap or hide in the pantry? That’s the joy of perimenopausal mood swings. One moment you’re fine, the next you’re rage-cleaning the fridge because someone ate your cheese.

Hormonal changes in your 40s and 50s don’t just mess with your cycle—they hit your nervous system, too. That’s why calming herbal rituals like bath tea can be so grounding. This DIY anxiety-soothing bath tea is a blend of herbs and salts that you steep in your bath like a giant teabag. It smells divine, softens your skin, and gives your mood a much-needed reset.

 Why Herbal Baths Help with Perimenopause Mood Swings

  • Estrogen influences serotonin and dopamine, the chemicals that regulate your mood

  • When estrogen dips (as it does erratically in perimenopause), mood instability, anxiety, and ragey outbursts can follow

  • Bathing in calming herbs helps regulate your nervous system through skin absorption and inhalation

  • Plus, who doesn’t need 30 minutes of quiet with the door locked?

 Ingredients for a DIY Calming Hormone-Support Bath Tea

  • ½ cup dried chamomile flowers (calming, gentle sedative)

  • ¼ cup dried lavender buds (anxiety-easing and floral aromatherapy)

  • ¼ cup dried rose petals (emotional support & self-love)

  • ½ cup Epsom salt (magnesium for muscles and nervous system)

  • ½ cup oats (soothes skin and emotional stress)

  • Optional: 5–7 drops Me-No-Pause Essential Oil Blend on the salts

  • 1 large muslin tea bag, drawstring pouch, or thin sock

 How to Make & Use Your Herbal Bath Tea

  1. Blend the dry ingredients
    In a bowl, combine all herbs, oats, and Epsom salt. If using essential oils, drop them onto the salt before mixing to prevent skin irritation.
  2. Fill your tea bag or pouch
    Spoon about ¾ to 1 cup of the mixture into your bath bag. Tie tightly.
  3. Steep your bath
    Drop the pouch into your tub while it fills. Let steep 5–10 minutes before you get in. You can even squeeze the pouch to release more goodness.
  4. Soak, breathe, repeat
    Soak for 20–30 minutes. No phones, no guilt. Just you and your bath. Let the herbs calm your body and mood.


I used to think self-care meant booking a spa or buying fancy creams. Now? It’s scooping herbs into a sock and taking a bath with the lights off. This blend is a hormonal hug. It helps me slow down, breathe deeper, and come back to myself. Every woman deserves this.

 Extra Tips:

  • Store the dry mixture in a jar so it’s ready to scoop anytime

  • Add dried lemon balm or passionflower for added emotional support

  • Want a stronger scent? Add a few more lavender buds and gently crush before use
«
»

Have you read?

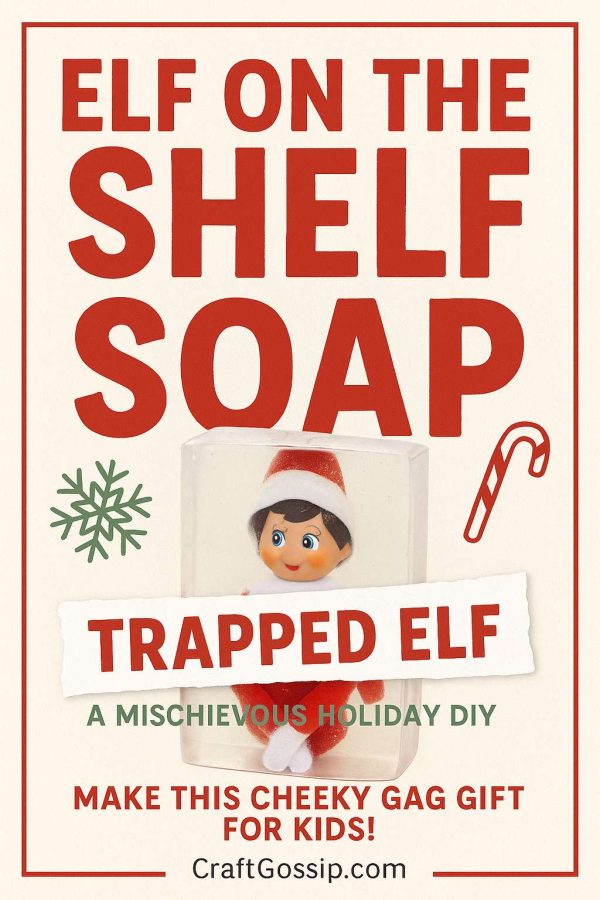
Elf on the Shelf Soap – A Trapped Elf Gag Gift Kids Will Love

Move over bath bombs—this Christmas, there’s a new mischief-maker in the tub.

If you’re looking for a clever twist on traditional Elf on the Shelf antics or a laugh-out-loud handmade gift, this Elf on the Shelf Soap is a crowd-pleaser. Featuring a mini elf trapped inside a block of clear soap, it’s festive, funny, and totally unexpected. Whether you use it as a prank, a stocking stuffer, or a bath-time surprise, this project will have kids and grownups giggling all the way to Christmas.

Plus, it’s easier than it looks! This DIY uses melt-and-pour soap, which means no lye, no curing, and no mess—just melt, pour, and giggle.

 Why You’ll Love This Holiday Soap DIY

  • Kid-safe and skin-friendly – uses gentle melt-and-pour base 
  • No special tools needed – beginner friendly 
  • Great gag gift or stocking stuffer 
  • Customizable scent and color 
  • Perfect for Elf on the Shelf setups or party favors 

Whether you’re a seasoned crafter or just dipping your toes into holiday DIYs, this soap project is as fun to make as it is to use.

 Supplies You’ll Need

To make one (or more) “Trapped Elf” soap bars, gather these easy-to-find materials:

 ½ lb clear melt-and-pour soap base


 1 mini Elf on the Shelf figurine (around 3–4” tall)


 Microwave-safe measuring jug or double boiler


 Soap fragrance oil (peppermint, sugar cookie, or vanilla – optional)


 Soap-safe colorant (green, red, or clear tint)


 Silicone soap mold (rectangle preferred)


 Rubbing alcohol in a spray bottle (to eliminate bubbles)


 Soap glitter (optional but cute!)


 Craft stick or spoon for stirring


Note: Avoid fabric elves unless they’re completely sealed in plastic wrap! The soap base can soak into fabric and cause mildew.

 Step-by-Step Tutorial: How to Make Elf in a Soap Block

Step 1: Melt the Soap Base

Chop the clear melt-and-pour soap into small chunks.
Place in a microwave-safe measuring cup and heat in 20-second intervals, stirring until fully melted and smooth.

Step 2: Add Fragrance & Color

Add a few drops of skin-safe soap fragrance oil and stir.
If using colorant, choose a light hand—too much tint will make your elf hard to see inside the soap.

Step 3: Pour the First Layer

Pour about ¼ inch of the soap mixture into the base of your silicone mold.
Spritz with rubbing alcohol to pop surface bubbles. Let it cool just enough to form a film (2–3 minutes).

Step 4: Place the Elf

Carefully press your elf upright or seated into the semi-set layer.
Now slowly pour more melted soap around the elf, being cautious not to melt any parts of it.
Leave the elf’s hat poking out—or fully encase it for a “totally trapped” effect!

Step 5: Final Spritz & Cool

Spray the top of the soap with rubbing alcohol to pop any final bubbles.
Let the soap set at room temperature for about 1 hour or chill in the fridge for 15–20 minutes.

Step 6: Unmold & Wrap

Once solid, gently unmold your soap bar.
Wrap in plastic wrap or shrink wrap to keep it fresh and prevent surface sweating.

 Fun Ways to Gift or Display

This mischievous soap makes the perfect stocking stuffer, Secret Santa gift, or Elf on the Shelf surprise. Here are some ideas to level up the presentation:

  • Pair with a mini washcloth and gift tag that says:
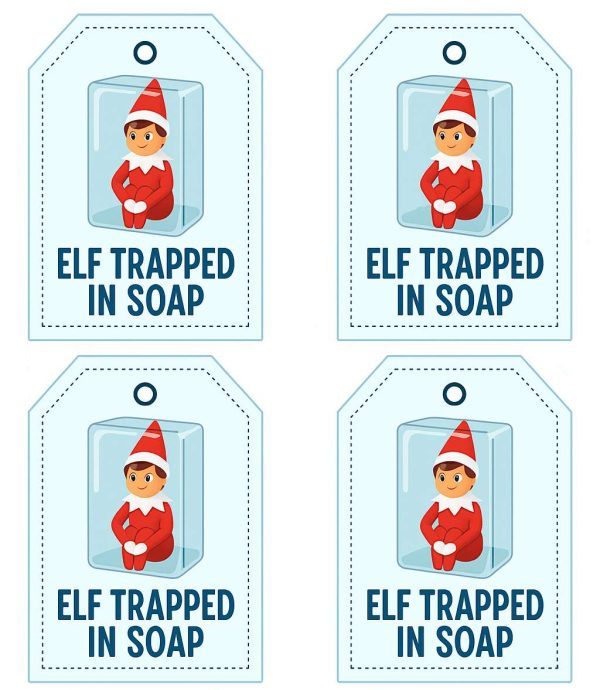
    “Naughty Elf Soap – He Got What He Deserved!”
    or
    “Free the Elf… One Wash at a Time!” 
  • Place it next to your Elf’s usual spot for a hilarious bathroom setup 
  • Add to Christmas Eve boxes as a silly self-care treat 
  • Create a batch for teacher gifts or classroom party favors


Leave a Reply

Your email address will not be published. Required fields are marked *

RSS feed: More Articles More Articles

  • How To Make A Recycled Bottle Cap Tray With Resin
  • 9 Painted Mosaic Walkway DIY Ideas to Brighten a Plain Garden Path
  • DIY Beaded Towel Holder: An Easy Boho Bathroom Update
  • How to Cook Lamb Shanks: Tender Oven and Slow Cooker Methods
  • Crochet Christmas Hat and Mitten Ornament
  • Christmas Stick and Stitch Embroidery Pattern – Etsy Review
  • Quilt As You Go Tutorial (Beginner-Friendly Step-by-Step Guide)
  • Etsy Feature – Bread Pan Pottery Template
  • A Nostalgic Christmas Pudding Knitting Pattern for Your Handmade Decorations
  • 10 Bucket Hat Knitting Patterns for a Fun Handmade Wardrobe

Copyright © 2026 · CraftGossip | Start Here | Contact Us | Link to Us | Your Editors | Privacy and affiliate policy