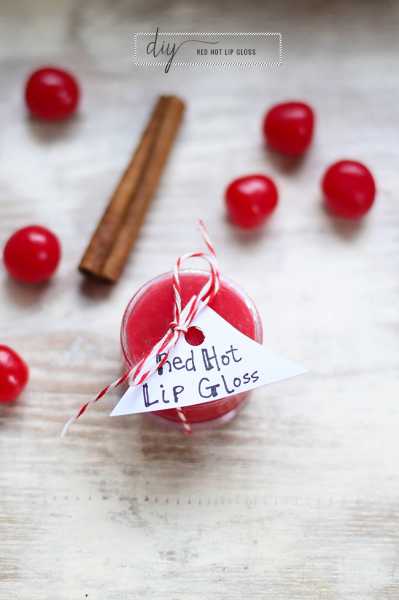
It’s a bit of a DIY secret (Shhhhh) but did you know Cinnamon oil makes your lips plump? Can you believe it , a natural essential oil can do the job of $100 lipsticks. HenryHappened shares this fun lip plumping lip gloss that is bright red! Love it!
Soap Making, Oils and Recipes
It’s a bit of a DIY secret (Shhhhh) but did you know Cinnamon oil makes your lips plump? Can you believe it , a natural essential oil can do the job of $100 lipsticks. HenryHappened shares this fun lip plumping lip gloss that is bright red! Love it!
For those who have already embraced the art of crafting bath bombs, you know that it’s not just about relaxation; it’s about creating an experience that’s nothing short of enchanting. The moment a bath bomb hits the water and bursts into a kaleidoscope of colors is pure magic. But what if you could take this enchantment a step further? Imagine the delight of a bath bomb that not only boasts vibrant, captivating colors but also releases them in a slow, mesmerizing dance. If you’re ready to unlock the secrets to achieving this next level of bath bomb artistry, read on as we delve into the insider tips that can transform your creations.
The Science Behind the Enchantment:
Crafting bath bombs is a harmony of chemistry and creativity. As seasoned bath bomb makers, you’re familiar with the core ingredients – baking soda, citric acid, essential oils, fragrances, and colorants. It’s this last ingredient that holds the key to achieving vibrant, slow-release colors.
The captivating colors in bath bombs stem from the interaction between colorants and the fizzing reaction triggered by citric acid and baking soda. But let’s dive into the techniques that can elevate your bath bombs to a whole new level:
Creating the Perfect Slow Color Release:
Strategic Colorant Incorporation: The secret to a slow color release lies in how you introduce colorants to your mixture. By dispersing colorants amidst the dry ingredients, you’re ensuring that as the bath bomb fizzes and dissolves, the colors are revealed gradually, unfolding a mesmerizing display.
Layering Artistry: Take a cue from the world of painting. Consider layering different color shades within the bath bomb. As each layer dissolves at its own pace, the colors intermingle in a slow, enchanting dance that transforms your bathwater into a work of art.
Fine-Tuning the Composition: Experiment with the ratio of baking soda to citric acid. Adjusting this balance can influence the overall fizzing speed, impacting how fast the bath bomb dissolves and the colors are set free.
Binder Exploration: Don’t underestimate the role of the binder. Different binders can alter how quickly the bath bomb disintegrates, ultimately influencing the pace of color release.
Patience in Drying: Ensuring your bath bombs are thoroughly dried before use is paramount. Extended drying time leads to a more solid bath bomb, contributing to the gradual release of colors.
Amplifying Vibrancy:
Premium Colorants: When it comes to colorants, quality matters. Opt for colorants specifically formulated for bath and body products. These colorants are designed to maintain their vibrancy, even in the presence of water and other ingredients.
Masterful Color Blending: As experienced creators, you understand the power of color mixing. Play with different color combinations to craft unique shades that stand out. However, exercise restraint, as too many colors can muddy the palette.
Begin with a Blank Canvas: Consider using a white or lightly tinted bath bomb base. This backdrop enhances the intensity of the colors as they are revealed in the water.
Boldness in Color Intensity: Don’t be shy with your colorants. The bathwater will naturally dilute the colors, so a slightly more concentrated hue in the bath bomb mixture results in a visually striking display.
In your journey as seasoned bath bomb artisans, the pursuit of perfecting the interplay of vibrant, slowly revealed colors is your newest challenge. This intricate dance of elements, technique, and creativity can elevate your craft to an entirely new level. So, take these insider insights, embrace experimentation, and infuse your bath bombs with colors that captivate the eye and unfold like a symphony in water. Your dedication to the art of bath bomb making is about to create an experience that’s not just relaxing, but truly unforgettable.
Here’s a step-by-step guide to help you master the art of crafting bath bombs with a mesmerizing slow color release:
Materials You’ll Need:
Baking soda (sodium bicarbonate)
Citric acid
Cornstarch (optional, for a smoother texture)
Epsom salts (optional, for muscle relaxation)
Essential oils or fragrance
Colorants (water-soluble dyes, micas, or natural colorants)
Binder (witch hazel or water in a spray bottle)
Mixing bowls
Whisk or spoon
Bath bomb molds
Step 1: Prepare Your Workspace
Set up a clean and organized workspace with all the necessary materials within reach. This will streamline the process and make crafting your bath bombs more enjoyable.
Step 2: Combine Dry Ingredients
In a mixing bowl, combine the baking soda, citric acid, and cornstarch (if using). The cornstarch can help create a smoother texture in your bath bombs.
Step 3: Add Epsom Salts (Optional)
If you want to add the benefits of Epsom salts to your bath bombs, incorporate them into the dry mixture. Epsom salts can enhance muscle relaxation during the bath.
Step 4: Incorporate Colorants
Slow color release starts with how you introduce colorants. Carefully disperse your chosen colorants into the dry mixture. Mix thoroughly to ensure an even distribution. This strategic incorporation will contribute to the gradual color reveal.
Step 5: Add Fragrance
Incorporate your selected essential oils or fragrances into the mixture. Remember that a little goes a long way, so add them sparingly to avoid overpowering scents.
Step 6: Prepare the Binder
Fill a spray bottle with water or witch hazel. This will serve as your binder to help the ingredients stick together.
Step 7: Gradually Add the Binder
Start spritzing the binder onto the dry mixture while whisking or stirring continuously. Add the binder gradually; you want the mixture to hold its shape when squeezed together without becoming overly wet. Achieving the right texture is crucial for slow color release.
Step 8: Fill the Molds
Pack the mixture into your bath bomb molds. Press down firmly to ensure a compact and solid bath bomb. You can layer different color mixtures within the molds to achieve the slow color release effect.
Step 9: Allow Drying Time
Carefully remove the bath bombs from the molds and place them on a clean, dry surface. Let them dry for an extended period, ideally 24-48 hours. This drying time contributes to a more robust bath bomb that releases colors slowly.
Step 10: Enjoy the Magic
Finally, it’s time to enjoy the fruits of your labor. Drop one of your slow release color bath bombs into a filled bathtub. Watch as the colors gently unfurl, creating a tranquil and mesmerizing bath experience.
Step 11: Experiment and Refine
Remember that crafting bath bombs is an art form, and each batch might require adjustments. Play around with the ratio of ingredients, colorant distribution, and drying time to fine-tune the slow color release effect according to your preferences.
By following these steps and embracing experimentation, you’ll gradually master the technique of crafting bath bombs that release colors in a captivating, slow dance. Each bath will be a journey of relaxation and enchantment as vibrant colors unfold around you.
Leave a Reply