• Home
  • Suggest A Craft
  • DIY Newsletter

Bath and Body

Soap Making, Oils and Recipes

  • About CraftGossip
  • Our Network
    • Bath & Body Crafts
    • Candle Making Ideas
    • Crochet Ideas
    • Cross Stitch
    • Edible Crafts
    • Felting Patterns
    • Glass Art
    • Home & Garden Ideas
    • Indie Crafts
    • Jewelry Making
    • Kids Crafts
    • Knitting Patterns
    • Lesson Plans
    • Needlework
    • Party Ideas
    • Polymer Clay
    • Quilting Ideas
    • Recycled Crafts
    • Scrapbooking
    • Sewing Patterns
    • Card Making
    • DIY Weddings
    • Not Craft Ideas
  • Giveaways
  • Roundups
  • Store
  • Search

Homemade Vanilla and Coffee Body Scrub

July 20, 2019 by Shellie Wilson 3 Comments

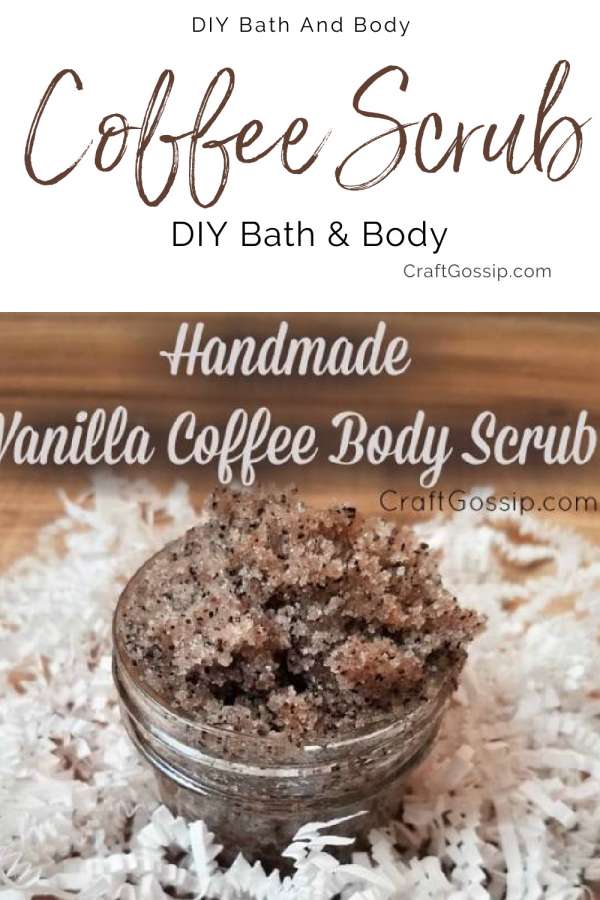
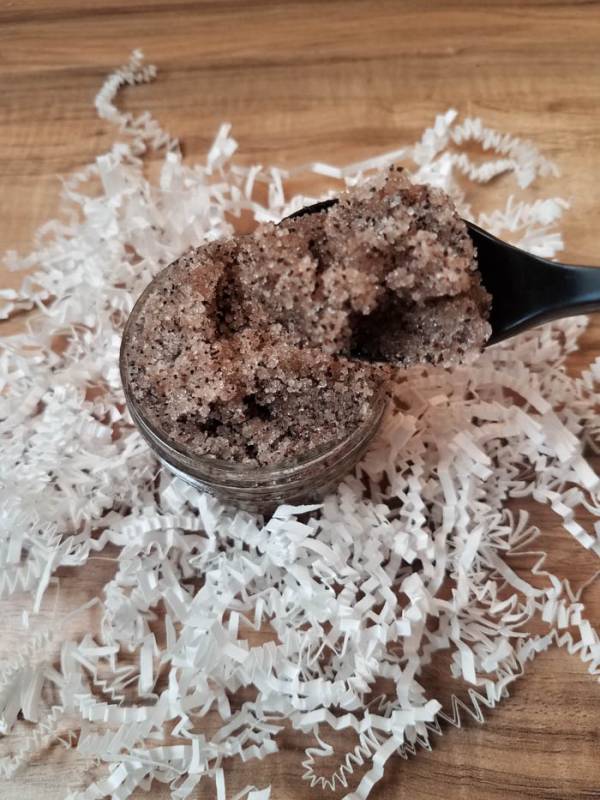
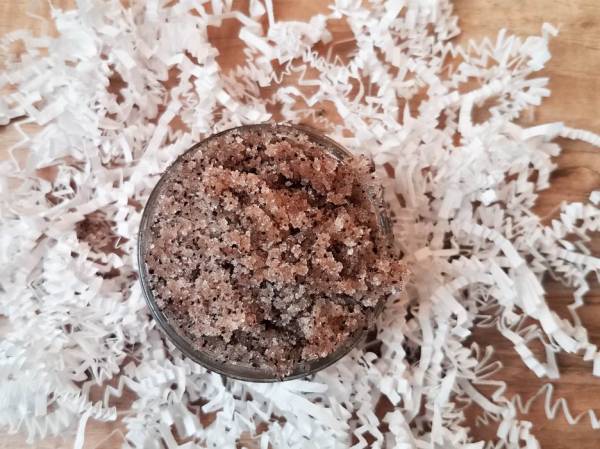
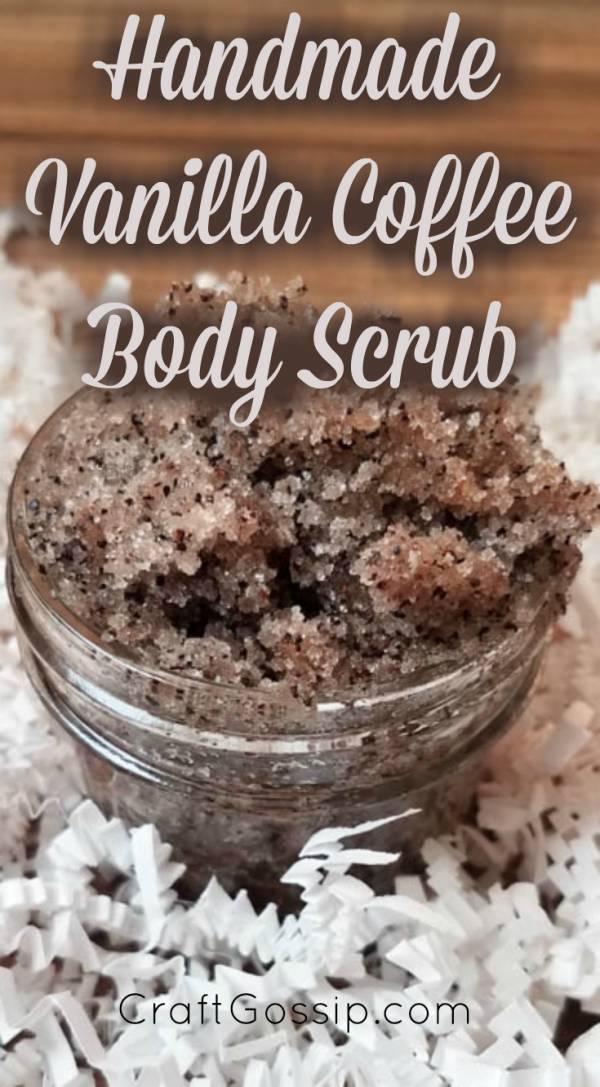
Vanilla Coffee Sugar Scrub Recipe – This DIY spa treatment is so easy to make and will leave your skin feeling amazing. The recipe can be increased to make a larger batch if you wish to gift it to friends and family.

Why Coffee? The caffeine in coffee grounds has potent antioxidant properties that can help protect the skin from sun damage, reduce cellulite and stimulate the blood vessels.


Recipe fills (3) 4 ounce mason jars
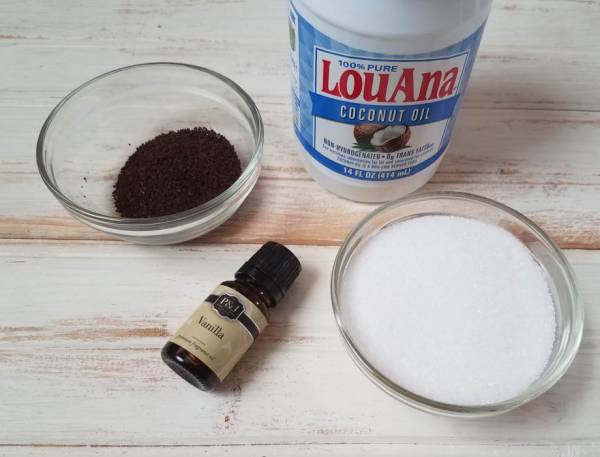
Ingredients:

  • 1 ½ cups sugar
  • ½ cup coconut oil
  • 20 drops Vanilla Essential Oil
  • 1 tbs coffee grounds

Step 1. Add sugar, coconut oil and essential oil to a bowl. Stir well

Step 2. Add coffee grounds.

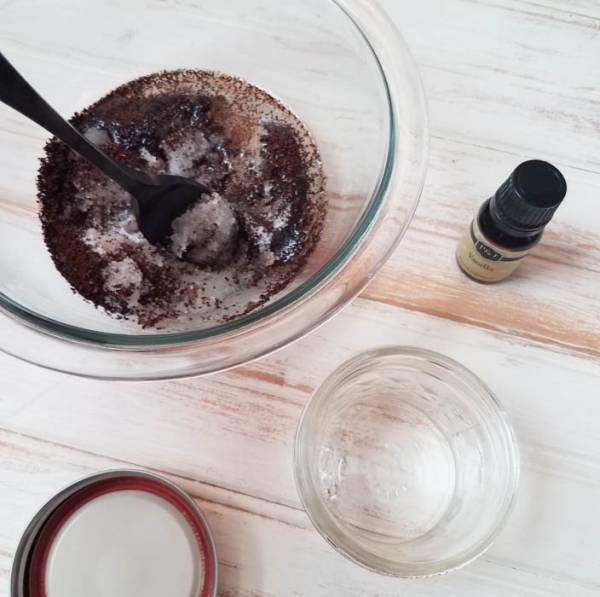
Step 2. Stir well to combine.

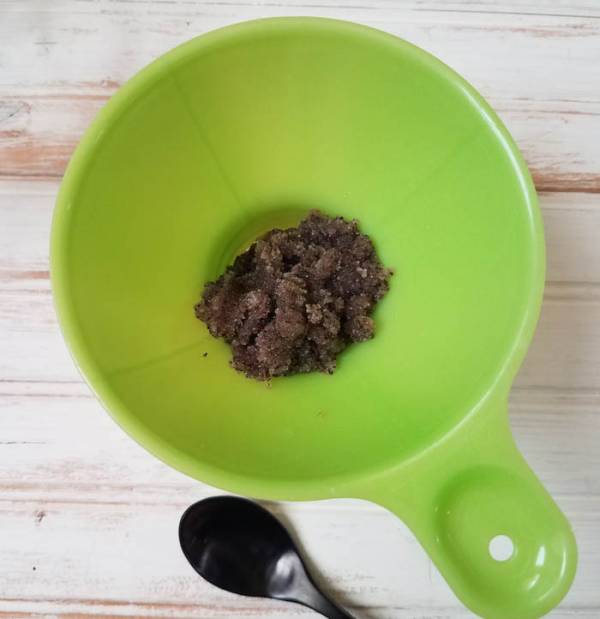
Step 4. Using a canning funnel, pour into 4 ounce mason jars.

DIY body scrubs are a great way to give handmade gifts to friends, family, and even yourself. Not only are they thoughtful presents, but they also have a variety of beneficial effects on the skin. Body scrubs can help to exfoliate, moisturize, and nourish the skin, giving it a healthy glow.

Exfoliating with a body scrub helps to remove dead skin cells and any impurities that can lead to a dull complexion. By removing these elements, body scrubs help to reveal softer, smoother skin and a brighter complexion. They can also help to reduce the appearance of acne and prevent ingrown hairs.

In addition to exfoliating, body scrubs can also help to nourish the skin and lock in moisture. Many body scrubs are made with natural oils, such as coconut, jojoba, or almond, which can help to replenish the skin and protect it from dryness. These oils are also rich in antioxidants, which can help to fight the signs of aging.

Finally, DIY body scrubs are an excellent way to relax and unwind. The act of scrubbing the skin with a body scrub can be incredibly therapeutic, and many scrubs are made with essential oils that can help to relieve stress and create a calming atmosphere.

Overall, DIY body scrubs can be a great way to give a handmade gift that is both thoughtful and beneficial to the recipient’s skin. They can help to exfoliate, nourish, and moisturize the skin, while also providing relaxation and stress relief.

Related Posts:

  • 10 DIY Bath And Body Recipes For When You Have A Headache
  • DIY Vanilla Body Scrub
«
»

Comments

  1. terri sommer says

    January 7, 2020 at 1:55 pm

    are the coffee grounds used or freshly ground?

  2. Christa says

    January 9, 2022 at 1:21 pm

    I’d like to know myself…. Are the coffee grounds fresh or is it already used coffee grounds?

  3. Laurieann says

    February 14, 2022 at 11:22 pm

    I save the coffee grounds from my husband’s morning coffee, spread them out to dry and save them in a container to use in coffee scrubs.

Have you read?

DIY Summer Nail Designs You’ll Want to Rock All Season Long

As soon as the weather heats up and the days get longer, I swap out my moody nail colors for something a little more fun, flirty, and full of sunshine. Summer is the perfect excuse to get playful with your nail designs — and this year, I’ve been experimenting at home to find a few favorites that are both easy to paint and seriously cute.

I’ve rounded up three of my go-to summer nail looks that you can totally do yourself, even if you’re not a pro. These are the styles I keep coming back to because they’re fun, eye-catching, and honestly — they just make you feel good. Whether you’re heading to the beach, a backyard BBQ, or just want to admire your nails while holding an iced latte, these are the ones to try.

Let’s dive in!

Sunset Ombre Nails

This is hands down one of the most satisfying nail designs you can do yourself. The colors melt into each other like a beach sunset, and the end result looks way more advanced than it really is.

You’ll Need:

  • A base coat

  • Three polishes (I use pink, orange, and yellow)

  • A makeup sponge

  • Top coat

  • Nail polish remover for cleanup

How to Do It:

  1. Start with a clear base coat to protect your nails.

  2. Paint horizontal stripes of your 3 colors directly onto the makeup sponge.

  3. Dab the sponge gently onto your nail, reapplying polish to the sponge as needed. Tap until the gradient blends.

  4. Clean up any excess polish around your cuticle.

  5. Apply a top coat to smooth the colors and add shine.

This design is one of those that looks good even when it’s a little messy — the top coat really pulls it all together.


 Tropical Palm Silhouettes

If you want vacation vibes without actually going anywhere, this one’s for you. The pastel base paired with simple black palm trees gives it that dreamy island feel.

You’ll Need:

  • A light pastel base polish or soft gradient background

  • Black nail art pen or thin brush with black polish

  • Top coat

How to Do It:

  1. Paint your nails with a soft pastel or ombre base.

  2. Once dry, draw a thin curved line for the palm trunk.

  3. From the top of the trunk, add small lines that fan out to mimic palm fronds.

  4. Let everything dry completely before adding a glossy top coat.

Even if your palm trees aren’t perfect, they still look awesome. Think of it like nail doodling — just more tropical.


 Watermelon French Tips

This design is so cheerful, I smile every time I see it. It’s a fruity twist on a French manicure and it’s perfect for pool parties or picnics.

You’ll Need:

  • Pink polish for the base

  • Green and white for the rind

  • Black polish for the seeds (use a dotting tool or toothpick)

  • Base and top coat

How to Do It:

  1. Paint your entire nail a soft pink.

  2. Add a green curved tip at the top edge (like a French tip).

  3. Under the green, paint a very thin white stripe.

  4. Add small black dots on the pink section to create seeds.

  5. Seal it all in with your favorite top coat.

This one is such a crowd-pleaser and looks adorable on both long and short nails.

Whether you try one of these or rotate through all three this summer, I hope these nail designs add a little color and creativity to your routine. They’re simple enough to do at home but still look like you spent time (and money!) at the salon.

Let me know which one you’re trying first — and don’t forget to tag us if you share your summer nail look!

Leave a Reply

Your email address will not be published. Required fields are marked *

RSS More Articles

  • Coldplay Caught on Camera?! This Free Coloring Page Will Leave You in Stitches!
  • Democratic Republic of the Congo for Kids
  • Primrose and Bee Punch Needle Pattern from DMC
  • Striped Ripple Afghan- Free Crochet Pattern
  • Knitting Pattern Review: Sabai Top by PaulaStrickt
  • Book Review – Capture Your Own Life with Collage Quilting
  • 4 FREE Christmas in July Digital Stamp Borders
  • Designer Spotlight: Needle Lot Designs
  • Coffee Cozy Knitting Patterns
  • Book Review: Sew Green: Reimagine, Reuse, Recreate

Categories

Bath And Body bath bombs Body Scrubs & Lotions Colds & Flu CraftGossip Exclusive Craft Inspirations detox DIY Recipes And Tutorials DIY Tutorials and Patterns Essential Oils And Aromatherapy facials Hair Care Makeup & Beauty Melt & Pour Soap Packaging Product Reviews Soapmaking Recipes, Products And Tutorials Style Me Quick Supply Store Specials & Discounts Wellbeing

Copyright © 2025 · CraftGossip | Start Here | Contact Us | Link to Us | Your Editors | Privacy and affiliate policy