• Home
  • Suggest A Craft
  • DIY Newsletter

Bath and Body

Soap Making, Oils and Recipes

  • About CraftGossip
  • Our Network
    • Bath & Body Crafts
    • Candle Making Ideas
    • Crochet Ideas
    • Cross Stitch
    • Edible Crafts
    • Felting Patterns
    • Glass Art
    • Home & Garden Ideas
    • Indie Crafts
    • Jewelry Making
    • Kids Crafts
    • Knitting Patterns
    • Lesson Plans
    • Needlework
    • Party Ideas
    • Polymer Clay
    • Quilting Ideas
    • Recycled Crafts
    • Scrapbooking
    • Sewing Patterns
    • Card Making
    • DIY Weddings
    • Not Craft Ideas
  • Giveaways
  • Roundups
  • Store
  • Search

Natural DIY Eczema Lotion

September 16, 2014 by Shellie Wilson 7 Comments

Eczema-collage

This Eczema lotion uses 5 basic ingredients that you can mix and match to suit your own bodies needs. As everyone reacts differently to different oils it might take a few batches until you find a lotion of salve that suits your skin type. Try some of our other recipes from previous blog posts too.  Do you know if you have Eczema? Check out this online guide. 

Do we need to tell you that you should ALWAYS get a medical opinion before diagnosing yourself? I don’t want to have to state the obvious each blog post so please use common sense.


Related Posts:

  • Why You Can't Claim Your Product Cures Eczema,…
  • How Much CBD Oil Should I Take For Insomnia?
«
»

Comments

  1. Jenni says

    September 16, 2014 at 10:31 am

    Uh – where’s the link to the recipe? There’s a link to eczema info and a link to OTHER recipes. . . where’s this one?

  2. Cindy Shlanger says

    September 16, 2014 at 10:41 am

    Would really like this recipe – but can’t seem to access it. Can you please forward. Thank you.

  3. Charissa says

    September 16, 2014 at 2:16 pm

    Is there a link for this recipe?

  4. Lindsay says

    September 16, 2014 at 5:10 pm

    I couldn’t find a link to the recipe

  5. Vikram Goyal says

    September 16, 2014 at 6:02 pm

    Sorry everyone. We have now updated the page with the link to the right recipe.

  6. Bea Lincoln says

    September 17, 2014 at 2:16 pm

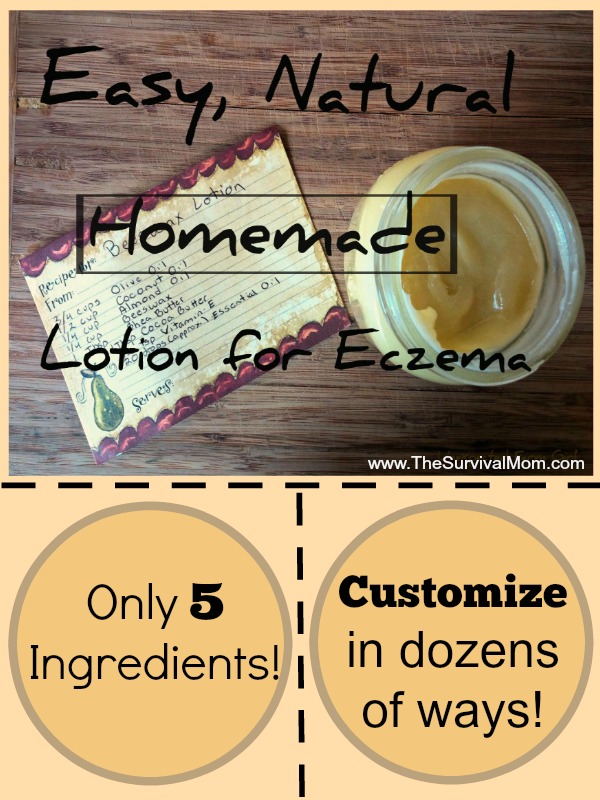
    1 1/2 cups of Oil (I use equal parts olive, almond, and coconut)
    1/4 cup of solid beeswax (or 2/3 cup of beeswax pastilles)
    2 Tbsp of Butter (I use equal parts Shea and Cocoa)
    20-40 drops of Essential Oil (I use Lavender)
    1 tsp of Vitamin E (for preserving purposes only)

    This amount will fit perfectly into a wide mouth, pint size, canning jar. The mixing, melting, cooling, and storing is done in one jar, eliminating any kind of mess.

    Oil Options

  7. Sharon says

    September 17, 2014 at 3:14 pm

    I use one product, one ingredient…CapriClear! It’s all natural coconut oil, no smell, no greasy mess, totally lightweight. Love it!

Have you read?

Pumpkin Pie Melt and Pour Soap: A Cozy Fall Soap Recipe That Smells Good Enough to Eat

When the leaves start crunching underfoot and pumpkin spice fills every café, it’s time to cozy up with an easy fall DIY that smells just like grandma’s dessert table—without the calories. This Pumpkin Pie Melt and Pour Soap is one of my absolute favorite seasonal recipes. It’s warm, comforting, and gives off those straight-out-of-the-oven vibes every time you lather up.

Perfect for fall craft fairs, Thanksgiving hostess gifts, or a festive bathroom refresh, this handmade soap smells divine, looks adorable, and takes less than an hour to whip up.

Why You’ll Love This Pumpkin Soap Recipe

  • Smells like real pumpkin pie (think cinnamon, nutmeg, vanilla—yes please!) 
  • Made with skin-friendly melt and pour base—no lye required 
  • Easy enough for beginners or weekend makers 
  • Customizable with layers, swirls, or “whipped cream” topping 

Ingredients & Supplies

Yields: 4–6 small bars depending on your mold size

  • 1 lb goat milk melt and pour soap base (or shea butter base) 
  • 1 tsp pumpkin pie spice (yes, the real baking blend!) 
  • ½ tsp ground cinnamon (optional for visual specks) 
  • 1 tsp vitamin E oil or sweet almond oil 
  • 1–2 tsp brown mica or orange soap-safe colorant 
  • 1 tsp vanilla extract (optional for scent depth—make sure it’s oil-based or use a fragrance oil blend) 
  • Pumpkin pie fragrance oil (skin-safe, approx. 1–2 tsp per pound of soap base) 
  • Rubbing alcohol in a spray bottle 
  • Silicone soap mold (round, square, or pie-slice shaped) 
  • Microwave-safe jug or double boiler 
  • Stirring sticks or silicone spatula 

Step-by-Step Instructions

1. Chop and Melt the Soap Base

Cut your melt and pour soap base into small cubes and place in a microwave-safe jug. Microwave in 30-second bursts, stirring between each round until fully melted. (Do not let it boil!)

2. Add Scent and Spice

Once melted, stir in your fragrance oil, pumpkin pie spice, and optional vanilla extract. Add a pinch of cinnamon if you like the flecked look.

Tip: Spray your mold lightly with rubbing alcohol before pouring to prevent bubbles.

3. Colour and Pour

Add your mica powder or orange colorant, a little at a time, until you reach your ideal pumpkiny hue. Stir well, then carefully pour the mixture into your soap molds.

Immediately spritz the tops with rubbing alcohol to remove surface bubbles.

4. Let It Set

Leave the soap undisturbed at room temperature for 2–4 hours until fully hardened. Pop the bars out of the mold once they’re firm to the touch.

Optional: If you’re feeling fancy, melt a small amount of white soap base and pipe a “whipped cream” swirl on top using a piping bag and star tip.

Tips & Variations

  • Make it two-tone: Pour half your batch in orange, then top with a creamy vanilla layer for a pie-slice look. 
  • Add oatmeal: Toss in 1 tsp of ground oats for a gentle exfoliant and rustic charm. 
  • Use pie molds: Silicone molds shaped like pie slices or tart pans give these a dessert-style finish. 
  • Gift-ready idea: Wrap in wax paper, tie with twine, and add a “Pumpkin Pie Soap” tag for instant fall gifts. 

How to Store Homemade Soap

Keep your finished soaps in an airtight container or shrink wrap them if you’re gifting. Melt and pour soap can sweat in humid climates, so cool, dry storage is best.

This DIY pumpkin spice soap recipe is everything you want from a cozy fall project—easy, fragrant, and irresistibly cute. Whether you’re new to soap making or a seasoned maker prepping for a market table, these little bars will have everyone asking, “Where’s the whipped cream?”


Leave a Reply

Your email address will not be published. Required fields are marked *

RSS More Articles

  • Etsy Spotlight: Floppy Teddy Bear Sewing Pattern
  • FREE Floral Alphabet Font
  • How to Make a Half-Square Triangle Surprise Quilt – Free Quilting Tutorial
  • Spooky Crochet Skull Scarf – Free Pattern
  • Clay Studio Series – YouTube Video Review: DIY Stoneware Plates
  • This DIY Board Game Table Made Me Want to Dust Off My Cricut
  • Clay Studio Series – YouTube Video Review: What type of clay should I use?
  • Cross Stitch the National Parks in Tiny Form
  • DMC Punch Needle Wall Hanging – A Bold and Modern Statement Stitch
  • Turtle Memory Game – Crochet Pattern

Categories

Bath And Body bath bombs Body Scrubs & Lotions Colds & Flu CraftGossip Exclusive Craft Inspirations detox DIY Recipes And Tutorials DIY Tutorials and Patterns Essential Oils And Aromatherapy facials Hair Care Makeup & Beauty Melt & Pour Soap Packaging Product Reviews Soapmaking Recipes, Products And Tutorials Style Me Quick Supply Store Specials & Discounts Wellbeing

Copyright © 2025 · CraftGossip | Start Here | Contact Us | Link to Us | Your Editors | Privacy and affiliate policy