• Home
  • Suggest A Craft
  • DIY Newsletter

Bath and Body

Soap Making, Oils and Recipes

  • About CraftGossip
  • Our Network
    • Bath & Body Crafts
    • Candle Making Ideas
    • Crochet Ideas
    • Cross Stitch
    • Edible Crafts
    • Felting Patterns
    • Glass Art
    • Home & Garden Ideas
    • Indie Crafts
    • Jewelry Making
    • Kids Crafts
    • Knitting Patterns
    • Lesson Plans
    • Needlework
    • Party Ideas
    • Polymer Clay
    • Quilting Ideas
    • Recycled Crafts
    • Scrapbooking
    • Sewing Patterns
    • Card Making
    • DIY Weddings
    • Not Craft Ideas
  • Giveaways
  • Roundups
  • Store
  • Search

SoapyLove book review

October 12, 2009 by jessica neaves 2 Comments

516h37O9EOL._SS500_
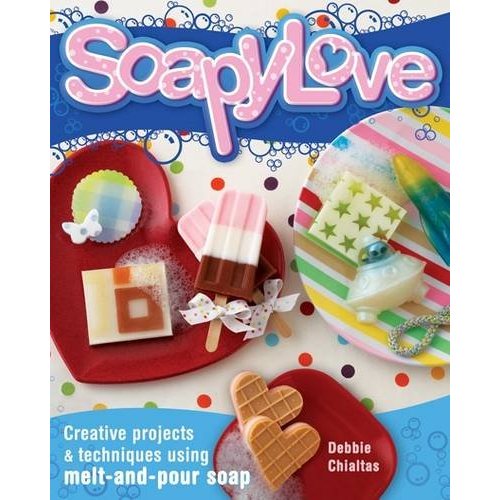
Debbie Chialtas of Soapylove has published her first book, SoapyLove: Squeaky-clean projects using melt and pour soap, and it does not disappoint!  SoapyLove is not only a great introductory book for the beginner melt and pour soap crafter, but will teach soapmaking veterans some new tricks as well.

The first portion of the book has an overview of  basic melt and pour techniques and materials, such as preventing surface bubbles; adding colorants, micas, and fragrances; layering soaps; and cutting soap. The balance of the book is dedicated to projects and more detailed techniques.  Some of the skills taught are layering, embedding shapes, cutting out shapes, soap on a rope, marbling, and using transfer sheets to create designs.

There are 25 wonderful projects included in SoapyLove, and several of the projects also have other suggested ideas for the skills used in the project. Projects include cameo bars, checkered stars, heavenly bars (clouds and grass with a blue sky), marbled ice cream cones, soap tarts (toaster pastries), and soap candies.  A couple of my personal favorites include the flame bars and plaid soaps.

Each project has lots of full color pictures and step-by-step instructions. While some of the projects are better suited to more advanced melt and pour soapcrafters, beginners should have no problem with the majority of the projects included.

The only thing that I would like to have been included would be a short resource guide in the back as a reference.  While Chialtas does mention some brand names of items and the occasional store, it would be helpful, especially for beginners, to have a resource guide giving more specific information on where to find some of the items, such as fragrances and molds, from such a seasoned soapmaker.  All in all, this is definitely the best melt and pour soap crafting book that I have seen!  Pick it up for only $19.99 at your favorite bookstore.

Related Posts:

  • How To Make Slow Release Vibrant Bath Bombs
  • Cold Process Soap Recipe: Dehydrated Orange Slice Elegance
«
»

Comments

  1. kerry santillo says

    September 3, 2011 at 4:31 am

    Have never been inclined to try sops as a craft as such but with this book it looks exciting!!

  2. kerry santillo says

    September 3, 2011 at 4:32 am

    that was soaps, damn you spell check, lol!!!

Have you read?

DIY Summer Nail Designs You’ll Want to Rock All Season Long

As soon as the weather heats up and the days get longer, I swap out my moody nail colors for something a little more fun, flirty, and full of sunshine. Summer is the perfect excuse to get playful with your nail designs — and this year, I’ve been experimenting at home to find a few favorites that are both easy to paint and seriously cute.

I’ve rounded up three of my go-to summer nail looks that you can totally do yourself, even if you’re not a pro. These are the styles I keep coming back to because they’re fun, eye-catching, and honestly — they just make you feel good. Whether you’re heading to the beach, a backyard BBQ, or just want to admire your nails while holding an iced latte, these are the ones to try.

Let’s dive in!

Sunset Ombre Nails

This is hands down one of the most satisfying nail designs you can do yourself. The colors melt into each other like a beach sunset, and the end result looks way more advanced than it really is.

You’ll Need:

  • A base coat

  • Three polishes (I use pink, orange, and yellow)

  • A makeup sponge

  • Top coat

  • Nail polish remover for cleanup

How to Do It:

  1. Start with a clear base coat to protect your nails.

  2. Paint horizontal stripes of your 3 colors directly onto the makeup sponge.

  3. Dab the sponge gently onto your nail, reapplying polish to the sponge as needed. Tap until the gradient blends.

  4. Clean up any excess polish around your cuticle.

  5. Apply a top coat to smooth the colors and add shine.

This design is one of those that looks good even when it’s a little messy — the top coat really pulls it all together.


 Tropical Palm Silhouettes

If you want vacation vibes without actually going anywhere, this one’s for you. The pastel base paired with simple black palm trees gives it that dreamy island feel.

You’ll Need:

  • A light pastel base polish or soft gradient background

  • Black nail art pen or thin brush with black polish

  • Top coat

How to Do It:

  1. Paint your nails with a soft pastel or ombre base.

  2. Once dry, draw a thin curved line for the palm trunk.

  3. From the top of the trunk, add small lines that fan out to mimic palm fronds.

  4. Let everything dry completely before adding a glossy top coat.

Even if your palm trees aren’t perfect, they still look awesome. Think of it like nail doodling — just more tropical.


 Watermelon French Tips

This design is so cheerful, I smile every time I see it. It’s a fruity twist on a French manicure and it’s perfect for pool parties or picnics.

You’ll Need:

  • Pink polish for the base

  • Green and white for the rind

  • Black polish for the seeds (use a dotting tool or toothpick)

  • Base and top coat

How to Do It:

  1. Paint your entire nail a soft pink.

  2. Add a green curved tip at the top edge (like a French tip).

  3. Under the green, paint a very thin white stripe.

  4. Add small black dots on the pink section to create seeds.

  5. Seal it all in with your favorite top coat.

This one is such a crowd-pleaser and looks adorable on both long and short nails.

Whether you try one of these or rotate through all three this summer, I hope these nail designs add a little color and creativity to your routine. They’re simple enough to do at home but still look like you spent time (and money!) at the salon.

Let me know which one you’re trying first — and don’t forget to tag us if you share your summer nail look!

Leave a Reply

Your email address will not be published. Required fields are marked *

RSS More Articles

  • Coldplay Caught on Camera?! This Free Coloring Page Will Leave You in Stitches!
  • Democratic Republic of the Congo for Kids
  • Primrose and Bee Punch Needle Pattern from DMC
  • Striped Ripple Afghan- Free Crochet Pattern
  • Knitting Pattern Review: Sabai Top by PaulaStrickt
  • Book Review – Capture Your Own Life with Collage Quilting
  • 4 FREE Christmas in July Digital Stamp Borders
  • Designer Spotlight: Needle Lot Designs
  • Coffee Cozy Knitting Patterns
  • Book Review: Sew Green: Reimagine, Reuse, Recreate

Categories

Bath And Body bath bombs Body Scrubs & Lotions Colds & Flu CraftGossip Exclusive Craft Inspirations detox DIY Recipes And Tutorials DIY Tutorials and Patterns Essential Oils And Aromatherapy facials Hair Care Makeup & Beauty Melt & Pour Soap Packaging Product Reviews Soapmaking Recipes, Products And Tutorials Style Me Quick Supply Store Specials & Discounts Wellbeing

Copyright © 2025 · CraftGossip | Start Here | Contact Us | Link to Us | Your Editors | Privacy and affiliate policy