• Home
  • Suggest A Craft
  • DIY Newsletter

Bath and Body

Soap Making, Oils and Recipes

  • About CraftGossip
  • Our Network
    • Bath & Body Crafts
    • Candle Making Ideas
    • Crochet Ideas
    • Cross Stitch
    • Edible Crafts
    • Felting Patterns
    • Glass Art
    • Home & Garden Ideas
    • Indie Crafts
    • Jewelry Making
    • Kids Crafts
    • Knitting Patterns
    • Lesson Plans
    • Needlework
    • Party Ideas
    • Polymer Clay
    • Quilting Ideas
    • Recycled Crafts
    • Scrapbooking
    • Sewing Patterns
    • Card Making
    • DIY Weddings
    • Not Craft Ideas
  • Giveaways
  • Roundups
  • Store
  • Search

Giveaway: Bee Venom $1100 worth of products

January 23, 2015 by Shellie Wilson 4 Comments

mask

You might recall some of our previous posts about Abeeco Bee Venom masks and plumper. The feedback we have been getting from you guys is amazing and we have the perfect opportunity for our readers to try the product for themselves. We are giving away 15 products for you to try. That’s over $1100 worth of Products.

There will be 15 Worldwide winners! We have the following products to giveaway.

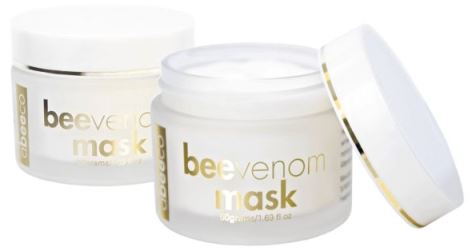
5 of the Original Bee Venom Mask.

mask


5 of the Bee Venom Mask Whitening
Maskwhiteningb
5 of the Bee Venom Skin Perfecting Serum


BeeVenomSkinperfectingSerum1


ABEECO GIVEAWAY BEE VENOM SKIN CARE PRODUCTS – OPEN WORLDWIDE!!

To enter simply pop on over to www.abeeco.com and sign up for their newsletter or click on the link http://www.abeeco.com/email_opt_in.html  and then answer the 2 following questions:

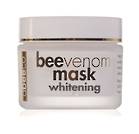
What is the name of the natural ingredient in the new Bee Venom Mask Whitening that lightens dark spots, evens skin tone and improves your overall complexion.

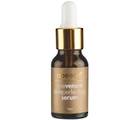
Name one of the essential oils starting with ‘M’ in the new Bee Venom Skin Perfecting Serum.

Email your answers to [email protected] or through the Contact Us link on www.abeeco.com

Competition ends 14th February and winners will be notified via email. Be sure to spread the word!


EDITED – Please note due to an error we have had to change the process for entering, to insure you are still in the running to win we suggest you re-enter your details.

Related Posts:

  • The Stuff No One Tells You About Running A Soap Business
  • A Guide to Photographing Handmade Soaps and…
«
»

Comments

  1. Kelly Caufield says

    February 2, 2015 at 12:01 am

    New Zealand???

  2. LILLIAN says

    February 4, 2015 at 4:05 pm

    I am getting old so anti-wrinkle anything is like gold to me!!!!!

  3. Gissele Godoy says

    March 10, 2015 at 6:17 pm

    Proud winner of this contest. Thank you very much, I justo got my bee venom lotion, yeeeeiiii.

  4. Shellie Wilson says

    March 11, 2015 at 10:40 pm

    Gissele, Make sure you pop back and tell us how it is.

Have you read?

DIY Summer Nail Designs You’ll Want to Rock All Season Long

As soon as the weather heats up and the days get longer, I swap out my moody nail colors for something a little more fun, flirty, and full of sunshine. Summer is the perfect excuse to get playful with your nail designs — and this year, I’ve been experimenting at home to find a few favorites that are both easy to paint and seriously cute.

I’ve rounded up three of my go-to summer nail looks that you can totally do yourself, even if you’re not a pro. These are the styles I keep coming back to because they’re fun, eye-catching, and honestly — they just make you feel good. Whether you’re heading to the beach, a backyard BBQ, or just want to admire your nails while holding an iced latte, these are the ones to try.

Let’s dive in!

Sunset Ombre Nails

This is hands down one of the most satisfying nail designs you can do yourself. The colors melt into each other like a beach sunset, and the end result looks way more advanced than it really is.

You’ll Need:

  • A base coat

  • Three polishes (I use pink, orange, and yellow)

  • A makeup sponge

  • Top coat

  • Nail polish remover for cleanup

How to Do It:

  1. Start with a clear base coat to protect your nails.

  2. Paint horizontal stripes of your 3 colors directly onto the makeup sponge.

  3. Dab the sponge gently onto your nail, reapplying polish to the sponge as needed. Tap until the gradient blends.

  4. Clean up any excess polish around your cuticle.

  5. Apply a top coat to smooth the colors and add shine.

This design is one of those that looks good even when it’s a little messy — the top coat really pulls it all together.


 Tropical Palm Silhouettes

If you want vacation vibes without actually going anywhere, this one’s for you. The pastel base paired with simple black palm trees gives it that dreamy island feel.

You’ll Need:

  • A light pastel base polish or soft gradient background

  • Black nail art pen or thin brush with black polish

  • Top coat

How to Do It:

  1. Paint your nails with a soft pastel or ombre base.

  2. Once dry, draw a thin curved line for the palm trunk.

  3. From the top of the trunk, add small lines that fan out to mimic palm fronds.

  4. Let everything dry completely before adding a glossy top coat.

Even if your palm trees aren’t perfect, they still look awesome. Think of it like nail doodling — just more tropical.


 Watermelon French Tips

This design is so cheerful, I smile every time I see it. It’s a fruity twist on a French manicure and it’s perfect for pool parties or picnics.

You’ll Need:

  • Pink polish for the base

  • Green and white for the rind

  • Black polish for the seeds (use a dotting tool or toothpick)

  • Base and top coat

How to Do It:

  1. Paint your entire nail a soft pink.

  2. Add a green curved tip at the top edge (like a French tip).

  3. Under the green, paint a very thin white stripe.

  4. Add small black dots on the pink section to create seeds.

  5. Seal it all in with your favorite top coat.

This one is such a crowd-pleaser and looks adorable on both long and short nails.

Whether you try one of these or rotate through all three this summer, I hope these nail designs add a little color and creativity to your routine. They’re simple enough to do at home but still look like you spent time (and money!) at the salon.

Let me know which one you’re trying first — and don’t forget to tag us if you share your summer nail look!

Leave a Reply

Your email address will not be published. Required fields are marked *

RSS More Articles

  • DIY Valentine Shabby Chic Bookmarks: A Creative and Heartfelt Gift Idea
  • Stitch Stars: Taylor: Over 20 unofficial embroidery patterns for stitchy superfans
  • Bee Themed Mini Scrapbook Album
  • Fun Tank Top Knitting Patterns
  • Books to Get Ready for Back to School
  • Just Feel Festive Shawl crochet pattern by QuirkyMondayCrafts
  • Cozy Up Your Holidays with This Stunning Christmas Blanket!
  • 5 Must-Know Secrets to Turning Your Suburban Home into a Profitable, Sustainable Homestead
  • Recycled Paper Cylinder Face Art – A Colorful Win for All Ages
  • 12 FREE Summer Digital Stamps to Download

Categories

Bath And Body bath bombs Body Scrubs & Lotions Colds & Flu CraftGossip Exclusive Craft Inspirations detox DIY Recipes And Tutorials DIY Tutorials and Patterns Essential Oils And Aromatherapy facials Hair Care Makeup & Beauty Melt & Pour Soap Packaging Product Reviews Soapmaking Recipes, Products And Tutorials Style Me Quick Supply Store Specials & Discounts Wellbeing

Copyright © 2025 · CraftGossip | Start Here | Contact Us | Link to Us | Your Editors | Privacy and affiliate policy