• Home
  • Suggest A Craft
  • DIY Newsletter

Bath and Body

Soap Making, Oils and Recipes

  • About CraftGossip
  • Our Network
    • Bath & Body Crafts
    • Candle Making Ideas
    • Crochet Ideas
    • Cross Stitch
    • Edible Crafts
    • Felting Patterns
    • Glass Art
    • Home & Garden Ideas
    • Indie Crafts
    • Jewelry Making
    • Kids Crafts
    • Knitting Patterns
    • Lesson Plans
    • Needlework
    • Party Ideas
    • Polymer Clay
    • Quilting Ideas
    • Recycled Crafts
    • Scrapbooking
    • Sewing Patterns
    • Card Making
    • DIY Weddings
    • Not Craft Ideas
  • Giveaways
  • Roundups
  • Store
  • Search

10 DIY Sea Sponge Soap Tutorials

September 18, 2022 by Shellie Wilson Leave a Comment

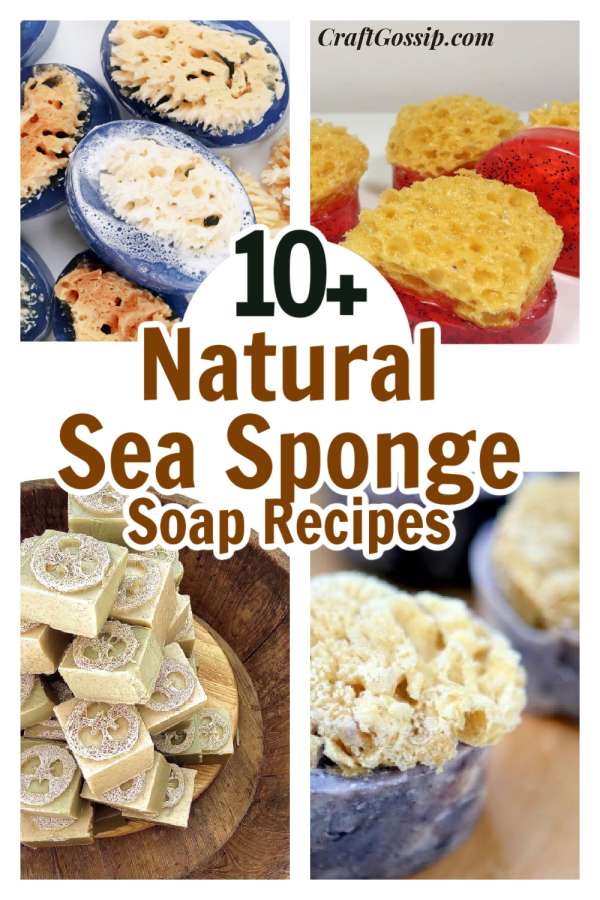
Sea sponges  are a great embed when it comes to DIY soap, adding an embed into a basic soap recipe can take your handmade soap from boring to something special.  All of these recipes below use natural sea sponges.  If you are looking for basic sponge soaps using store-bought bathroom sponges then check out this article here.

Sponges are found on the ocean floor or attached to substrates such as rocks, coral, shells, and marine organisms

So why add a sea sponge to your soap? Natural sea sponges provide gentle exfoliation to the skin, they are natures microfibre cloth, perfect for lifting impurities off the skin. The Sea Sponge is a renewable natural resource with divers taking from the top and the sponge regrowing from the bottom.


Strawberry Sea Sponge Soap

Bring the Ocean into Your Bathtub with Handmade Sea Sponge Soap Bars – Garden Therapy

Sea Sponge Cold Process Soap Project | Bramble Berry

Sea Sponge Soap

Spirulina and sea sponge video tutorial 

Tropical Sea Sponges Melt & Pour Soap Project

Check out this tutorial that uses Loofahs, Sliced Loofahs are more exfoliating and great for heels and elbows, you can even use synthetic loofahs embedded into your soaps.

Cucumber and Aloe Loofah Soap 

Here are my top tips for working with loofahs

Using loofahs in soaps can be a great way to add exfoliating properties and enhance the overall cleansing experience. Here are some tips for using loofahs in your soap making:

Choose the right loofah: Make sure you choose a high-quality loofah that is free of mold, mildew, or other contaminants. It is best to use natural loofahs as opposed to synthetic ones.

Cut the loofah: Cut the loofah into small pieces that are the same size as your soap mold. This will make it easier to embed the loofah pieces into the soap and ensure that each bar of soap has an equal amount of exfoliation.

Soak the loofah: Soak the loofah pieces in warm water for a few minutes before using them in your soap. This will help soften them up and make them easier to work with.

Embed the loofah: Once your soap has reached the appropriate temperature, gently press the loofah pieces into the soap mixture. Make sure they are evenly distributed throughout the soap.

Let the soap harden: Allow the soap to harden completely before removing it from the mold. This will ensure that the loofah pieces are firmly embedded in the soap and won’t fall out when in use.

Store the soap properly: Store the soap in a cool, dry place to prevent the loofah pieces from becoming damp and developing mold.


Related Posts:

  • DIY Money Saving Bathroom And Kitchen Cleaners
  • Why You Can't Claim Your Product Cures Eczema,…
«
»

Have you read?

Pumpkin Pie Melt and Pour Soap: A Cozy Fall Soap Recipe That Smells Good Enough to Eat

When the leaves start crunching underfoot and pumpkin spice fills every café, it’s time to cozy up with an easy fall DIY that smells just like grandma’s dessert table—without the calories. This Pumpkin Pie Melt and Pour Soap is one of my absolute favorite seasonal recipes. It’s warm, comforting, and gives off those straight-out-of-the-oven vibes every time you lather up.

Perfect for fall craft fairs, Thanksgiving hostess gifts, or a festive bathroom refresh, this handmade soap smells divine, looks adorable, and takes less than an hour to whip up.

Why You’ll Love This Pumpkin Soap Recipe

  • Smells like real pumpkin pie (think cinnamon, nutmeg, vanilla—yes please!) 
  • Made with skin-friendly melt and pour base—no lye required 
  • Easy enough for beginners or weekend makers 
  • Customizable with layers, swirls, or “whipped cream” topping 

Ingredients & Supplies

Yields: 4–6 small bars depending on your mold size

  • 1 lb goat milk melt and pour soap base (or shea butter base) 
  • 1 tsp pumpkin pie spice (yes, the real baking blend!) 
  • ½ tsp ground cinnamon (optional for visual specks) 
  • 1 tsp vitamin E oil or sweet almond oil 
  • 1–2 tsp brown mica or orange soap-safe colorant 
  • 1 tsp vanilla extract (optional for scent depth—make sure it’s oil-based or use a fragrance oil blend) 
  • Pumpkin pie fragrance oil (skin-safe, approx. 1–2 tsp per pound of soap base) 
  • Rubbing alcohol in a spray bottle 
  • Silicone soap mold (round, square, or pie-slice shaped) 
  • Microwave-safe jug or double boiler 
  • Stirring sticks or silicone spatula 

Step-by-Step Instructions

1. Chop and Melt the Soap Base

Cut your melt and pour soap base into small cubes and place in a microwave-safe jug. Microwave in 30-second bursts, stirring between each round until fully melted. (Do not let it boil!)

2. Add Scent and Spice

Once melted, stir in your fragrance oil, pumpkin pie spice, and optional vanilla extract. Add a pinch of cinnamon if you like the flecked look.

Tip: Spray your mold lightly with rubbing alcohol before pouring to prevent bubbles.

3. Colour and Pour

Add your mica powder or orange colorant, a little at a time, until you reach your ideal pumpkiny hue. Stir well, then carefully pour the mixture into your soap molds.

Immediately spritz the tops with rubbing alcohol to remove surface bubbles.

4. Let It Set

Leave the soap undisturbed at room temperature for 2–4 hours until fully hardened. Pop the bars out of the mold once they’re firm to the touch.

Optional: If you’re feeling fancy, melt a small amount of white soap base and pipe a “whipped cream” swirl on top using a piping bag and star tip.

Tips & Variations

  • Make it two-tone: Pour half your batch in orange, then top with a creamy vanilla layer for a pie-slice look. 
  • Add oatmeal: Toss in 1 tsp of ground oats for a gentle exfoliant and rustic charm. 
  • Use pie molds: Silicone molds shaped like pie slices or tart pans give these a dessert-style finish. 
  • Gift-ready idea: Wrap in wax paper, tie with twine, and add a “Pumpkin Pie Soap” tag for instant fall gifts. 

How to Store Homemade Soap

Keep your finished soaps in an airtight container or shrink wrap them if you’re gifting. Melt and pour soap can sweat in humid climates, so cool, dry storage is best.

This DIY pumpkin spice soap recipe is everything you want from a cozy fall project—easy, fragrant, and irresistibly cute. Whether you’re new to soap making or a seasoned maker prepping for a market table, these little bars will have everyone asking, “Where’s the whipped cream?”


Leave a Reply

Your email address will not be published. Required fields are marked *

RSS More Articles

  • Create a Giant Halloween Decoration That Will Leave Everyone Spooked – DIY Big Guy Tutorial
  • Combine Knit and Crochet with this Cute Checkers Set
  • Rosh Hashanah Coloring Sheets and Other Activities for Kids
  • Cassette Tape Shaped Mini Album
  • Free Crochet Pattern – Chunky Rib Tunisian Hat and Cowl
  • What is Silver Art Clay or Precious Metal Clay (PMC) and How Do You Work With It (and Fire It!)
  • Learn How to Sew Potholders with Creativebug’s Online Class!
  • Pumpkin Pie Melt and Pour Soap: A Cozy Fall Soap Recipe That Smells Good Enough to Eat
  • DIY Tablet Pouch Tutorial: A Stylish and Practical Craft
  • Designer Spotlight: Embrovia

Categories

Bath And Body bath bombs Body Scrubs & Lotions Colds & Flu CraftGossip Exclusive Craft Inspirations detox DIY Recipes And Tutorials DIY Tutorials and Patterns Essential Oils And Aromatherapy facials Hair Care Makeup & Beauty Melt & Pour Soap Packaging Product Reviews Soapmaking Recipes, Products And Tutorials Style Me Quick Supply Store Specials & Discounts Wellbeing

Copyright © 2025 · CraftGossip | Start Here | Contact Us | Link to Us | Your Editors | Privacy and affiliate policy