• Home
  • Suggest A Craft
  • DIY Newsletter

Bath and Body

Soap Making, Oils and Recipes

  • About CraftGossip
  • Our Network
    • Bath & Body Crafts
    • Candle Making Ideas
    • Crochet Ideas
    • Cross Stitch
    • Edible Crafts
    • Felting Patterns
    • Glass Art
    • Home & Garden Ideas
    • Indie Crafts
    • Jewelry Making
    • Kids Crafts
    • Knitting Patterns
    • Lesson Plans
    • Needlework
    • Party Ideas
    • Polymer Clay
    • Quilting Ideas
    • Recycled Crafts
    • Scrapbooking
    • Sewing Patterns
    • Card Making
    • DIY Weddings
    • Not Craft Ideas
  • Giveaways
  • Roundups
  • Store
  • Search

13 Spooky Halloween Bath Bombs To Make And Gift

September 26, 2021 by Shellie Wilson Leave a Comment

Halloween is right around the corner and whilst in some areas of the world trick or treating is banned, you can still make it fun. I love the idea of having a Halloween month or week and spread out the fun over a few different nights. Have a scary movie night, do some Halloween arts and crafts or make and use a Halloween bath bomb.

These Halloween-themed bath bombs are great for giving as gifts to those who do not eat candy. You can make your Homemade Halloween bath bombs as complicated or as simple as you like.  For simplicity go for the jack o lantern all orange bath bomb, this one has the least amount of supplies needed too.

If you don’t have a bath bomb mold, then go for the cauldrons, no shaping required just stuffing the bath bomb mixture into the pot. This one is great if you need to make a lot of bath bombs or if the kids want to help too.


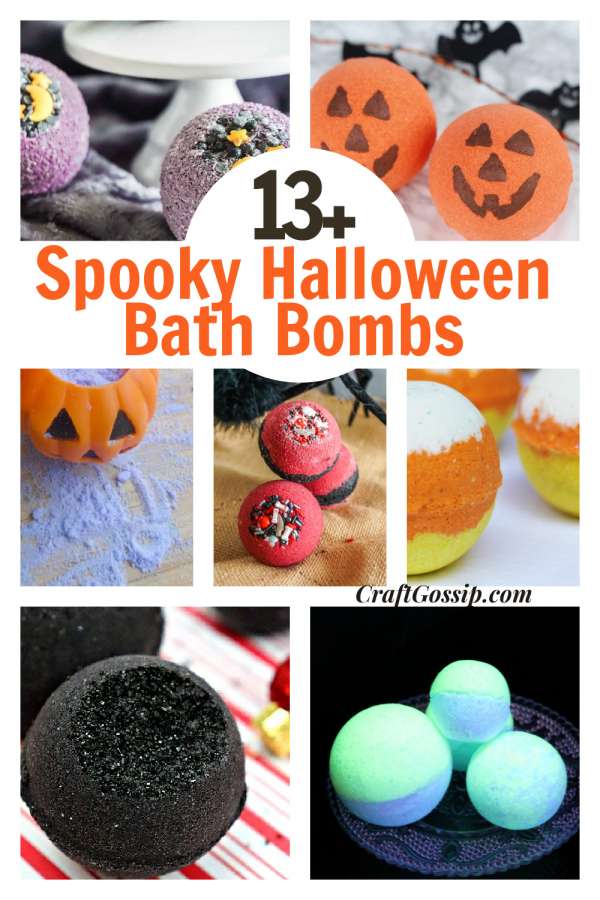
DIY Halloween Cauldron and Jack O Lantern Bath Bombs

Halloween Bath Bombs Non Candy Fun — CraftBits.com

Witches-brew-bath-bomb

How to Make Blood Bath Bomb Recipe

How to Make Halloween Jack-o’-Lantern Bath Bombs 

DIY Pumpkin Spice Bath Bombs – 3 Fall Homemade Bath Bomb Recipes

Candy Corn Bath Bomb (with Video) ? Sugar, Spice and Glitter 

Cyclops Monster DIY Halloween Bath Bombs

Candy Corn Bath Bombs – A Fall Bath Bomb Idea to WOW!

How to make spooky Halloween-themed bath bombs

DIY Glow in the Dark Bath Bombs

DIY Expecto Patronum Bath Bombs

How to Make Black Bath Bombs with Activated Charcoal

Here are some Spooky oil blends for Halloween

Spooky Pumpkin Patch:
10 drops of cinnamon essential oil
8 drops of clove essential oil
5 drops of sweet orange essential oil
2 drops of nutmeg essential oil

Witch’s Brew:
8 drops of lavender essential oil
6 drops of eucalyptus essential oil
5 drops of peppermint essential oil
3 drops of frankincense essential oil

Vampire’s Lair:
10 drops of patchouli essential oil
5 drops of vetiver essential oil
3 drops of bergamot essential oil
2 drops of cedarwood essential oil

Ghostly Graveyard:
8 drops of rosemary essential oil
6 drops of lemon essential oil
4 drops of tea tree essential oil
2 drops of peppermint essential oil

Mysterious Mansion:
8 drops of ylang-ylang essential oil
6 drops of sandalwood essential oil
4 drops of jasmine essential oil
2 drops of cedarwood essential oil

Haunted Forest:
8 drops of fir essential oil
6 drops of pine essential oil
4 drops of cedarwood essential oil
2 drops of cypress essential oil.


Related Posts:

  • Efficiency and Expertise: Crafting 200 Bath Bombs in…
  • How To Add Rose Petals and Other Botanicals to Bath Bombs
«
»

Have you read?

DIY Summer Nail Designs You’ll Want to Rock All Season Long

As soon as the weather heats up and the days get longer, I swap out my moody nail colors for something a little more fun, flirty, and full of sunshine. Summer is the perfect excuse to get playful with your nail designs — and this year, I’ve been experimenting at home to find a few favorites that are both easy to paint and seriously cute.

I’ve rounded up three of my go-to summer nail looks that you can totally do yourself, even if you’re not a pro. These are the styles I keep coming back to because they’re fun, eye-catching, and honestly — they just make you feel good. Whether you’re heading to the beach, a backyard BBQ, or just want to admire your nails while holding an iced latte, these are the ones to try.

Let’s dive in!

Sunset Ombre Nails

This is hands down one of the most satisfying nail designs you can do yourself. The colors melt into each other like a beach sunset, and the end result looks way more advanced than it really is.

You’ll Need:

  • A base coat

  • Three polishes (I use pink, orange, and yellow)

  • A makeup sponge

  • Top coat

  • Nail polish remover for cleanup

How to Do It:

  1. Start with a clear base coat to protect your nails.

  2. Paint horizontal stripes of your 3 colors directly onto the makeup sponge.

  3. Dab the sponge gently onto your nail, reapplying polish to the sponge as needed. Tap until the gradient blends.

  4. Clean up any excess polish around your cuticle.

  5. Apply a top coat to smooth the colors and add shine.

This design is one of those that looks good even when it’s a little messy — the top coat really pulls it all together.


 Tropical Palm Silhouettes

If you want vacation vibes without actually going anywhere, this one’s for you. The pastel base paired with simple black palm trees gives it that dreamy island feel.

You’ll Need:

  • A light pastel base polish or soft gradient background

  • Black nail art pen or thin brush with black polish

  • Top coat

How to Do It:

  1. Paint your nails with a soft pastel or ombre base.

  2. Once dry, draw a thin curved line for the palm trunk.

  3. From the top of the trunk, add small lines that fan out to mimic palm fronds.

  4. Let everything dry completely before adding a glossy top coat.

Even if your palm trees aren’t perfect, they still look awesome. Think of it like nail doodling — just more tropical.


 Watermelon French Tips

This design is so cheerful, I smile every time I see it. It’s a fruity twist on a French manicure and it’s perfect for pool parties or picnics.

You’ll Need:

  • Pink polish for the base

  • Green and white for the rind

  • Black polish for the seeds (use a dotting tool or toothpick)

  • Base and top coat

How to Do It:

  1. Paint your entire nail a soft pink.

  2. Add a green curved tip at the top edge (like a French tip).

  3. Under the green, paint a very thin white stripe.

  4. Add small black dots on the pink section to create seeds.

  5. Seal it all in with your favorite top coat.

This one is such a crowd-pleaser and looks adorable on both long and short nails.

Whether you try one of these or rotate through all three this summer, I hope these nail designs add a little color and creativity to your routine. They’re simple enough to do at home but still look like you spent time (and money!) at the salon.

Let me know which one you’re trying first — and don’t forget to tag us if you share your summer nail look!

Leave a Reply

Your email address will not be published. Required fields are marked *

RSS More Articles

  • Monday Musings: The Blog Post That Flopped (And What I Learned From It)
  • Simple Embroidery: 35 projects to make: Embellish clothes, accessories, and more and create wall art with modern hand-sewn designs
  • Book Review: The Secret Life of the Forest
  • Textured Baby Blanket Knitting Patterns
  • Jethro Cardigan- Crochet Pattern
  • Book Review: Merry Stitchmas
  • Etsy Spotlight – Sew the Dress of Your Dreams with This Romantic Puff Sleeve Pattern
  • Vacation Pocket Mini Album Project
  • DIY Soda Bottle Cloches – A Clever Way to Shield Your Seedlings
  • Crochet Pattern Review: Aura Pullover

Categories

Bath And Body bath bombs Body Scrubs & Lotions Colds & Flu CraftGossip Exclusive Craft Inspirations detox DIY Recipes And Tutorials DIY Tutorials and Patterns Essential Oils And Aromatherapy facials Hair Care Makeup & Beauty Melt & Pour Soap Packaging Product Reviews Soapmaking Recipes, Products And Tutorials Style Me Quick Supply Store Specials & Discounts Wellbeing

Copyright © 2025 · CraftGossip | Start Here | Contact Us | Link to Us | Your Editors | Privacy and affiliate policy