• Home
  • Suggest A Craft
  • DIY Newsletter

Bath and Body

Soap Making, Oils and Recipes

  • About CraftGossip
  • Our Network
    • Bath & Body Crafts
    • Candle Making Ideas
    • Crochet Ideas
    • Cross Stitch
    • Edible Crafts
    • Felting Patterns
    • Glass Art
    • Home & Garden Ideas
    • Indie Crafts
    • Jewelry Making
    • Kids Crafts
    • Knitting Patterns
    • Lesson Plans
    • Needlework
    • Party Ideas
    • Polymer Clay
    • Quilting Ideas
    • Recycled Crafts
    • Scrapbooking
    • Sewing Patterns
    • Card Making
    • DIY Weddings
    • Not Craft Ideas
  • Giveaways
  • Roundups
  • Store
  • Search

Covid test kits for home

August 25, 2021 by Shellie Wilson 2 Comments

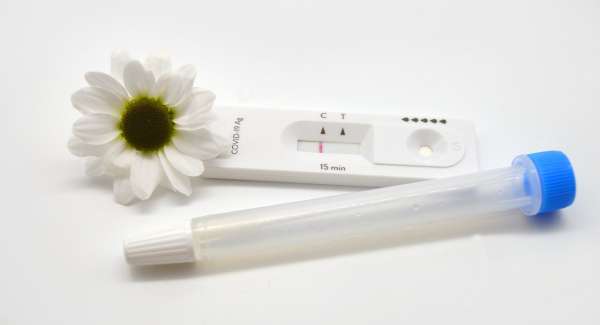
Note: These are tests that you buy to test yourself for Covid at home, not tests that you make yourself. Only tests done and kits created by medical professionals should be trusted.

Who would have thought I would ever have to write a DIY post about pandemic testing. Ugh, well here we are, one year after all our DIY face mask posts went viral and now we are bringing you the DIY Covid test.

Updated:  This article was originally written back in august of 2021 and covid home tests or Rats or Rapid Antigen Tests were not even a thing, and now they are not only popular but are in short supply. Australia is struggling to fill the shelves with Rat’s or Rapid antigen tests. Unlike other countries, Australia does not provide these tests for free, so as you can imagine prices for tests (when available) are becoming crazy with prices hiked up over 1000%. So where you can find a Rat test and how much should you pay? There are Facebook groups for finding the locations of tests, but our best suggestion is to make sure you buy them BEFORE you need them. Not stockpiling, not hoarding, just enough for your family. Because when Covid grabs you, or any similar flu you are not going to want to line up for hours to get tested because you will most likely feel like shit!

Though they seem like a fantastic idea, actually getting them in stock is a little harder as it seems everyone is buying these right now. Taking your own DIY covid test is faster process than attending testing clinics that may have long lines and of course possible exposure. I literally have no idea about these tests, so for all the facts, you need to jump over to the product information and get all the medical jargon from them. Please do not e-mail me saying the disease is fake, or that I am not a Dr. etc etc. If you do not like what you read…. Scroll on by….

Need face-masks?

Check out our other articles related to face masks
The best filters for face masks
DIY no sew Face masks
7 Masks you can make at home
Bandana Face Mask
DIY Face Mask Brace for tighter fitting masks
Need to make a lot of masks? Check out this amazing Mask Cutting Machine. It cuts 6 masks out at a time!

Related Posts:

  • Why You Can't Claim Your Product Cures Eczema,…
  • 15 Ways To Use Avocado On Your Body
«
»

Comments

  1. Linda G says

    August 25, 2021 at 5:21 pm

    So these are actual tests you buy, not tests you create, correct?

  2. Vikram Goyal says

    September 19, 2021 at 5:04 pm

    Hi Linda – yes, and sorry for the confusion. We have added a note.

Have you read?

Pumpkin Pie Melt and Pour Soap: A Cozy Fall Soap Recipe That Smells Good Enough to Eat

When the leaves start crunching underfoot and pumpkin spice fills every café, it’s time to cozy up with an easy fall DIY that smells just like grandma’s dessert table—without the calories. This Pumpkin Pie Melt and Pour Soap is one of my absolute favorite seasonal recipes. It’s warm, comforting, and gives off those straight-out-of-the-oven vibes every time you lather up.

Perfect for fall craft fairs, Thanksgiving hostess gifts, or a festive bathroom refresh, this handmade soap smells divine, looks adorable, and takes less than an hour to whip up.

Why You’ll Love This Pumpkin Soap Recipe

  • Smells like real pumpkin pie (think cinnamon, nutmeg, vanilla—yes please!) 
  • Made with skin-friendly melt and pour base—no lye required 
  • Easy enough for beginners or weekend makers 
  • Customizable with layers, swirls, or “whipped cream” topping 

Ingredients & Supplies

Yields: 4–6 small bars depending on your mold size

  • 1 lb goat milk melt and pour soap base (or shea butter base) 
  • 1 tsp pumpkin pie spice (yes, the real baking blend!) 
  • ½ tsp ground cinnamon (optional for visual specks) 
  • 1 tsp vitamin E oil or sweet almond oil 
  • 1–2 tsp brown mica or orange soap-safe colorant 
  • 1 tsp vanilla extract (optional for scent depth—make sure it’s oil-based or use a fragrance oil blend) 
  • Pumpkin pie fragrance oil (skin-safe, approx. 1–2 tsp per pound of soap base) 
  • Rubbing alcohol in a spray bottle 
  • Silicone soap mold (round, square, or pie-slice shaped) 
  • Microwave-safe jug or double boiler 
  • Stirring sticks or silicone spatula 

Step-by-Step Instructions

1. Chop and Melt the Soap Base

Cut your melt and pour soap base into small cubes and place in a microwave-safe jug. Microwave in 30-second bursts, stirring between each round until fully melted. (Do not let it boil!)

2. Add Scent and Spice

Once melted, stir in your fragrance oil, pumpkin pie spice, and optional vanilla extract. Add a pinch of cinnamon if you like the flecked look.

Tip: Spray your mold lightly with rubbing alcohol before pouring to prevent bubbles.

3. Colour and Pour

Add your mica powder or orange colorant, a little at a time, until you reach your ideal pumpkiny hue. Stir well, then carefully pour the mixture into your soap molds.

Immediately spritz the tops with rubbing alcohol to remove surface bubbles.

4. Let It Set

Leave the soap undisturbed at room temperature for 2–4 hours until fully hardened. Pop the bars out of the mold once they’re firm to the touch.

Optional: If you’re feeling fancy, melt a small amount of white soap base and pipe a “whipped cream” swirl on top using a piping bag and star tip.

Tips & Variations

  • Make it two-tone: Pour half your batch in orange, then top with a creamy vanilla layer for a pie-slice look. 
  • Add oatmeal: Toss in 1 tsp of ground oats for a gentle exfoliant and rustic charm. 
  • Use pie molds: Silicone molds shaped like pie slices or tart pans give these a dessert-style finish. 
  • Gift-ready idea: Wrap in wax paper, tie with twine, and add a “Pumpkin Pie Soap” tag for instant fall gifts. 

How to Store Homemade Soap

Keep your finished soaps in an airtight container or shrink wrap them if you’re gifting. Melt and pour soap can sweat in humid climates, so cool, dry storage is best.

This DIY pumpkin spice soap recipe is everything you want from a cozy fall project—easy, fragrant, and irresistibly cute. Whether you’re new to soap making or a seasoned maker prepping for a market table, these little bars will have everyone asking, “Where’s the whipped cream?”


Leave a Reply

Your email address will not be published. Required fields are marked *

RSS More Articles

  • Diwali Festival Handmade Chocolate with Edible Gold Leaf
  • Free Pattern – Colvin Socks
  • Transform Ordinary Candles into Stunning DIY Masterpieces with Image Transfers
  • Etsy Spotlight: Floppy Teddy Bear Sewing Pattern
  • FREE Floral Alphabet Font
  • How to Make a Half-Square Triangle Surprise Quilt – Free Quilting Tutorial
  • Spooky Crochet Skull Scarf – Free Pattern
  • Clay Studio Series – YouTube Video Review: DIY Stoneware Plates
  • This DIY Board Game Table Made Me Want to Dust Off My Cricut
  • Clay Studio Series – YouTube Video Review: What type of clay should I use?

Categories

Bath And Body bath bombs Body Scrubs & Lotions Colds & Flu CraftGossip Exclusive Craft Inspirations detox DIY Recipes And Tutorials DIY Tutorials and Patterns Essential Oils And Aromatherapy facials Hair Care Makeup & Beauty Melt & Pour Soap Packaging Product Reviews Soapmaking Recipes, Products And Tutorials Style Me Quick Supply Store Specials & Discounts Wellbeing

Copyright © 2025 · CraftGossip | Start Here | Contact Us | Link to Us | Your Editors | Privacy and affiliate policy