• Home
  • Suggest A DIY
  • DIY Newsletter

Bath and Body

Soap Making, Oils and Recipes

  • About CraftGossip
  • Our Network
    • Bath & Body Crafts
    • Candle Making Ideas
    • Crochet Ideas
    • Cross Stitch
    • Edible Crafts
    • Felting Patterns
    • Glass Art
    • Home & Garden Ideas
    • Indie Crafts
    • Jewelry Making
    • Kids Crafts
    • Knitting Patterns
    • Lesson Plans
    • Needlework
    • Party Ideas
    • Polymer Clay
    • Quilting Ideas
    • Recycled Crafts
    • Scrapbooking
    • Sewing Patterns
    • Card Making
    • DIY Weddings
    • Not Craft Ideas
  • Giveaways
  • Roundups
  • Store
  • Search

Do You Share Your Bed With Dust Mites?

February 1, 2016 by Shellie Wilson 7 Comments

DMCP-Products[1]

I was recently asked to try out Bosisto’s range of Dust Mite Products. I love Bosisto’s Eucalyptus Spray and use it all the time. I use it when the kids have a cold, I use it when my son’s bedroom smells like poo. (He has an en suite and clearly has bowel issues)

So trying Bosisto’s Dust mite range actually had me excited. I know small things excite me!

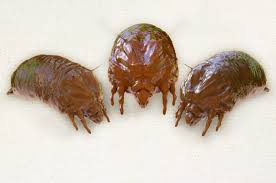
My son has terrible allergies, the kind of allergies that hit at 4am in the morning. He climbs in to my bed sniffling and snotting as we fondly call it. He keeps sniffling until I threaten him back to his own room if he doesn’t stop. Tiredness gets the better of him and he falls back to sleep. I have long thought it was an issue with his bedroom or perhaps the plants outside his window. It never occurred to me it might be dust mites. Since then I have done a little research on these disgusting little bugs and let me tell you, it is nothing but GROSS.
dust-mite-bosisto

So apart from the fact that they are gross, why are they a problem?

House dust mites can trigger respiratory or dermatological conditions including asthma and eczema. Symptoms can include:

  • Wheezing
  • Coughing
  • Breathlessness
  • A tight feeling in the chest
  • Runny nose
  • Itchy nose
  • Itchy eyes
  • Itchy skin
  • Skin rashes.

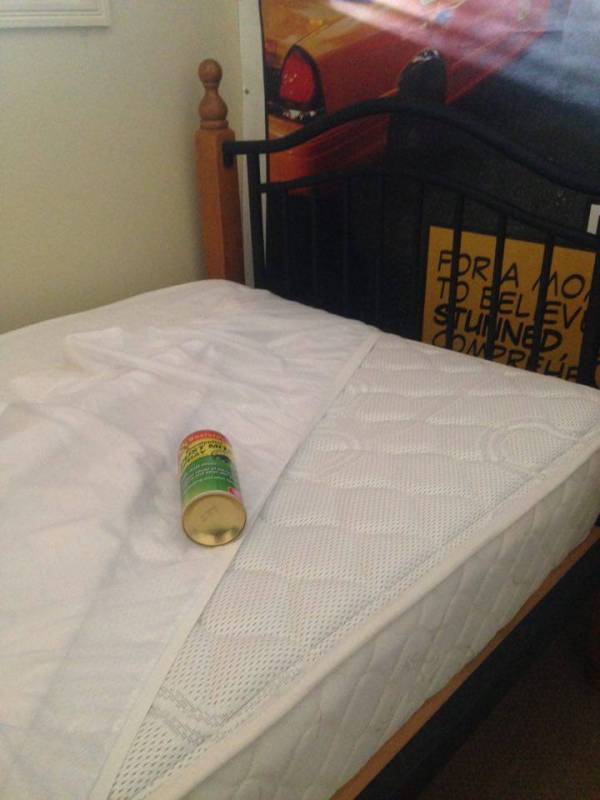
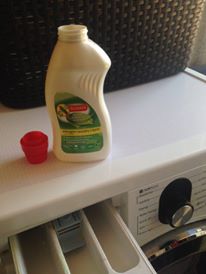
So is it easy to get rid of them? Well thanks to Bosisto’s range it is. You wash the washables with the laundry wash. You can use the spray on larger items such as mattresses and items that can’t be washed.  Don’t be fooled though, these little things don’t just hide in your bed, they can be on any kind of furnishing, even on your curtains and in your carpet.
12596082_10207330562075353_280181994_n 12606707_10207330562115354_582134759_n

As soon as the package arrived I got busy.

First I sprayed all my couches. I then stripped the offending boy’s bed and sprayed up and down until it felt well coated. You leave it for several hours and then vacuum it and don’t forget the pillow too.

Because I love the smell, I carried on spraying until I was out the room and down the hall.  I used the In- Laundry wash for all his bedding. You simply replace your normal liquid soap with this solution. It’s school holidays so anything that is EASY, is great right now.

I know you are probably starting to itch and scratch, just at the thought of these guys living in your house. Don’t despair I have 2 packs to give-away to two lucky Craftgossip.com readers.

WIN WIN WIN This competition is now Closed All Winners have been contacted.

For your chance to win simply comment below and tell us what is the first item you are going to wash and why? 

Giveaway closes 1st of march – Open to Australian Residents only.

If you need more information check out this video by Bosisto’s with all the information.

https://www.youtube.com/watch?v=xTbNIKTqejg
«
»

Comments

  1. cleo says

    February 1, 2016 at 10:29 pm

    Bed sheets to stop the itching and eliminate dust mites .

  2. Heather Pitkeathly says

    February 2, 2016 at 3:56 am

    Definetly the mattress protectors on mine and my toddler daughters bed.Followed very closely by the sheets!!

  3. Sarah says

    February 2, 2016 at 1:17 pm

    I’m washing my bedding first! I have one allergy… Dust mites. And I never knew until a year ago!

  4. Teresa Clark says

    February 2, 2016 at 7:07 pm

    I am washing all our families bedding/linen first. now I’m itchy!!!

  5. Michelle says

    February 3, 2016 at 12:52 am

    I’m washing my pillow and slips first because I use them every night and my face goes on them.

  6. Sandy N says

    February 3, 2016 at 9:32 am

    I live in the U.S., so I’m not eligible to win, but I wanted to thank you for highlighting this product. I just found out my main allergy is to dust mites so I will definitely be looking into this product!

  7. sarah mary says

    February 4, 2016 at 6:21 pm

    I would start with my couch too, as that piece of furniture has the most use by our English mastiff, Brutus. Then I’d go and make a start on all the bedrooms. I get the creeps just thinking we may be sharing the same environment as dust mites, so this would give me peace of mind.

Have you read?

Homemade Jewellery Cleaner Recipes Using Pantry Ingredients

There is something mildly horrifying about looking down at a favourite ring or necklace and realising it has gone from “sparkly and loved” to “did I dig this out of the back of a drawer from 1998?” Jewellery has a funny way of collecting everything — lotion, soap residue, perfume, hairspray, body oils, dust, and whatever mystery fluff lives in the bottom of handbags.

The good news is that you do not always need a commercial jewellery cleaner to bring back a bit of shine. A few simple pantry and laundry cupboard ingredients can help freshen up everyday pieces, especially if you are dealing with dull silver, slightly grubby gold jewellery, or costume pieces that just need a gentle clean.

This is one of those practical homemade cleaning recipes that feels very old-school in the best possible way. It is frugal, useful, and a good reminder that our grandmothers were making half their cleaning cupboard from basics long before “natural cleaning” became trendy. If you enjoy simple DIY cleaning ideas, you may also like our easy homemade laundry soap recipe or this DIY toilet paper spray recipe for another bathroom-cupboard-style homemade solution.

Before You Clean Jewellery At Home

Before you dunk everything into a bowl and hope for the best, take a moment to check what your jewellery is made from. Not every piece should be treated the same way.

Avoid soaking:

  • pearls
  • opals
  • turquoise
  • soft or porous stones
  • glued costume jewellery
  • antique pieces with delicate settings
  • plated jewellery where the finish is already wearing
  • jewellery with unknown stones or finishes

Pearls are especially fussy little things. Never use vinegar on pearls, as acidic cleaners can damage their surface. If in doubt, stick with a soft damp cloth or ask a jeweller before cleaning anything sentimental or valuable.

Also, never mix ammonia-based cleaners with chlorine bleach. That is one of those “absolutely not, not even once” household safety rules.

Basic Homemade Jewellery Cleaner Recipe

This simple homemade jewellery cleaner is useful for everyday metal jewellery that needs a light refresh. It is best for sturdy pieces, not delicate pearls or porous stones.

You Will Need

  • 1 tablespoon mild dishwashing liquid
  • 1 tablespoon baking soda
  • 1 tablespoon household ammonia
  • 3 cups warm water
  • Glass jar with lid
  • Soft toothbrush or clean mascara wand
  • Soft lint-free cloth

How To Make It

Combine the dishwashing liquid, baking soda, ammonia, and warm water in a bowl. Stir gently until mixed.

Pour the solution into a clean glass jar, label it clearly, and store it safely out of reach of children and pets.

To use, place suitable jewellery into the solution for 1 to 10 minutes, depending on how dull or dirty the piece is. Swish the jewellery gently to loosen grime from small crevices.

Use a soft toothbrush or a well-washed mascara wand to carefully clean around settings, chain links, clasps, and detailed areas. Rinse thoroughly with clean water and dry completely with a soft cloth.

This is the sort of job I always think will take ages, and then five minutes later I am standing there admiring a ring I had practically forgotten was shiny.

Gentle Dish Soap Jewellery Cleaner For Everyday Pieces

For most everyday jewellery, the safest place to start is not with the strongest cleaner. A gentle dish soap soak is often enough to remove lotion, oil, makeup, and general daily grime.

You Will Need

  • A small bowl of warm water
  • A few drops of mild dish soap
  • Soft toothbrush
  • Soft cloth

How To Use It

Add a few drops of dish soap to warm water and stir gently. Place suitable jewellery into the bowl and let it soak for 10 to 15 minutes.

Use a soft toothbrush to clean around the settings and any little grooves where dirt likes to settle. Rinse well and dry completely.

This method is a nice first step for rings, chains, earrings, and bangles that are not heavily tarnished. It is also a good habit to get into if you wear hand cream or sunscreen regularly, because those products can dull jewellery surprisingly quickly.

For more gentle DIY cleaning inspiration, our foaming hand soap tutorial is another handy way to stretch simple ingredients around the home.

How To Clean Gold Jewellery At Home

Gold jewellery often looks dull because it has collected body oils, soap, and product residue rather than because the gold itself is damaged. A gentle clean can make a noticeable difference.

For plain gold jewellery, you can use the dish soap method above. If the piece is sturdy and does not contain pearls or porous stones, some people also use cider vinegar as a quick cleaner.

Cider Vinegar Method For Plain Gold Jewellery

Pour cider vinegar into a shallow glass dish. Place the gold jewellery into the vinegar, making sure the piece is covered but not tangled with other jewellery.

Let it sit for around 10 to 15 minutes. Remove the jewellery, rinse it well, and wipe dry with a soft clean cloth.

Do not use this method on pearls, opals, turquoise, soft stones, plated jewellery, or anything with glue. When jewellery has stones or settings, gentle soapy water is usually the safer homemade option.

How To Clean Silver Jewellery Naturally

Silver is the one that tends to cause the most drama because tarnish can make it look far worse than it is. Luckily, the classic aluminium foil and baking soda method can help remove tarnish from many plain silver pieces.

You Will Need

  • Glass bowl
  • Aluminium foil
  • Baking soda
  • Boiling water
  • Tongs or fork
  • Soft cloth

How To Clean Silver Jewellery

Line a glass bowl with aluminium foil, shiny side facing upward.

Place the silver jewellery in the bowl, making sure the jewellery touches the foil.

Sprinkle baking soda over the jewellery until the tarnished areas are covered.

Carefully pour boiling water over the jewellery so it is fully immersed.

Let it sit for 3 to 5 minutes. If the jewellery is only lightly tarnished, start with less time.

Use tongs or a fork to remove the jewellery carefully, then rinse under cool water and dry thoroughly with a soft cloth.

This method is best for plain silver pieces. Be cautious with silver jewellery that has gemstones, plating, glued elements, or deliberately oxidised details. Some silver jewellery has darkened areas added on purpose to highlight the design, and aggressive cleaning may remove that aged effect.

If you are making or repairing jewellery as well as cleaning it, you may also enjoy browsing the Jewelry Making section on CraftGossip for ideas, tutorials, and inspiration.

What Not To Use On Jewellery

A homemade jewellery cleaner can be brilliant, but only when matched to the right material. Some common household ingredients are too harsh for certain pieces.

Avoid using vinegar on pearls or porous stones. Avoid abrasive scrubbing on plated jewellery. Avoid soaking costume jewellery that may have glued stones. Avoid toothpaste, as it can be too abrasive for many finishes. Avoid bleach completely.

And please do not clean jewellery over an open sink drain unless you enjoy the particular panic of trying to rescue an earring back from plumbing. Put a cloth or strainer in the sink first. Ask me how many times I learned that lesson the hard way.

How Often Should You Clean Jewellery?

For jewellery you wear daily, a gentle clean every couple of weeks can help prevent buildup. Rings may need cleaning more often because they come into contact with soap, moisturiser, hand sanitiser, food prep, and all the little everyday messes we pretend we are not constantly touching.

Pieces worn occasionally can be cleaned before storing and then given a quick polish before wearing.

A soft jewellery cloth is worth keeping in a drawer or travel pouch. It is one of those inexpensive little tools that makes you feel far more organised than you actually are.

Simple Jewellery Care Tips To Keep Pieces Cleaner Longer

Remove jewellery before swimming, cleaning, gardening, showering, or applying lotions and perfume.

Store jewellery in a dry place, ideally separated so chains do not tangle and softer metals do not scratch. Small pouches, jewellery boxes, drawer dividers, and even tiny zip bags can help keep pieces protected.

Let perfume, hairspray, sunscreen, and moisturiser dry before putting jewellery on. This one small habit can make a big difference, especially with costume jewellery and plated pieces.

For special, expensive, antique, or sentimental jewellery, professional cleaning is still the safest option. Homemade jewellery cleaner recipes are wonderful for everyday maintenance, but they are not a replacement for a jeweller’s advice when a piece really matters.

Printable Quick Guide: Which Cleaner Should I Use?

For everyday gold jewellery

Use warm water and mild dish soap. For plain sturdy gold, cider vinegar may be used cautiously.

For plain silver jewellery

Use the aluminium foil, baking soda, and boiling water method.

For pearls

Use only a soft damp cloth. Do not use vinegar or soaking solutions.

For costume jewellery

Use a lightly damp cloth. Avoid soaking, especially if stones are glued.

For gemstone jewellery

Use mild dish soap and warm water only if the stones are safe to clean this way. Avoid vinegar and harsh cleaners.

For antique or valuable jewellery

Ask a jeweller before using any homemade cleaner.

A Little Shine Without The Fancy Bottle

Homemade jewellery cleaner is one of those wonderfully practical DIY ideas that saves money, uses what you already have, and gives instant satisfaction. There is something very pleasing about taking a tired-looking ring, giving it a quick clean, and suddenly remembering why you loved it in the first place.

Start gently, avoid soaking delicate pieces, and always test carefully when you are unsure. Your jewellery box will look a little brighter, and you might even rediscover a few forgotten favourites hiding at the bottom.

Leave a Reply

Your email address will not be published. Required fields are marked *

RSS More Articles

  • 4 Crayon Cutable or Printable Files for Back to School
  • How to Make a Crochet Vision Board – Plan the Crochet Projects You Actually Want to Make
  • What to Serve with Rotisserie Chicken: 21 Delicious Sides You’ll Want on Repeat
  • Etsy Feature – Moth Pottery Template for Slab Building
  • Hubcap Creatures: Transforming Roadside Finds into Sculptural Wildlife
  • Learning about Georgia for Kids
  • How to Make a Moth Birthday Card
  • DIY Giant Eyeball Lanterns – Creepy Halloween Decoration
  • Designer Spotlight: Artmishka Cross Stitch
  • Freebie Friday – Grungy Pumpkins and Fall Tags Junk Journal Printables

Copyright © 2026 · CraftGossip | Start Here | Contact Us | Link to Us | Your Editors | Privacy and affiliate policy