• Home
  • Suggest A Craft
  • DIY Newsletter

Bath and Body

Soap Making, Oils and Recipes

  • About CraftGossip
  • Our Network
    • Bath & Body Crafts
    • Candle Making Ideas
    • Crochet Ideas
    • Cross Stitch
    • Edible Crafts
    • Felting Patterns
    • Glass Art
    • Home & Garden Ideas
    • Indie Crafts
    • Jewelry Making
    • Kids Crafts
    • Knitting Patterns
    • Lesson Plans
    • Needlework
    • Party Ideas
    • Polymer Clay
    • Quilting Ideas
    • Recycled Crafts
    • Scrapbooking
    • Sewing Patterns
    • Card Making
    • DIY Weddings
    • Not Craft Ideas
  • Giveaways
  • Roundups
  • Store
  • Search

Go Girl Review – Wee Everywhere

March 8, 2015 by Shellie Wilson 7 Comments

go-girl-review

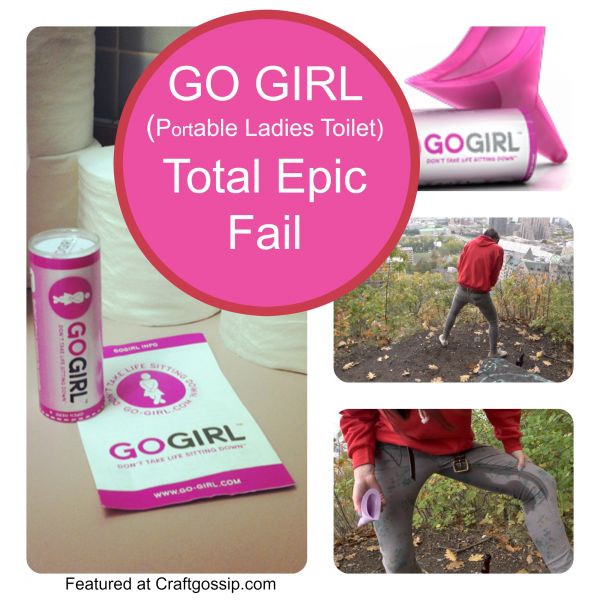
I came across this post by Kara Crabb and just had to share it. I really wanted to call the blog post pis*&ng myself laughing but thought better of it as the profanity police will come out. But I am sure you agree (Okay some of you) that is would have made a much catcher title. So back to the Go Girl product – I have known about it for sometime after googling for travel products a year or so ago as we were heading off on a big trip. (Read Travelling With Kids) I didn’t really think it would work then but didn’t want to invest in the $12.99 to find out if it worked or not.

I am sure this product has a place and I am sure many woman love it but before you buy it you have to read this

funny review by Kara.

Meantime need a toilet in a hurry? Check out this DIY Emergency toilet.

Related Posts:

  • Why You Can't Claim Your Product Cures Eczema,…
  • Efficiency and Expertise: Crafting 200 Bath Bombs in…
«
»

Comments

  1. Kim says

    March 8, 2015 at 1:18 pm

    Women in military aviation use these often. The alternative would be having to unzip and drop your entire flight suit so you can pop a squat in front of all the other (most likely male) pilots and crew while in the middle of nowhere. It’s a handy little device for that situation.

  2. Mrs B says

    March 8, 2015 at 2:04 pm

    So where is the review, link takes you to the Go Girl site

  3. Tanja says

    March 8, 2015 at 2:42 pm

    I can’t find the funny review either … Can’t find any review at all 😉

  4. Lori says

    March 8, 2015 at 3:37 pm

    I thought Kara Crabb was very discussing and was wondering why this is on your website. Not very entertaining.

  5. stephanie says

    March 9, 2015 at 1:51 am

    I’m not so refined I can’t handle a cuss word or two, but I found her review quite angry & not so tongue in cheek. I began wondering why this was on your website/fb feed. I get humor but this was really over the top with crude humor. Sorry…

  6. Dianne says

    March 9, 2015 at 4:52 pm

    I think Lori, in the comment before mine, meant to say “disgusting” not “discussing.” It was a disgusting article, peeing on a crucifix. Just horrible.

  7. Tina Schroer says

    March 9, 2015 at 10:32 pm

    You might might not like the profanity police but how about the vocabulary police? The definition of piss is to urinate in anger. Not possible if you’re laughing your a** off. I wonder why this type of thing is even considered remotely appropriate for a craft site.

Have you read?

DIY Summer Nail Designs You’ll Want to Rock All Season Long

As soon as the weather heats up and the days get longer, I swap out my moody nail colors for something a little more fun, flirty, and full of sunshine. Summer is the perfect excuse to get playful with your nail designs — and this year, I’ve been experimenting at home to find a few favorites that are both easy to paint and seriously cute.

I’ve rounded up three of my go-to summer nail looks that you can totally do yourself, even if you’re not a pro. These are the styles I keep coming back to because they’re fun, eye-catching, and honestly — they just make you feel good. Whether you’re heading to the beach, a backyard BBQ, or just want to admire your nails while holding an iced latte, these are the ones to try.

Let’s dive in!

Sunset Ombre Nails

This is hands down one of the most satisfying nail designs you can do yourself. The colors melt into each other like a beach sunset, and the end result looks way more advanced than it really is.

You’ll Need:

  • A base coat

  • Three polishes (I use pink, orange, and yellow)

  • A makeup sponge

  • Top coat

  • Nail polish remover for cleanup

How to Do It:

  1. Start with a clear base coat to protect your nails.

  2. Paint horizontal stripes of your 3 colors directly onto the makeup sponge.

  3. Dab the sponge gently onto your nail, reapplying polish to the sponge as needed. Tap until the gradient blends.

  4. Clean up any excess polish around your cuticle.

  5. Apply a top coat to smooth the colors and add shine.

This design is one of those that looks good even when it’s a little messy — the top coat really pulls it all together.


 Tropical Palm Silhouettes

If you want vacation vibes without actually going anywhere, this one’s for you. The pastel base paired with simple black palm trees gives it that dreamy island feel.

You’ll Need:

  • A light pastel base polish or soft gradient background

  • Black nail art pen or thin brush with black polish

  • Top coat

How to Do It:

  1. Paint your nails with a soft pastel or ombre base.

  2. Once dry, draw a thin curved line for the palm trunk.

  3. From the top of the trunk, add small lines that fan out to mimic palm fronds.

  4. Let everything dry completely before adding a glossy top coat.

Even if your palm trees aren’t perfect, they still look awesome. Think of it like nail doodling — just more tropical.


 Watermelon French Tips

This design is so cheerful, I smile every time I see it. It’s a fruity twist on a French manicure and it’s perfect for pool parties or picnics.

You’ll Need:

  • Pink polish for the base

  • Green and white for the rind

  • Black polish for the seeds (use a dotting tool or toothpick)

  • Base and top coat

How to Do It:

  1. Paint your entire nail a soft pink.

  2. Add a green curved tip at the top edge (like a French tip).

  3. Under the green, paint a very thin white stripe.

  4. Add small black dots on the pink section to create seeds.

  5. Seal it all in with your favorite top coat.

This one is such a crowd-pleaser and looks adorable on both long and short nails.

Whether you try one of these or rotate through all three this summer, I hope these nail designs add a little color and creativity to your routine. They’re simple enough to do at home but still look like you spent time (and money!) at the salon.

Let me know which one you’re trying first — and don’t forget to tag us if you share your summer nail look!

Leave a Reply

Your email address will not be published. Required fields are marked *

RSS More Articles

  • Designer Spotlight: Stitch with Coffee
  • Peach Themed Learning Activities
  • How to Create a Photo Box Card
  • Embellish Your Knit Dishcloth with Flowers
  • Free Crochet Pattern – Emotional Support Chicken
  • 30 Brilliant Uses for Empty Pill Bottles You Probably Haven’t Tried Yet
  • Unisex Pajama Top Free Pattern
  • Back to School Cross Stitch Patterns
  • Wrap Yourself in Brilliance: Crochet Your Own Shawl or Scarf
  • 3 FREE Boho Bugs Coloring Pages and Digital Images

Categories

Bath And Body bath bombs Body Scrubs & Lotions Colds & Flu CraftGossip Exclusive Craft Inspirations detox DIY Recipes And Tutorials DIY Tutorials and Patterns Essential Oils And Aromatherapy facials Hair Care Makeup & Beauty Melt & Pour Soap Packaging Product Reviews Soapmaking Recipes, Products And Tutorials Style Me Quick Supply Store Specials & Discounts Wellbeing

Copyright © 2025 · CraftGossip | Start Here | Contact Us | Link to Us | Your Editors | Privacy and affiliate policy