• Home
  • Suggest A DIY
  • DIY Newsletter

Bath and Body

Soap Making, Oils and Recipes

  • About CraftGossip
  • Our Network
    • Bath & Body Crafts
    • Candle Making Ideas
    • Crochet Ideas
    • Cross Stitch
    • Edible Crafts
    • Felting Patterns
    • Glass Art
    • Home & Garden Ideas
    • Indie Crafts
    • Jewelry Making
    • Kids Crafts
    • Knitting Patterns
    • Lesson Plans
    • Needlework
    • Party Ideas
    • Polymer Clay
    • Quilting Ideas
    • Recycled Crafts
    • Scrapbooking
    • Sewing Patterns
    • Card Making
    • DIY Weddings
    • Not Craft Ideas
  • Giveaways
  • Roundups
  • Store
  • Search

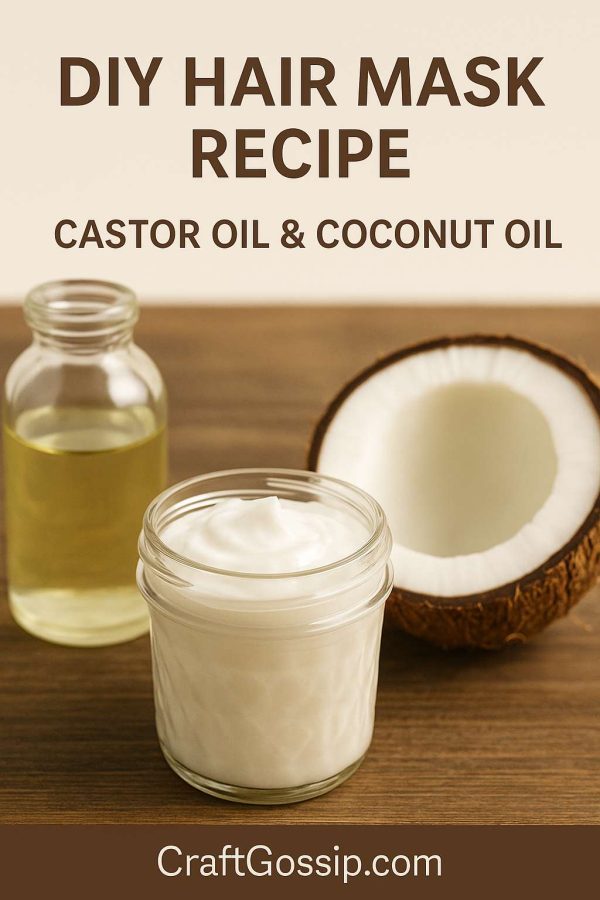
Nourishing Hot Castor Oil Hair Mask

May 20, 2026 by Shellie Wilson Leave a Comment

Between the Queensland humidity, teen hair tools mysteriously disappearing from my bathroom, and the occasional dye job gone rogue, my hair sometimes feels like a neglected houseplant—frizzy, thirsty, and limp.

So, when I stumbled across the old-school hot oil method using castor oil, I gave it a whirl. Let me just say—game changer. Castor oil is rich in fatty acids, particularly ricinoleic acid, which helps with circulation and hair hydration. Pair it with a lightweight oil and you’ve got a natural mask that doesn’t cost $40 a bottle.

I make this once a week, usually while I’m folding laundry or catching up on Bake Off. It’s one of those simple routines that actually feels like self-care.

Ingredients:

  • 2 tbsp castor oil 
  • 1 tbsp coconut oil or olive oil 
  • 5 drops rosemary or lavender essential oil (optional but heavenly) 

Instructions:

  1. Mix oils in a small bowl or jar. Warm gently—either over hot water or in 10-second microwave bursts until just warm (never hot). 
  2. Massage into scalp using fingertips in circular motions. Comb through to ends. 
  3. Wrap hair in a towel or cover with a shower cap. Leave on for 20–30 minutes (or overnight if you’re brave and towel your pillow). 
  4. Rinse with warm water and shampoo twice. Conditioner optional. 

Tips:

  • Apply to damp—not wet—hair to help absorption. 
  • Use a warm towel for deeper penetration. 
  • If you’re short on time, rub a tiny bit into dry ends as a leave-in serum. 

Why it works:

Castor oil locks in moisture, rosemary encourages growth, and coconut helps melt down the thick texture of castor oil so it spreads easier.
 

«
»

Have you read?

How to Make DIY Shower Jellies – Lush-Inspired, Kid-Friendly and Naturally Scented

If your morning shower feels more like a chore than a treat, it’s time to shake things up—literally. These DIY shower jellies are bouncy, fun, and scented with natural essential oils that turn your bath or shower into a playful spa moment. Inspired by Lush but made at home for a fraction of the cost, they’re perfect for kids, tweens, or anyone who wants a little joy added to their self-care routine.

Best part? You can tailor the scent, color, and shape to match your mood, season, or even holiday gifts. I’ve made everything from zesty lemon sunbursts in summer to calming lavender moons for bedtime wind-downs. My teens love them, and even Aloo (our cheeky pup) tries to sneak a sniff.

What Are Shower Jellies?

Shower jellies are squishy, soap-based gels that clean like body wash but jiggle like jelly. They melt on skin contact, lather up beautifully, and add a bit of tactile joy to your daily scrub. Think wobbly soap that feels like toy-slash-skincare.

Ingredients (All-Natural Option)

  • 1 tablespoon unflavored gelatin (or 1 tbsp agar agar for vegan version) 
  • 3/4 cup boiling water 
  • 1/4 cup liquid castile soap (or SLS-free body wash) 
  • 10–20 drops essential oil (lavender, citrus, eucalyptus – your call) 
  • Optional: skin-safe mica powder or natural food coloring 
  • Optional: dried botanicals (lavender buds, calendula petals) 
  • Silicone molds or ice cube tray 

Instructions

Step 1: Boil & Bloom
In a heatproof bowl, whisk the gelatin into the boiling water until fully dissolved. This is your jelly base—make sure there are no lumps. If using agar agar, simmer for a couple of minutes for full gelling power.

Step 2: Add the Fun Stuff
Once smooth, stir in your liquid soap, essential oils, and any color or botanicals. I love using pink clay for a rosy tint or a few drops of lemon essential oil for a fresh, morning zing.

Step 3: Mold It
Pour your mixture into silicone molds or an ice cube tray. Let cool at room temp for about 10 minutes, then pop into the fridge for 2–3 hours until set.

Step 4: Pop Out & Store
Once firm, gently remove your shower jellies from the mold. Store them in an airtight container in the fridge if your bathroom is steamy, or a lidded jar by the shower in cooler months.

How to Use Shower Jellies

Simply grab one in the shower, squish it between your hands or rub directly on your skin to lather up. They glide easily and rinse clean, leaving your skin soft and lightly scented. For extra cooling, keep them chilled and use post-sun or after a workout.

Tips & Variations

  • Sleepytime Blend: Lavender + chamomile essential oil 
  • Energy Boost: Orange + peppermint (keep away from eyes!) 
  • Holiday Jellies: Add glitter (biodegradable) and candy cane scent for stocking stuffers 
  • Kid-Safe: Use unscented baby body wash and natural fruit coloring

These DIY shower jellies are pure joy in a jar. Whether you’re making them for your little ones, holiday gifting, or your own self-care stash, they add a bouncy boost to your bath time. Bonus: They’re easy to make in big batches, so get ready for a fridge full of jiggly, wiggly goodness.

Leave a Reply

Your email address will not be published. Required fields are marked *

RSS feed: More Articles More Articles

  • Stitch Some Small Cross Stitch Patterns for Fall
  • Halloween Jewellery To Complete Your Costume Look
  • DIY Textured Ghost Candy Box Made From Recycled Cardboard
  • Adorable Ghost Knitting Patterns
  • 12 Pumpkin and Jack O’ Lantern Handmade Card Ideas for Halloween
  • How to Make DIY Shower Jellies – Lush-Inspired, Kid-Friendly and Naturally Scented
  • 20 Crafts Made From Paper
  • Mini Mending Mondays: Patch a Child’s Leggings Knee Without Using a Sewing Machine
  • Crafts to Celebrate Hispanic Heritage Month
  • Crochet Colourful Doily Pillow – Bright, Easy, and a Great Scrap Yarn Project

Copyright © 2026 · CraftGossip | Start Here | Contact Us | Link to Us | Your Editors | Privacy and affiliate policy