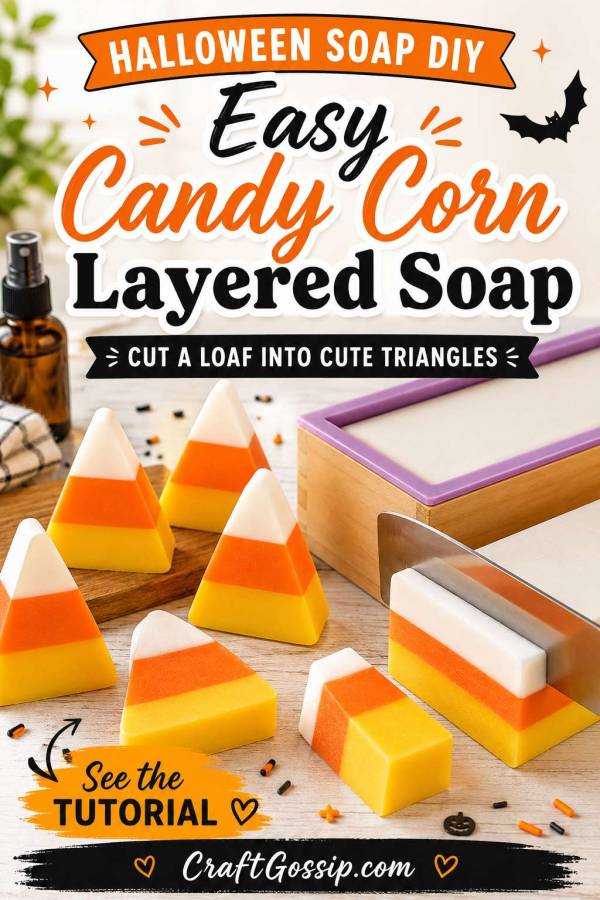
Candy corn is one of those Halloween treats people seem to either adore or avoid like the neighbour handing out raisins. Whether you eat it by the handful or simply love its cheerful yellow, orange and white stripes, it makes a wonderfully easy theme for homemade Halloween soap.
This candy corn layered soap is made using a beginner-friendly melt and pour soap base, so there is no handling lye and no long curing time. The three colours are poured into a silicone loaf mold, allowed to harden and then cut into chunky triangular bars.
The clever part is the cutting method. Instead of trying to find a special candy corn soap mold, you create one layered soap loaf and cut the finished bars into wedges. Any leftover soap trimmings can be remelted, so nothing needs to disappear into that mysterious craft-room drawer where all the scraps go to retire.
These candy corn soaps make lovely Halloween party favours, non-candy trick-or-treat gifts, teacher gifts or additions to a Halloween pamper basket.
Easy Candy Corn Melt and Pour Soap
Makes: Approximately 8–10 triangular soaps
Difficulty: Beginner
Setting time: Approximately 3–4 hours
Soap base required: 680 g or 1½ pounds
Supplies
- 680 g or 1½ pounds white melt and pour soap base
- Yellow soap-safe colourant
- Orange soap-safe colourant
- White soap-safe colourant or titanium dioxide, optional
- 7–13 g skin-safe fragrance oil, or the amount recommended by its manufacturer
- Isopropyl alcohol in a small spray bottle
- Silicone loaf soap mold
- Three microwave-safe measuring jugs
- Silicone spatulas or stirring sticks
- Sharp non-serrated knife or soap cutter
- Cutting board
- Digital kitchen scale
You can find silicone loaf molds, soap cutters, melt and pour soap base and beginner soap-making kits through Amazon or specialist soap-making suppliers. A digital scale is particularly helpful because dividing the soap by weight gives you much neater, more consistent layers.
Before beginning, check the usage rate supplied with your fragrance oil. Fragrance oils vary considerably, and more is definitely not better when the finished product will be used on skin.
A candy corn, vanilla, marshmallow or orange cream fragrance works beautifully. However, some vanilla-based fragrance oils can turn white soap beige or brown, so choose a non-discolouring fragrance if you want the top layer to remain bright white.
For a refresher before you begin, our melt and pour soap tutorial for beginners explains the basic melting, colouring and pouring process.
Dividing the Soap Base
For a recognisable candy corn shape, the yellow bottom section should be the largest, the orange centre slightly smaller and the white tip the smallest.
Divide the soap base into:
- 300 g yellow layer
- 250 g orange layer
- 130 g white layer
The measurements do not need to be exact to the gram, but keeping the white layer smaller helps it look like the little white tip of a real candy corn.
Step 1: Prepare the Mold
Place the silicone loaf mold on a flat tray or cutting board. This makes it easier to move later without bending the mold and sending warm soap sloshing across the bench.
Lightly spray the inside of the mold with isopropyl alcohol, then allow the excess to evaporate.
Keep the spray bottle nearby. The alcohol will be used to remove surface bubbles and help each soap layer stick to the next.
Step 2: Make the Yellow Layer
Cut the 300 g portion of soap base into small, evenly sized cubes and place them in a microwave-safe jug.
Microwave in 20–30 second bursts, stirring gently between each burst, until the soap has just melted. Do not allow the soap to boil. Excessive heat can cause moisture loss, bubbles and a rubbery finished texture.
Add yellow soap-safe colourant a little at a time. Candy corn yellow is usually bright and warm rather than pale lemon, but it is much easier to add more colour than to remove it.
Add the appropriate portion of fragrance oil and stir slowly to avoid creating bubbles.
Pour the yellow soap into the loaf mold. Spray the surface lightly with alcohol to pop any bubbles.
Allow the layer to sit until it develops a firm skin but is not completely cold. Depending on the room temperature and depth of the layer, this will usually take around 15–25 minutes.
The surface should feel firm enough to support the next layer without breaking, but it should still be slightly warm.
Step 3: Help the Layers Stick
Once the yellow layer has formed a skin, gently score the surface with a fork, skewer or the point of a knife.
You only need to make shallow lines. Do not cut deeply into the soap.
Spray the scored surface generously with isopropyl alcohol immediately before adding the orange layer. This small step helps prevent the soap layers separating when the loaf is sliced.
Step 4: Make the Orange Layer
Cut the 250 g portion of soap base into cubes and melt it in short microwave bursts.
Add orange soap-safe colourant and the next portion of fragrance oil. Stir slowly until evenly combined.
Let the melted soap cool slightly before pouring. If it is extremely hot, it may melt into the yellow layer and blur the line between the colours.
Pour the orange soap slowly over the back of a spoon or spatula held just above the yellow layer. This softens the pour and helps protect the layer underneath.
Spray the surface with alcohol to remove bubbles.
Allow the orange layer to form a firm skin for approximately 15–25 minutes.
Step 5: Add the White Layer
Lightly score the orange surface and spray it well with alcohol.
Melt the remaining 130 g of white soap base. If your base is slightly translucent, add a small amount of white soap colourant or soap-safe titanium dioxide.
Add the remaining fragrance oil and stir gently.
Allow the soap to cool slightly, then pour it carefully over the back of a spoon onto the orange layer.
Spray the top with alcohol and leave the entire loaf undisturbed until completely firm.
This usually takes 3–4 hours at room temperature. Leaving it overnight is perfectly fine too, especially when life interrupts your crafting—as it so often does.
Step 6: Remove and Slice the Soap Loaf
Once completely firm, gently pull the sides of the silicone mold away from the soap. Turn the mold over and press carefully on the base until the loaf releases.
Use a sharp, straight-edged knife or soap cutter to slice the loaf into bars approximately 2–2.5 cm, or ¾–1 inch, thick.
You will now have rectangular bars with yellow on the bottom, orange through the middle and white across the top.
Step 7: Cut the Bars Into Candy Corn Triangles
To make one correctly coloured candy corn triangle from each rectangular bar:
- Place the bar flat on the cutting board with the yellow section at the bottom and the white section at the top.
- Mark the centre of the top white edge.
- Cut from the bottom-left corner up to the centre mark.
- Cut from the bottom-right corner up to the same centre mark.
- Remove the two small side pieces.
The centre piece will now have a wide yellow base, an orange middle and a narrow white tip, just like a piece of candy corn.
Do not throw away the side trimmings. Chop them into small pieces and remelt them for mini soaps, soap embeds or a fun orange-and-yellow confetti soap.
No-Waste Cutting Option
For a faster no-waste version, cut each rectangular bar once on the diagonal. This produces two triangular soaps, but only one triangle will have the traditional white pointed tip. The second will have the colours arranged in the opposite direction.
They still look bright and Halloween-ready, and most gift recipients are unlikely to lodge a formal candy corn accuracy complaint.
Neatening the Edges
Freshly cut soap can sometimes have sharp corners. Run a vegetable peeler very lightly along the edges or smooth them with a clean finger while the soap is still slightly soft.
You can also round the two yellow corners slightly to create the softer shape of real candy corn.
Avoid wetting the bars to smooth them, as water can encourage glycerin dew and make the surface sticky.
Preventing the Soap Layers From Separating
Layered melt and pour soap is simple, but timing matters.
For stronger layers:
- Allow each colour to form a skin before pouring the next.
- Do not let the first layer become completely cold.
- Score the surface between layers.
- Spray generously with isopropyl alcohol before every new pour.
- Allow hot soap to cool slightly before pouring.
- Pour gently over the back of a spoon.
- Use the same type of soap base for all three layers.
If a layer is still liquid, the colours may mix. If it has become completely cold and hard, the next layer may peel away after cutting.
Think firm skin with a little warmth remaining—that is the sweet spot.
Packaging Your Candy Corn Soap
Melt and pour soap contains glycerin, which attracts moisture from the air. This can create harmless but slightly unattractive droplets known as glycerin dew.
Once the bars are completely cool and dry, wrap them tightly in plastic wrap or shrink wrap. You can then add:
- Black and orange ribbon
- Clear Halloween treat bags
- Paper belly bands
- “Good Clean Fun” gift tags
- Small cauldron-shaped gift baskets
- A printed ingredients label
Because these soaps look very much like sweets, clearly label them SOAP – NOT EDIBLE, particularly when giving them to children.
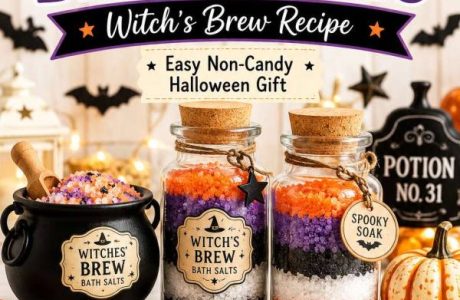
They would be especially cute paired with these candy corn bath salts for a coordinated handmade Halloween gift set.
Candy Corn Soap Variations
Candy Corn Scent
Use a skin-safe candy corn fragrance oil for the full sweet-shop effect. Check that the fragrance is approved for soap and follow its maximum usage rate.
Orange Cream Soap
Combine a non-discolouring vanilla-style fragrance with sweet orange fragrance oil. Avoid using expressed citrus essential oils without checking their skin-safety and phototoxicity information.
Unscented Halloween Soap
Skip the fragrance entirely for a simple decorative soap suitable for people who prefer fragrance-free bath products.
Glow-In-The-Dark Soap
Add a soap-safe glow pigment to the white tip. Check that the pigment is specifically approved for cosmetic or soap use rather than using ordinary craft pigment.
Mini Candy Corn Soaps
Pour the three layers into a shallower tray mold and cut smaller triangles. These are ideal for party favours, guest soaps or non-candy Halloween handouts.
Candy Corn Confetti Soap
Chop the leftover yellow, orange and white trimmings into small cubes and embed them in clear melt and pour soap. It is a lovely way to use every scrap and often ends up looking more impressive than the original plan.
For even more seasonal inspiration, browse our collection of Halloween bath and body projects.
Handmade Halloween Gift Idea
Bundle two or three candy corn soaps in a clear bag and tie them with black gingham ribbon. Add a miniature wooden scoop and a jar of candy corn bath salts for an easy Halloween hostess gift.
They are also a useful alternative to edible treats for school staff, neighbours and Halloween party guests. Just remember that the soap may look and smell surprisingly convincing, so a clear “not edible” label is essential.
These easy candy corn layered soaps have all the fun of Halloween crafting without requiring a cupboard full of specialised molds. Once you have mastered the pouring temperature and remembered the alcohol between layers, the rest is simply melt, pour, slice and wrap.
And unlike real candy corn, nobody can complain that it is too sweet.

Leave a Reply