• Home
  • Suggest A Craft
  • DIY Newsletter

Bath and Body

Soap Making, Oils and Recipes

  • About CraftGossip
  • Our Network
    • Bath & Body Crafts
    • Candle Making Ideas
    • Crochet Ideas
    • Cross Stitch
    • Edible Crafts
    • Felting Patterns
    • Glass Art
    • Home & Garden Ideas
    • Indie Crafts
    • Jewelry Making
    • Kids Crafts
    • Knitting Patterns
    • Lesson Plans
    • Needlework
    • Party Ideas
    • Polymer Clay
    • Quilting Ideas
    • Recycled Crafts
    • Scrapbooking
    • Sewing Patterns
    • Card Making
    • DIY Weddings
    • Not Craft Ideas
  • Giveaways
  • Roundups
  • Store
  • Search

Melt and Pour Soap – Coconut and Lime

July 2, 2018 by Shellie Wilson 8 Comments

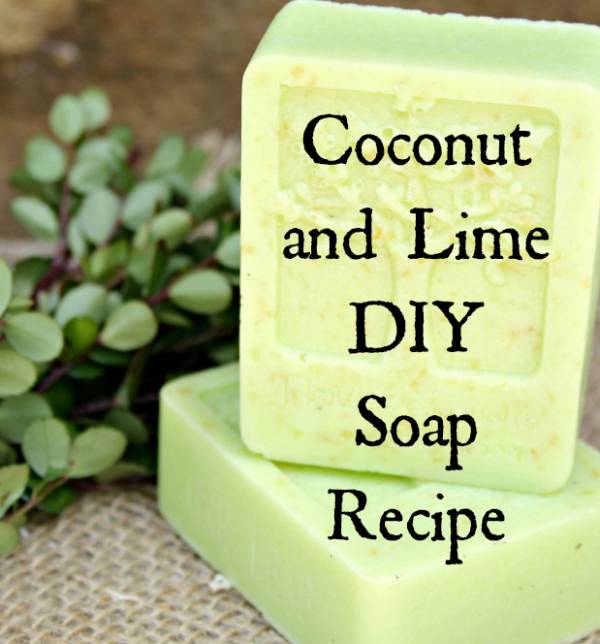
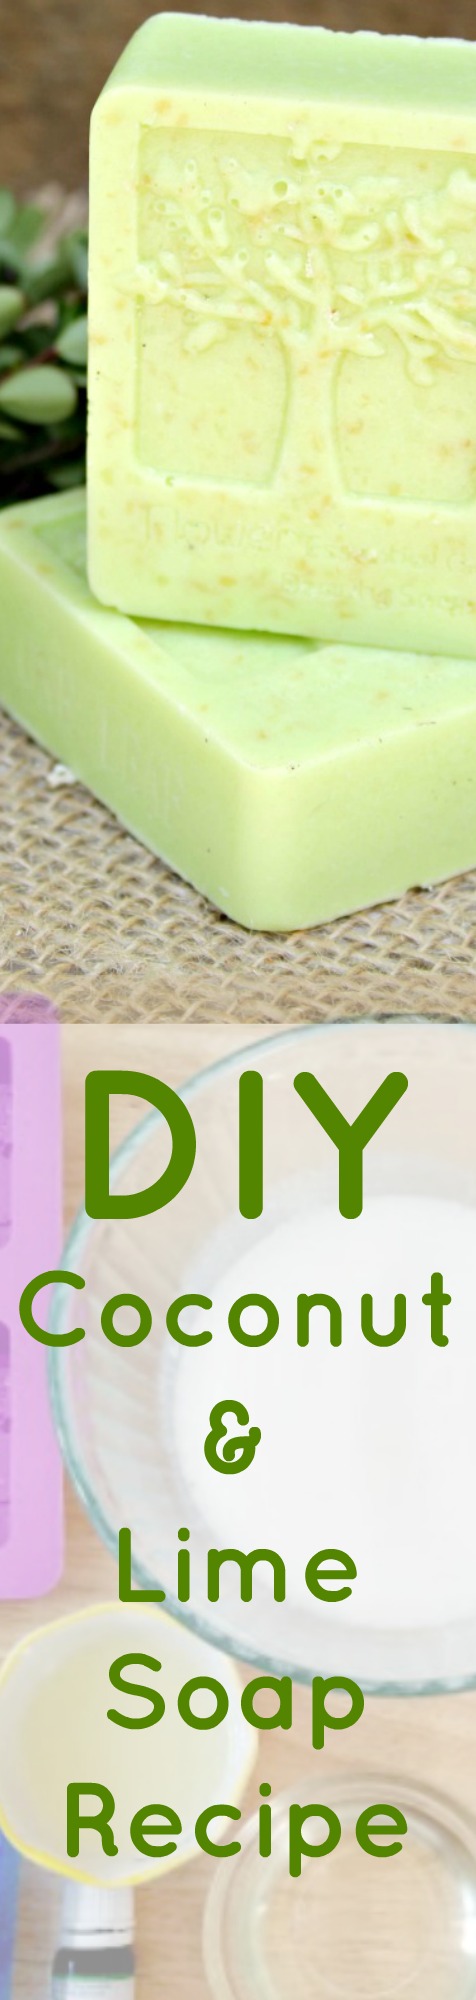
This soap making recipe shows you how to make soap using Coconut milk and lime juice. This melt and pour soap method using easy to use soap base that you just add ingredients to. The soap making tutorial is easy to use with step by step photos to guide you as you make this handmade soap. Use organic materials to create a natural organic soap.


Lime Essential oil : is invigorating and can help promote mental clarity. It has an uplifting fresh citrus scent. Lime soap is perfect for morning showers to wake your senses.


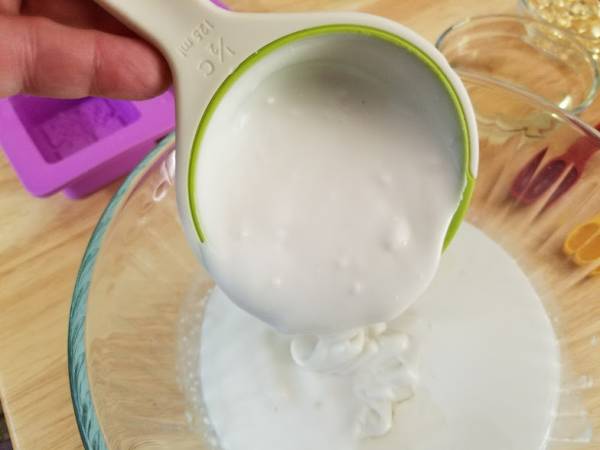
1/2 cup coconut milk

1-pound goats milk soap base

1 teaspoon lime juice

1 teaspoon coconut oil

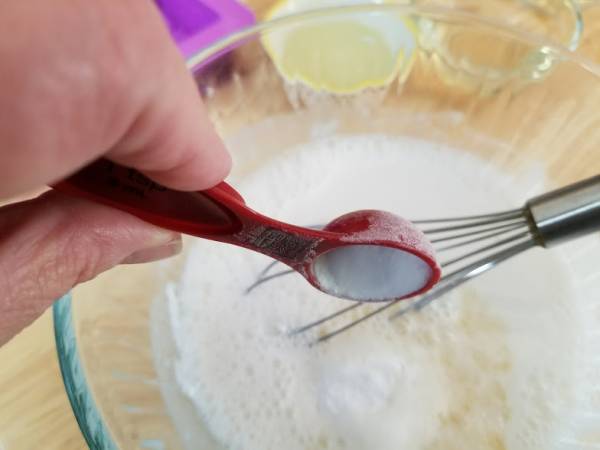
1 teaspoon apple cider vinegar

1 teaspoon baking soda

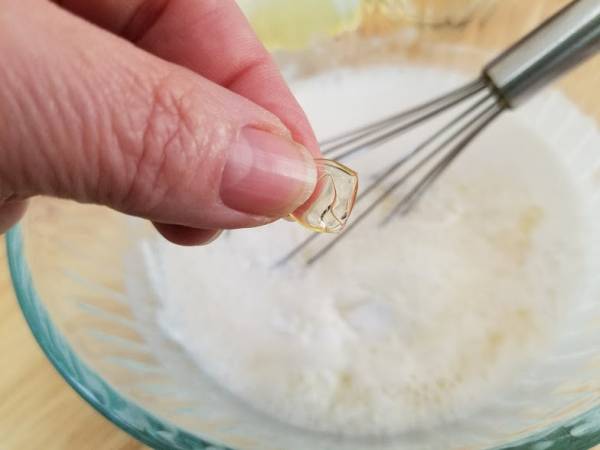
1 teaspoon vitamin e oil

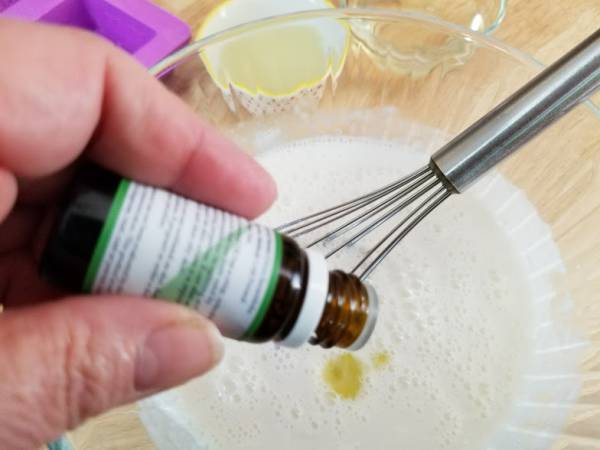
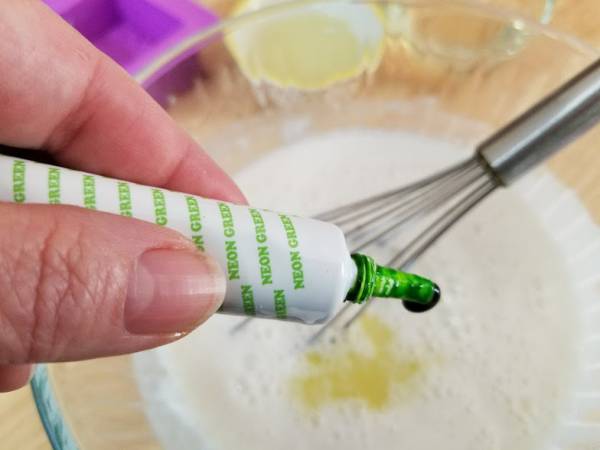
10 drops lime essential oil

Food or soap coloring

Spray bottle of rubbing alcohol to remove bubbles

Mold


Step 1: Melt soap base in the microwave and add coconut milk.

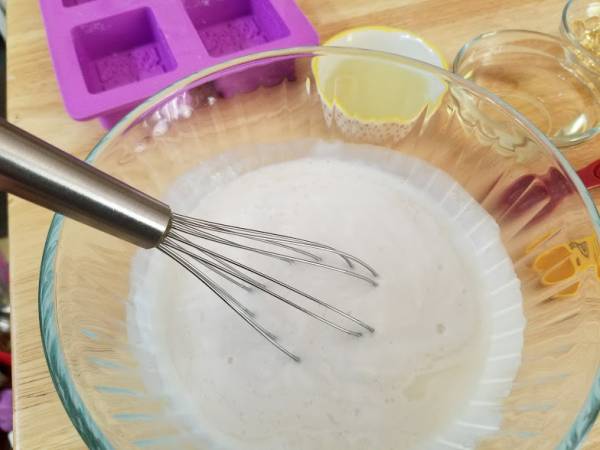
Step 2: Add lime juice

Step 3: Using a whisk, combine ingredients.

Step 4: Add coconut oil to the bowl


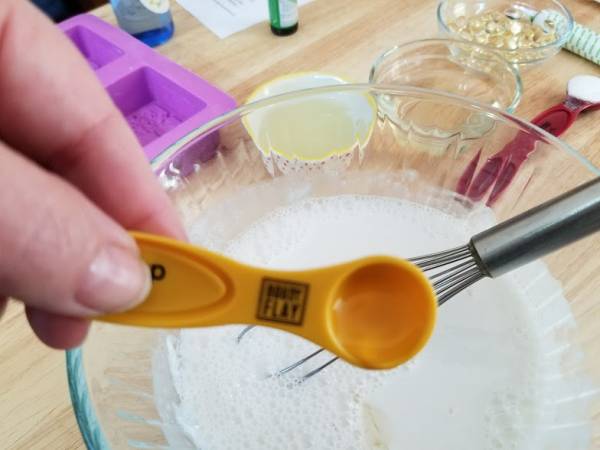
Step 5: Add apple cider vinegar to the mixture


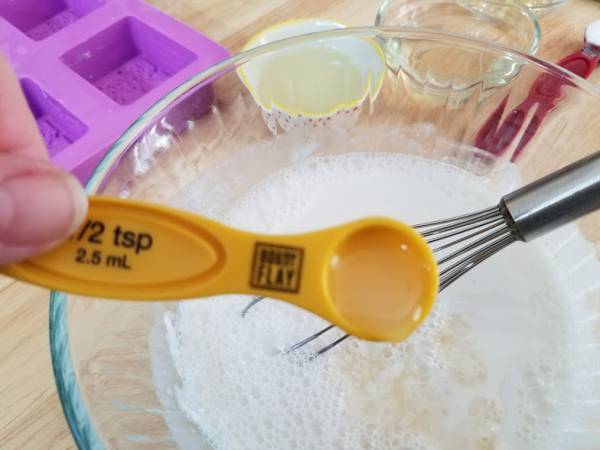
Step 6: Add baking soda to the bowl


Step 7: Add vitamin E to the mixture

Step 8: Add lime essential oil

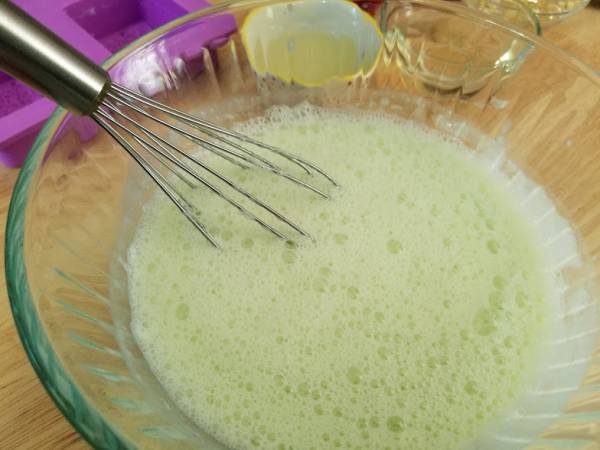
Step 9: Add colouring if desired


Step 10: Mix everything together well with a whisk


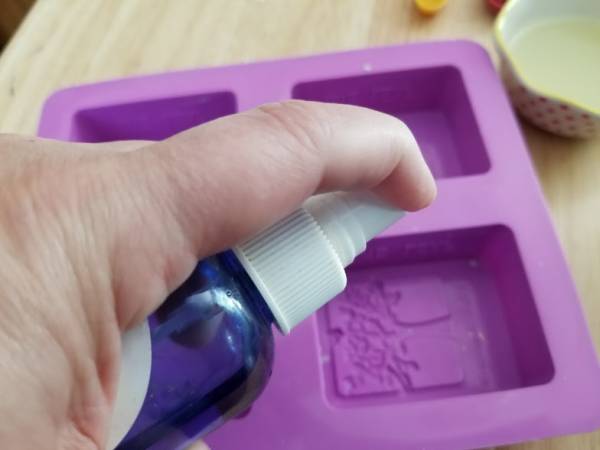
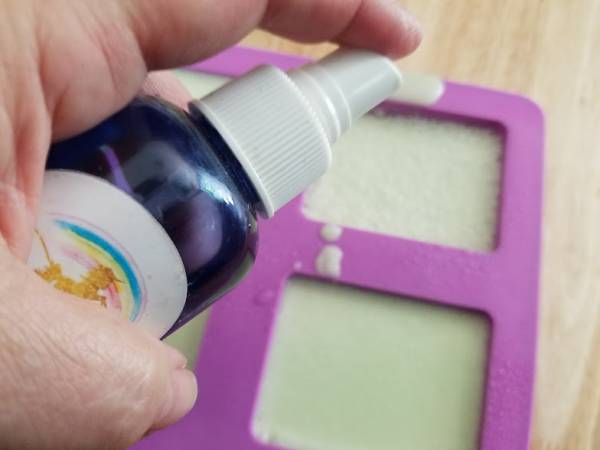
Step 11: Spray bottom of mold with rubbing alcohol. This removes the bubbles formed when mixing your soap!


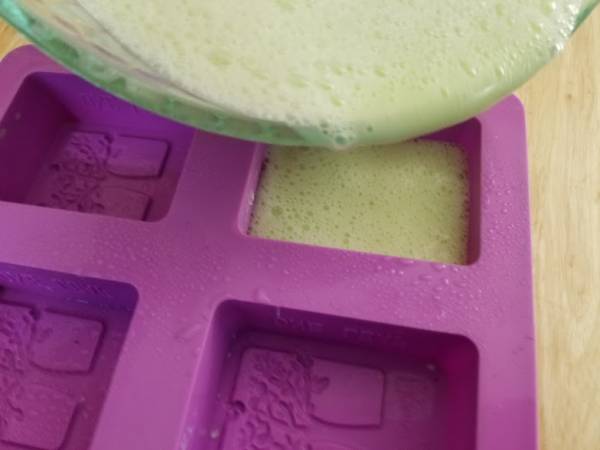
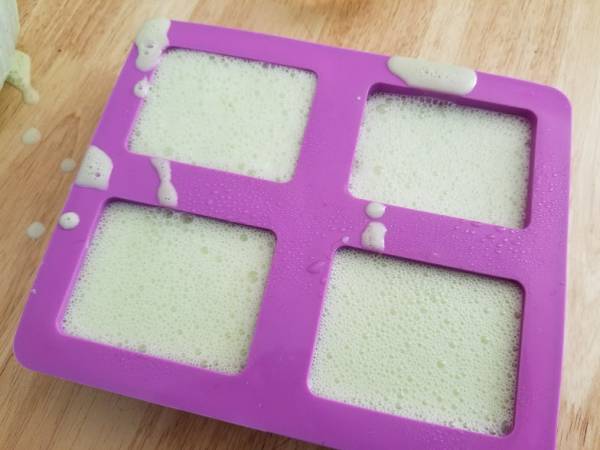
Step 12: Carefully add soap mixture to mold.


Step 13: Spray top of mold with the rubbing alcohol.


Step 14: Allow hardening for at least 2 hours.


Store in an airtight container or Ziploc bag until ready for use.

This article contains affiliate links, this means that when you purchase from the links below we will get a kick back in small change, this is at no extra cost to you.

Looking for more Goat’s Milk recipes? Check out our DIY recipe for making your own goat’s milk lip chapstick. The Goat’s milk in this DIY Goat’s Milk Chapstick recipe will leave your lips soft and smooth.  The PH Level in goat’s milk is super skin-friendly and the lactic acid helps remove dead skin cells from your lips for a soft and brighter smile. The ingredients are so basic for making this lip balm you will be surprised, you may even have the chapstick ingredients in your fridge or pantry.

Related Posts:

  • The Power of Aromas: How Candle and Soap Scents…
  • Cold Process Soap Recipe: Dehydrated Orange Slice Elegance
«
»

Comments

  1. Dave says

    January 27, 2019 at 12:20 pm

    When you say coconut milk do you mean the stuff from the grocery store?

  2. Shellie Wilson says

    February 3, 2019 at 10:12 pm

    Yes

  3. Lisa J says

    April 24, 2019 at 7:10 am

    Could I add Lime zest ? and/or coconut flakes ?

  4. julie plank says

    May 9, 2019 at 4:06 pm

    whats the shelf life for this please

  5. Mary says

    September 11, 2019 at 7:28 pm

    Is it the coconut milk in the can?

  6. Sandra Rekemeier says

    August 8, 2020 at 9:56 am

    Trying to find a pleasant smelling coconut oil. What brand do you use?

  7. Biu says

    April 20, 2021 at 6:28 am

    Hey is it possible to use alcohol to spray on it or I can escape it?

  8. Ciska says

    May 16, 2021 at 3:04 pm

    This is an awful recipe… Who makes these up? What do you gain buy it..?

    Melt and pour soap 101:

    For melt and pour you cannot use: coconut milk (too much moisture and this will mold! ), lime juice (same), vinegar (too much moisture) , baking soda (wth?). The rest is OK to add but is useless in reality and together the additives are way too much.

    Using food coloring in soap is not allowed per the FDA.

    Only use soap and skin safe essential oils. Keep to the max weight % the manufacturer gives you for soap. Never measure EO in ‘drops’.

    Keep all additives combined (!) to 1 level teaspoon per pound of soap base to prevent issues like the soap not setting well, less lather, sweating, feeling oily.

    Bottom line:
    Even if you get a somewhat hard soap using this recipe, the shelf life of a soap like this is 1 or 2 days max. After that the mold spores and bacteria from the botanicals can cause health issues. For healthy people, let alone for people with mold allergies, asthma, low immune system or pregnant.

    Please take better care when posting recipes!

    ….

Have you read?

How to Make Distilled Water at Home – A Simple DIY Method

When it comes to soap-making and other skin-loving crafts, using distilled water isn’t just a fussy extra—it can actually make or break your batch. Tap water might be fine for drinking, but it contains minerals, chlorine, and trace contaminants that can mess with lye reactions in cold process soap or leave cloudy spots in melt-and-pour bars.

Distilled water is simply pure H?O. Nothing else. No minerals, no impurities, no sneaky sediment from old pipes. And the good news? You can make it yourself with tools you already have in your kitchen.

Whether you’re making natural soap, diluting essential oils, or filling a steam iron, learning how to distill your own water is a handy life skill that costs next to nothing.

Why Distilled Water Matters in Crafting

If you’re working with ingredients that require precision—like sodium hydroxide (lye) in cold process soap—distilled water is non-negotiable. The minerals in tap water can alter your soap’s texture, accelerate spoilage, and even react with lye to form unwanted residue (that dreaded white film on your bars).

Plus, if you’re creating facial sprays, toners, or bath products, distilled water gives you peace of mind that you’re not introducing hidden bacteria or heavy metals into your skincare.

What You’ll Need

  • A large stainless steel pot with a domed or regular lid

  • A heat-safe glass or metal bowl (that fits inside the pot without touching the bottom)

  • Ice cubes

  • Tap water

  • Stove or heat source

  • Oven mitts or tongs

  • A clean glass jar or container with a lid for collecting the distilled water

Optional but helpful: a small wire rack or trivet to rest the bowl on, if it doesn’t float.

Step-by-Step Instructions to Make Distilled Water

Step 1: Add Tap Water to the Pot

Fill the large pot about halfway with regular tap water. This water will be boiled and turned into steam, which becomes your distilled water.

Step 2: Place the Collection Bowl Inside

Gently set your smaller bowl inside the pot. It should float, or if not, rest it on a small rack so it doesn’t touch the bottom. This bowl is where your clean distilled water will collect.

Step 3: Invert the Lid and Add Ice

Flip the lid upside down so the knob points down toward the center of the bowl. The lid will catch the rising steam, and the cold from the ice will help it condense into liquid. As the steam rises, it will drip down into the bowl—leaving the impurities behind.

Step 4: Turn on the Heat

Bring the water to a gentle boil. Keep the heat medium-low—you want a steady simmer, not a rapid boil, to allow for proper condensation.

Step 5: Watch and Wait

As the water steams and condenses on the lid, it will drip into your collection bowl. Keep adding ice to the top of the lid as needed. One liter of distilled water may take 30–45 minutes.

Step 6: Cool and Store

Once you’ve collected enough water, turn off the heat and allow everything to cool. Carefully remove the bowl using oven mitts or tongs. Transfer your freshly distilled water into a clean glass container with a lid. Store in a cool, dry place.

How Much Can You Make?

Depending on the size of your pot and bowl, you can expect to make 300–500ml per hour. It’s not lightning fast, but it’s perfect for small-batch crafting.

Tips and Variations

  • If your lid isn’t domed, tilt it slightly toward the bowl to encourage dripping.

  • For even purer results, use filtered water as your base.

  • Sterilise your collecting bowl and container if you’re using the distilled water for skincare or medical use.

Is It the Same as Boiled Water?

No. Boiled water kills bacteria but still contains minerals and chemicals. Distillation removes those impurities by turning water into steam and then collecting the clean vapor.

What Can You Use Homemade Distilled Water For?

  • Cold process and melt & pour soap making

  • Essential oil blends and room sprays

  • Facial toners and skin care products

  • Herbal tinctures or infusions

  • Cleaning irons, humidifiers, or CPAP machines

Once you’ve made your own distilled water, you’ll wonder why you ever bought it in a jug. It’s a simple, satisfying process that supports all your homemade projects—without the price tag or plastic waste. And it’s surprisingly relaxing to watch those little droplets fall into the bowl, knowing you’re crafting something pure from scratch.

Would you like to bundle this into your soap-making PDF guide? Or should I move ahead with the next tutorial in the soap series?


Leave a Reply

Your email address will not be published. Required fields are marked *

RSS More Articles

  • Book Review: Punch Needle Rug Hooking Handbook
  • Your “Sustainable Fabric” Isn’t as Eco-Friendly as You Think
  • 12 Back to School Scrapbook Layout Ideas
  • One Block Baby Quilt Tutorial
  • Crochet Pattern Review: Shelby Skirt – Lion Brand
  • How to Make Distilled Water at Home – A Simple DIY Method
  • Learning about Angola for Kids
  • Handmade with a Past: Tuesday’s Top Recycled Etsy Find
  • The Hourglass Beanie – Free Crochet Pattern
  • 12 Handmade Card Ideas Featuring Fish and Sea Creatures

Categories

Bath And Body bath bombs Body Scrubs & Lotions Colds & Flu CraftGossip Exclusive Craft Inspirations detox DIY Recipes And Tutorials DIY Tutorials and Patterns Essential Oils And Aromatherapy facials Hair Care Makeup & Beauty Melt & Pour Soap Packaging Product Reviews Soapmaking Recipes, Products And Tutorials Style Me Quick Supply Store Specials & Discounts Wellbeing

Copyright © 2025 · CraftGossip | Start Here | Contact Us | Link to Us | Your Editors | Privacy and affiliate policy